
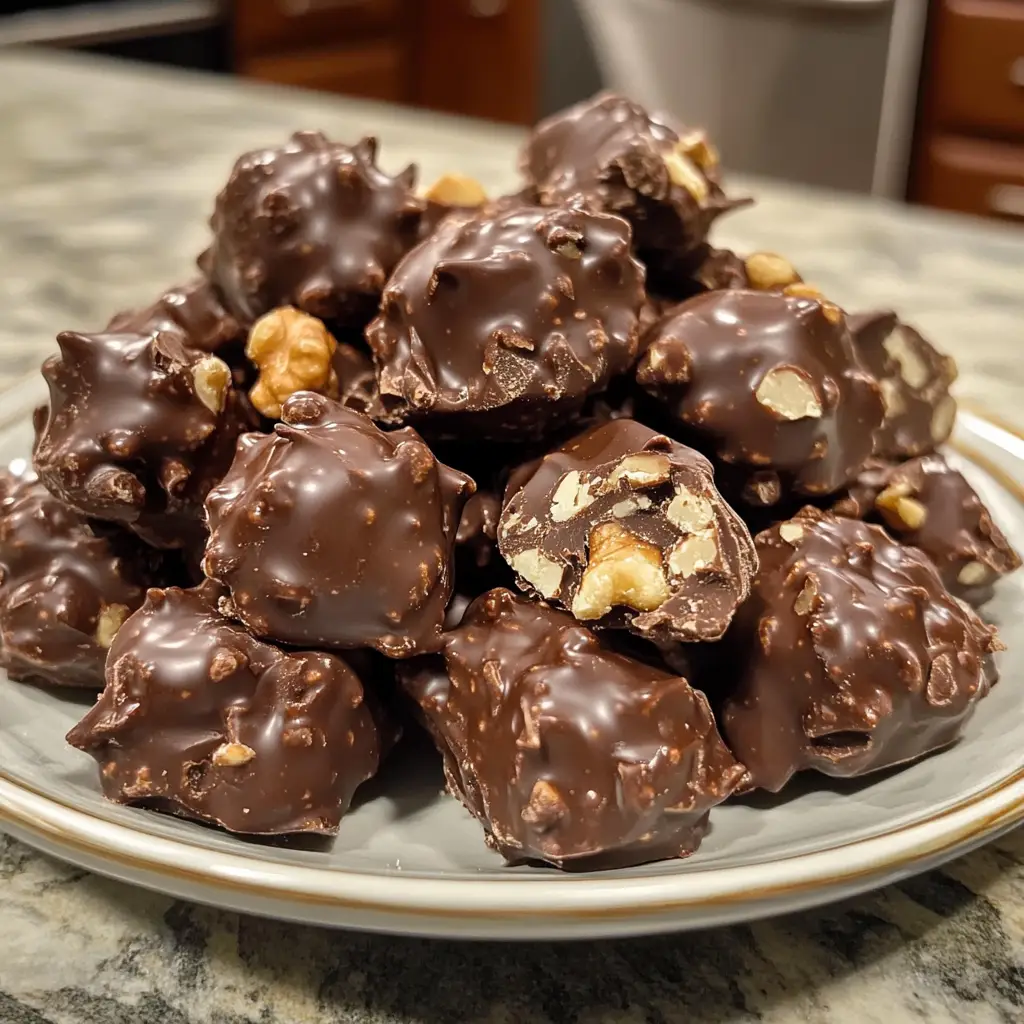
Introduction to Dark Chocolate Walnut Fudge Clusters Recipe
As a passionate home cook, I find joy in creating sweet treats that not only satisfy my cravings but also bring smiles to the faces of my loved ones. One of my all-time favorite recipes is the Dark Chocolate Walnut Fudge Clusters. The moment I first tasted these delightful bites, I was transported to a world of rich chocolatey goodness, where every bite felt like a warm hug on a chilly day.
What I love most about this recipe is its simplicity. With just a handful of ingredients, I can whip up a batch of these fudgy clusters in no time. The combination of dark chocolate and crunchy walnuts creates a perfect harmony of flavors and textures. It’s like a dance party in my mouth! Plus, they make for a fantastic gift during the holidays or a sweet surprise for a friend’s birthday.
Every time I prepare these clusters, I’m reminded of the first time I made them. I was hosting a small gathering, and I wanted to impress my guests with something special. As I melted the chocolate and mixed in the walnuts, the aroma filled my kitchen, drawing everyone in like bees to honey. The clusters disappeared faster than I could serve them, and I knew I had stumbled upon a winner.
In this article, I’ll share my cherished Dark Chocolate Walnut Fudge Clusters Recipe with you. I’ll guide you through each step, sprinkle in some personal tips, and even share a few variations to keep things exciting. So, grab your apron, and let’s embark on this delicious adventure together!
Ingredients for Dark Chocolate Walnut Fudge Clusters Recipe
Before we dive into the delightful process of making Dark Chocolate Walnut Fudge Clusters, let’s gather our ingredients. I always believe that quality matters, especially when it comes to chocolate. So, let’s make sure we have the best ingredients on hand to create these scrumptious treats!
Main Ingredients
- 2 cups dark chocolate chips (I prefer using high-quality chocolate with at least 70% cocoa for a rich flavor.)
- 1 cup walnuts (Chopped, of course! Fresh walnuts add a lovely crunch and nutty flavor.)
- 1 tablespoon coconut oil (This is optional, but it helps to give the fudge a smooth texture.)
- 1 teaspoon vanilla extract (For that extra layer of flavor that makes everything better!)
Optional Add-ons
- Sea salt (A sprinkle on top can enhance the chocolate flavor beautifully.)
- Dried fruits (Like cranberries or cherries, for a fruity twist.)
- Other nuts (Feel free to mix in almonds or pecans for a different crunch.)
- Peanut butter (Swirl in a bit for a deliciously nutty flavor.)
When I shop for ingredients, I often visit local markets or specialty stores. The aroma of fresh nuts and chocolate is simply irresistible! If you can, try to find organic or fair-trade chocolate. It not only tastes better but also supports sustainable practices. Now that we have our ingredients ready, let’s move on to the fun part—preparing our fudge clusters!
How to Prepare Dark Chocolate Walnut Fudge Clusters Recipe
Now that we have our ingredients ready, it’s time to roll up our sleeves and dive into the delightful process of making Dark Chocolate Walnut Fudge Clusters! I promise, this part is where the magic happens. Follow these simple steps, and you’ll be on your way to creating a batch of these irresistible treats.
Step 1: Melting the Dark Chocolate
First things first, we need to melt our dark chocolate. I like to use a double boiler for this, as it gently melts the chocolate without burning it. If you don’t have one, a microwave works just fine—just be sure to do it in short bursts!
Tips for Melting Chocolate
- Always chop the chocolate into small, even pieces. This helps it melt uniformly.
- If using a microwave, heat in 30-second intervals, stirring in between. This prevents overheating.
- Keep a close eye on it! Chocolate can go from melted to burnt in a flash.
Step 2: Mixing in the Walnuts
Once your chocolate is beautifully melted and smooth, it’s time to mix in the walnuts. I love the sound of the walnuts crunching as I fold them into the chocolate. It’s like music to my ears!
Tips for Choosing Walnuts
- Opt for fresh walnuts. They should smell nutty and pleasant, not stale.
- If you can, toast the walnuts lightly in a pan for a few minutes. This enhances their flavor!
- Chop them to your desired size. I prefer a mix of larger and smaller pieces for texture.
Step 3: Forming the Clusters
Now comes the fun part—shaping our clusters! Using a spoon, scoop out a generous amount of the chocolate-walnut mixture and drop it onto a parchment-lined baking sheet. I like to make them about the size of a golf ball, but you can go smaller or larger depending on your preference.
Tips for Shaping Clusters
- Use two spoons to help shape the clusters. This keeps your hands clean and makes it easier!
- Don’t worry about making them perfect. The rustic look adds to their charm!
- Leave some space between each cluster on the baking sheet. They will spread a little as they set.
Step 4: Chilling the Clusters
After forming the clusters, it’s time to chill them. This step is crucial for achieving that perfect fudge texture. I usually pop them in the fridge for about 30 minutes, but you can also use the freezer for a quicker set.
Tips for Proper Chilling
- Make sure the clusters are completely cooled before chilling. This helps them set better.
- If you’re in a hurry, the freezer works wonders, but keep an eye on them to avoid freezing solid.
- Once set, you can store them in an airtight container in the fridge for up to a week—if they last that long!
And there you have it! With these steps, you’ll create delicious Dark Chocolate Walnut Fudge Clusters that are sure to impress. I can already imagine the smiles on everyone’s faces as they take that first bite. Let’s keep the momentum going and move on to the next section!
Equipment Needed for Dark Chocolate Walnut Fudge Clusters Recipe
Before we dive into the delicious world of Dark Chocolate Walnut Fudge Clusters, let’s make sure we have the right tools at our disposal. Having the right equipment can make the process smoother and more enjoyable. Here’s what you’ll need:
- Double Boiler or Microwave-Safe Bowl: A double boiler is perfect for melting chocolate gently. If you don’t have one, a microwave-safe bowl will do just fine. Just remember to melt in short bursts!
- Parchment Paper: This is essential for lining your baking sheet. It prevents the clusters from sticking and makes cleanup a breeze.
- Baking Sheet: A standard baking sheet will work well for setting your clusters. If you have a silicone mat, that’s a great alternative too!
- Mixing Spoon: A sturdy spoon is perfect for mixing the chocolate and walnuts together. I often use a wooden spoon for its durability.
- Measuring Cups and Spoons: Accurate measurements are key to achieving the perfect balance of flavors. Make sure you have these handy!
- Refrigerator or Freezer: You’ll need one of these to chill your clusters. I usually opt for the fridge, but the freezer is great for a quick set!
With these tools in your kitchen arsenal, you’re all set to create your Dark Chocolate Walnut Fudge Clusters. I remember the first time I made these, I was a bit overwhelmed by the thought of gathering everything. But once I had my equipment ready, it felt like I was gearing up for a fun culinary adventure! So, let’s keep the excitement going and move on to the next section!
Variations of Dark Chocolate Walnut Fudge Clusters Recipe
While I absolutely adore the classic Dark Chocolate Walnut Fudge Clusters, there’s something thrilling about experimenting with different flavors and textures. Each variation brings a unique twist to the original recipe, making it even more fun to share with friends and family. Here are a few delightful variations that I’ve tried and loved:
- Mint Chocolate Walnut Clusters: Add a few drops of peppermint extract to the melted chocolate for a refreshing minty flavor. It’s like a cool breeze on a warm day!
- Spicy Chocolate Clusters: For those who enjoy a little heat, sprinkle in some cayenne pepper or chili powder. The combination of spicy and sweet is simply irresistible!
- Caramel Swirl Clusters: Drizzle some melted caramel over the clusters before they set. The gooey caramel adds a luscious layer of sweetness that’s hard to resist.
- Nutty Chocolate Clusters: Mix in a variety of nuts like almonds, pecans, or hazelnuts for a delightful crunch. Each nut brings its own flavor, creating a symphony of tastes!
- Fruit and Nut Clusters: Toss in some dried fruits like apricots or figs along with the walnuts. The fruity bits add a chewy texture that complements the fudge beautifully.
These variations not only keep things exciting but also allow you to tailor the clusters to suit different tastes. I love to surprise my guests with a new twist each time I make them. It’s like giving them a little gift of flavor! So, don’t hesitate to get creative and make these clusters your own. Now, let’s move on to some cooking notes that will help you perfect your fudge-making skills!
Cooking Notes for Dark Chocolate Walnut Fudge Clusters Recipe
As I’ve journeyed through the delightful world of making Dark Chocolate Walnut Fudge Clusters, I’ve picked up a few cooking notes that can help elevate your fudge-making experience. These little nuggets of wisdom can make a big difference in the final outcome, so let’s dive in!
- Quality Matters: Always choose high-quality dark chocolate. The better the chocolate, the richer and more satisfying your clusters will be. I often splurge a little on chocolate because it truly makes a difference!
- Room Temperature Ingredients: If you’re using any add-ons like peanut butter or caramel, make sure they’re at room temperature. This helps them blend seamlessly into the chocolate.
- Don’t Rush the Melting: Take your time when melting the chocolate. Patience is key! Rushing can lead to burnt chocolate, which is a sad fate for such a delicious treat.
- Experiment with Textures: Feel free to play around with the size of your walnut pieces. Larger chunks give a delightful crunch, while smaller pieces blend in beautifully. It’s all about what you enjoy!
- Storage Tips: Store your clusters in an airtight container in the fridge. This keeps them fresh and prevents them from becoming too soft. I often find that they taste even better after a day in the fridge!
These cooking notes have helped me refine my technique over the years, and I hope they do the same for you. Each batch of Dark Chocolate Walnut Fudge Clusters is a chance to learn and grow as a home cook. So, let’s keep the momentum going and explore some serving suggestions next!
Serving Suggestions for Dark Chocolate Walnut Fudge Clusters Recipe
Now that we’ve created our delicious Dark Chocolate Walnut Fudge Clusters, it’s time to think about how to serve them! Presentation can elevate the experience, and I love to get a little creative when it comes to serving these sweet treats. Here are some of my favorite serving suggestions:
- On a Decorative Platter: Arrange the clusters on a beautiful platter, perhaps with a sprinkle of sea salt on top. It adds a touch of elegance and makes them look irresistible!
- Gift Boxes: Package them in cute little boxes or jars tied with a ribbon. They make perfect gifts for friends, family, or even as party favors. Who wouldn’t love a sweet surprise?
- With Fresh Fruit: Serve the clusters alongside fresh berries or slices of apple. The fruity contrast complements the rich chocolate beautifully, creating a delightful balance.
- As a Dessert Topping: Crumble the clusters over a scoop of vanilla ice cream or yogurt. It adds a crunchy texture and a burst of chocolatey goodness that’s simply divine!
- With Coffee or Tea: Pair these clusters with a warm cup of coffee or tea. The combination of flavors is comforting and perfect for a cozy afternoon treat.
These serving suggestions not only enhance the visual appeal but also create a delightful experience for everyone enjoying them. I often find that the way I present my treats sparks conversations and brings smiles all around. So, get creative and have fun with it! Now, let’s move on to some tips for perfecting our Dark Chocolate Walnut Fudge Clusters.
Tips for Perfecting Dark Chocolate Walnut Fudge Clusters Recipe
As I’ve crafted my Dark Chocolate Walnut Fudge Clusters over the years, I’ve gathered a treasure trove of tips that can help you achieve fudge perfection. These little insights can make a world of difference, ensuring that each batch is as delightful as the last. Here are my top tips to elevate your fudge-making game:
- Use a Kitchen Scale: For the most accurate measurements, consider using a kitchen scale. This ensures that your chocolate and walnuts are perfectly balanced, leading to a consistent texture and flavor.
- Experiment with Chocolate Types: While dark chocolate is my go-to, don’t hesitate to try semi-sweet or even milk chocolate for a different flavor profile. Each type brings its own unique sweetness!
- Chill Between Steps: If you’re adding multiple layers or toppings, chill the clusters briefly between each addition. This helps them set properly and prevents the layers from mixing together.
- Keep It Clean: When working with chocolate, keep your utensils and bowls dry. Any moisture can cause the chocolate to seize, which is a bummer for our fudge dreams!
- Have Fun with Toppings: Don’t shy away from getting creative with toppings! A drizzle of melted white chocolate or a sprinkle of crushed nuts can add a beautiful finishing touch.
These tips have transformed my fudge-making experience, turning it into a delightful adventure each time. I hope they inspire you to create your own perfect Dark Chocolate Walnut Fudge Clusters. Now, let’s take a quick look at the time breakdown for this delicious recipe!
Breakdown of Time for Dark Chocolate Walnut Fudge Clusters Recipe
As a home cook, I know that time is often a crucial factor in the kitchen. That’s why I love to keep track of how long each step takes when making my Dark Chocolate Walnut Fudge Clusters. This way, you can plan your baking adventure without any surprises! Here’s a quick breakdown of the time involved:
- Prep Time: 15 minutes – This includes gathering your ingredients, chopping the walnuts, and melting the chocolate. It’s a breeze, and you’ll be amazed at how quickly it comes together!
- Cooking Time: 10 minutes – This is the time it takes to mix the melted chocolate with the walnuts and form the clusters. It’s all about that sweet, sweet chocolatey goodness!
- Total Time: 55 minutes – This includes the prep and cooking time, plus the chilling time of about 30 minutes. You’ll have a delicious batch of fudge clusters ready to enjoy in under an hour!
Knowing the time breakdown helps me stay organized and makes the whole process feel more manageable. Plus, it’s always exciting to see how quickly these delightful treats come together! So, let’s keep the momentum going and dive into the nutritional information for our scrumptious Dark Chocolate Walnut Fudge Clusters.
Nutritional Information for Dark Chocolate Walnut Fudge Clusters Recipe
As a passionate home cook, I always find it helpful to know the nutritional information of the treats I make. It allows me to enjoy them mindfully while sharing them with friends and family. Here’s a quick overview of the nutritional content for one serving of Dark Chocolate Walnut Fudge Clusters, assuming you make about 12 clusters from the recipe:
- Calories: Approximately 150 calories
- Fat: 10 grams (mostly from walnuts and chocolate)
- Saturated Fat: 5 grams
- Carbohydrates: 15 grams
- Fiber: 2 grams
- Sugar: 7 grams
- Protein: 2 grams
These clusters are a delightful treat that balances indulgence with nutrition. The walnuts provide healthy fats and protein, while the dark chocolate offers antioxidants. I love knowing that I can enjoy a sweet bite without feeling too guilty! Just remember, moderation is key. So, go ahead and savor these delicious Dark Chocolate Walnut Fudge Clusters, knowing they’re a treat you can feel good about sharing!
Frequently Asked Questions about Dark Chocolate Walnut Fudge Clusters Recipe
As I’ve shared my beloved Dark Chocolate Walnut Fudge Clusters Recipe with friends and family, I’ve noticed a few common questions pop up. It’s always great to clarify any doubts and help fellow home cooks enjoy this delightful treat to the fullest. Here are some frequently asked questions that I hope will guide you on your fudge-making journey!
Can I use milk chocolate instead of dark chocolate?
Absolutely! While I adore the rich flavor of dark chocolate, milk chocolate can be a delicious alternative. Just keep in mind that it will be sweeter, so you might want to adjust the sugar content if you’re adding any. It’s all about personal preference!
How long do the fudge clusters last?
When stored in an airtight container in the fridge, these clusters can last up to a week. However, I can almost guarantee they won’t last that long in my house! They’re just too tempting!
Can I freeze the fudge clusters?
Yes, you can! If you want to make a big batch ahead of time, simply place the clusters in a single layer on a baking sheet and freeze them until solid. Then, transfer them to an airtight container. They can last for up to three months in the freezer. Just remember to let them thaw in the fridge before enjoying!
What can I substitute for walnuts?
If walnuts aren’t your thing, no worries! You can substitute them with other nuts like pecans, almonds, or even hazelnuts. Each nut brings its own unique flavor and texture, so feel free to experiment!
Can I add other flavors to the fudge clusters?
Definitely! I love to get creative with flavors. You can add spices like cinnamon or nutmeg, or even a splash of flavored extracts like almond or orange. The possibilities are endless, and it’s a fun way to make the recipe your own!
These questions reflect the curiosity and creativity that come with cooking. I hope my answers help you feel more confident as you embark on your own fudge-making adventure. Remember, cooking is all about experimenting and having fun, so don’t hesitate to make this recipe your own! Now, let’s wrap things up with a sweet conclusion on our Dark Chocolate Walnut Fudge Clusters Recipe.
Conclusion on Dark Chocolate Walnut Fudge Clusters Recipe
As I reflect on my journey of creating Dark Chocolate Walnut Fudge Clusters, I can’t help but smile at the joy they bring. This recipe is not just about satisfying a sweet tooth; it’s about sharing love and happiness with those around us. The rich, velvety chocolate combined with the crunchy walnuts creates a delightful treat that’s perfect for any occasion.
What I adore most is the simplicity of the recipe. With just a few quality ingredients, you can whip up a batch that impresses friends and family alike. Whether you’re celebrating a special occasion or simply indulging in a cozy night at home, these clusters are sure to elevate the moment.
Moreover, the versatility of this recipe allows you to experiment and make it your own. From adding spices to trying different nuts, the possibilities are endless. Each variation brings a new twist, making it a fun adventure in the kitchen.
So, whether you’re a seasoned home cook or just starting your culinary journey, I encourage you to give this Dark Chocolate Walnut Fudge Clusters Recipe a try. I promise, the smiles and satisfaction that follow will be worth every moment spent in the kitchen. Happy cooking!
