Ingredients
Every great potion requires precisely chosen components, and the Fairy Dust Shot is no exception. Each ingredient plays a specific role in building its flavor profile, texture, and, of course, its magical character. Understanding the “why” behind each element is the first step to mastering the “how.”
The Foundation: Vodka or Silver Rum
Every potion needs a potent base, and here you have two excellent choices. Vodka, being a neutral spirit, is the ultimate team player. It provides a clean, alcoholic backbone without imposing any dominant flavor of its own, allowing the fruity and sweet liqueurs to take center stage. Its clarity also helps maintain the shot’s beautiful, translucent pink hue. For those seeking a base with a bit more personality, silver rum is a fantastic alternative. It introduces subtle notes of sugarcane and a faint tropical warmth that complements the peach and coconut variations beautifully. The choice between the two allows you to subtly steer the drink’s character—vodka for pure, unadulterated fruitiness, or rum for a more complex, tropical undertone.
The Fruity Heart: Peach Schnapps or Coconut Liqueur
This is where the shot’s primary flavor profile is defined. Peach schnapps brings a bright, sweet, and unmistakably fruity core. Its vibrant stone fruit flavor pairs perfectly with the tartness of cranberry juice, creating a classic and beloved combination. It evokes a sense of sunny, summery joy. On the other hand, coconut liqueur offers a creamier, more decadent tropical twist. It transforms the shot into something reminiscent of a tiny, potent piña colada, especially when paired with the rum base. This choice is the first major crossroad in your magical creation: do you lean into bright, cheerful fruit, or lush, creamy tropics?
The Tart Soul: Cranberry Juice or Pink Lemonade
The role of this ingredient is to provide balance. Both peach schnapps and coconut liqueur are quite sweet, and without a tart component, the shot would be one-dimensional and cloying. Cranberry juice, particularly 100% juice or a low-sugar variant, introduces a sharp, bracing acidity that cleanses the palate and enhances the other flavors. It also gives the shot its characteristic pink or rosy color. Pink lemonade serves a similar purpose but brings a different kind of tartness—one that is often slightly sweeter and more candied, with distinct citrus notes. This choice allows you to fine-tune the sweet-to-tart ratio of your final potion.
The Magical Sparkle: Edible Glitter and Colored Sugar
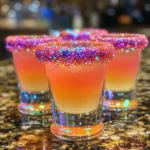
While technically optional, the garnish is what earns this shot its “Fairy Dust” name and transforms it from a simple drink into an experience. A rim of colored sugar or a sprinkle of edible glitter creates an immediate visual spectacle that promises fun. It’s a tactile element, as the first thing your lips touch is a sweet, crunchy, or shimmering rim. When using glitter, it is absolutely paramount that you use only edible glitter specifically designed for consumption. Craft glitter is not safe to ingest and can be dangerous. Edible glitter is typically made from gum arabic, starch, and food-grade colorants, and it dissolves safely. This attention to safety ensures the magic is both beautiful and harmless.
Instructions
The process of making these shots is a ritual in itself—a simple alchemy that yields magical results. Following these steps with care will ensure a flawless and stunning final product.
Step 1: The Preparatory Enchantment (The Rim)
Before you mix a single liquid, prepare your vessel. This is a crucial step for both presentation and taste. Pour a small amount of a simple syrup, agave nectar, or even the leftover liqueur from the bottle onto a small plate. On a separate plate, spread a layer of your chosen colored sugar or edible glitter. Take your shot glasses and gently dip the rims first into the liquid, ensuring an even coat, and then into the sugar or glitter, twisting slightly for full coverage. Set these prepared glasses aside. This upfront work prevents messy last-minute rushing and guarantees a professional-looking result.
Step 2: The Chilling Phase
Take a cocktail shaker and fill it two-thirds full with fresh, high-quality ice. The ice should be clean and odor-free. Using a shaker is highly recommended over stirring in a glass, as it rapidly chills the ingredients through agitation and creates a perfectly blended, slightly diluted mixture that is smooth and pleasant to take as a shot.
Step 3: The Core Concoction
Now, it’s time to combine your chosen spirits and juices. Carefully measure and pour one ounce of your base spirit (vodka or silver rum) into the shaker. Follow this with half an ounce of your chosen liqueur (peach schnapps or coconut liqueur) and half an ounce of your tart component (cranberry juice or pink lemonade). The precision in measurement is key here; because the volume is small, even a slight overpour of one ingredient can throw off the entire delicate balance of the shot.
Step 4: The Energetic Shake
Securely fasten the lid on your cocktail shaker. If you are using a Boston shaker (a tin and a pint glass), ensure you have a firm seal. Shake the mixture vigorously for 10-15 seconds. You should feel the outside of the shaker become frosty and cold. This shaking does more than just chill the drink; it aerates the liquids, slightly dilutes them with meltwater to soften the alcohol’s edge, and fully integrates the flavors into a harmonious whole.
Step 5: The Final Strain and Sparkle
Remove the lid from your shaker and, using a Hawthorne or julep strainer, strain the chilled liquid into your pre-rimmed shot glasses. The strainer will catch any small ice chips, ensuring a smooth sip. If you have chosen to add a splash of sparkling water for effervescence, this is the time to add a few drops on top of each strained shot. The bubbles will add a delightful textural fizz that makes the experience even more playful. Serve immediately while the potion is at its coldest and most vibrant.
