
Introduction to French Cruller Donuts Recipe
Ah, the French cruller donut! Just the thought of it makes my heart flutter like a butterfly in spring. These delightful treats are not just any ordinary donuts; they are a heavenly combination of light, airy pastry and a sweet glaze that dances on your taste buds. I remember the first time I tried a cruller. It was at a quaint little café tucked away in a bustling city. The moment I took a bite, I was transported to a world of fluffy bliss, and I knew I had to recreate that magic in my own kitchen.
What I love most about making French cruller donuts is the joy it brings to my family and friends. The process of whipping up the choux pastry, piping those beautiful shapes, and watching them puff up in the hot oil is nothing short of a culinary adventure. It’s like painting a masterpiece, where each donut is a unique creation. And let me tell you, the aroma that fills the kitchen is simply irresistible!
In this recipe, I’ll share my secrets and tips to help you achieve that perfect cruller texture. Whether you’re a seasoned baker or a novice in the kitchen, I promise you’ll find joy in every step. So, roll up your sleeves, grab your apron, and let’s embark on this delicious journey together. Trust me, once you taste these crullers, you’ll want to make them again and again!
Ingredients for French Cruller Donuts Recipe
Before we dive into the delightful world of French cruller donuts, let’s gather our ingredients. Having everything ready is like setting the stage for a beautiful performance. Each ingredient plays a crucial role in creating that light, airy texture and sweet glaze that makes crullers so irresistible. Here’s what you’ll need:
Main Ingredients
- 1 cup water
- 1/2 cup unsalted butter
- 1 cup all-purpose flour
- 1/4 teaspoon salt
- 4 large eggs
- 1 teaspoon vanilla extract
- Vegetable oil (for frying)
When it comes to the butter, I always opt for unsalted. This way, I can control the saltiness of my donuts. And trust me, using high-quality butter makes a noticeable difference in flavor. As for the flour, all-purpose works perfectly, but if you want to experiment, you can try cake flour for an even lighter texture.
Optional Add-ons
- 1/2 teaspoon almond extract (for a nutty flavor)
- Powdered sugar (for dusting)
- Cinnamon (for a hint of spice)
- Chocolate glaze (for a decadent twist)
These optional add-ons can elevate your crullers to a whole new level. I love adding a splash of almond extract for that extra depth of flavor. And if you’re feeling adventurous, a chocolate glaze can turn your crullers into a dessert that’s hard to resist. Just imagine biting into a fluffy cruller, only to discover a rich chocolatey surprise!
Now that we have our ingredients lined up, we’re ready to embark on our cruller-making adventure. Each ingredient is like a note in a symphony, coming together to create a delicious harmony. Let’s move on to the next step and start preparing our French cruller donuts!
How to Prepare French Cruller Donuts Recipe
Now that we have our ingredients ready, it’s time to roll up our sleeves and dive into the fun part—preparing our French cruller donuts! This process is like a dance, where each step flows into the next, creating a delightful rhythm. Let’s get started!
Step 1: Making the Choux Pastry
First things first, we need to make the choux pastry. This is the heart of our cruller donuts, and it’s surprisingly simple! In a medium saucepan, combine the water and butter over medium heat. Stir until the butter melts completely. Once it’s bubbling, add the flour and salt all at once. Stir vigorously with a wooden spoon until the mixture forms a ball and pulls away from the sides of the pan. This should take about 2-3 minutes.
Tips for Step 1
- Make sure to keep stirring! This helps to cook the flour and gives the pastry its structure.
- Don’t rush the melting process; let the butter fully melt before adding the flour.
- For a smoother texture, you can use a stand mixer to beat in the eggs after the dough cools slightly.
Step 2: Piping the Donuts
Once your choux pastry is ready, it’s time to pipe those beautiful donut shapes! Let the dough cool for about 5 minutes, then add the eggs one at a time, mixing well after each addition. The dough should be smooth and glossy. Now, transfer the mixture to a piping bag fitted with a star tip. On a parchment-lined baking sheet, pipe 3-inch rings, making sure to leave some space between each one.
Tips for Step 2
- Practice makes perfect! If you’re new to piping, try practicing on a piece of parchment before piping directly onto the baking sheet.
- Don’t worry if they aren’t perfect; each cruller has its own charm!
- For a fun twist, you can pipe smaller crullers for bite-sized treats.
Step 3: Frying the Donuts
Now comes the exciting part—frying! Heat vegetable oil in a deep pot or fryer to 350°F (175°C). Carefully drop the piped donuts into the hot oil, a few at a time. Fry them for about 3-4 minutes on each side, or until they turn a beautiful golden brown. Use a slotted spoon to remove them and place them on a paper towel-lined plate to drain excess oil.
Tips for Step 3
- Keep an eye on the temperature! If the oil is too hot, the outside will burn before the inside cooks.
- Don’t overcrowd the pot; this can lower the oil temperature and lead to soggy donuts.
- Use a thermometer for accuracy; it’s a game-changer!
Step 4: Preparing the Glaze
While the donuts are cooling, let’s whip up a simple glaze. In a bowl, mix 1 cup of powdered sugar with 2-3 tablespoons of milk and 1 teaspoon of vanilla extract. Stir until smooth and creamy. If you want a thicker glaze, add more powdered sugar. For a chocolate glaze, simply melt some chocolate and mix it with a bit of cream!
Tips for Step 4
- Adjust the consistency to your liking; a thicker glaze will coat the donuts better.
- Feel free to experiment with flavors—try adding a splash of almond extract for a unique twist!
Step 5: Glazing the Donuts
Finally, it’s time to glaze those beautiful crullers! Dip the top of each donut into the glaze, allowing the excess to drip off. Place them on a wire rack to let the glaze set. If you’re feeling fancy, sprinkle some powdered sugar or cinnamon on top for an extra touch!
Tips for Step 5
- For a thicker glaze, let the donuts sit for a few minutes before dipping them again.
- Don’t be shy with the glaze; it’s what makes these crullers so delicious!
- Serve them fresh for the best taste; they’re best enjoyed the same day!
And there you have it! Your very own French cruller donuts, ready to be devoured. The joy of making these treats is only matched by the joy of sharing them with loved ones. So, gather your family around, and enjoy the fruits of your labor!
Equipment Needed for French Cruller Donuts Recipe
Before we dive into the delightful process of making French cruller donuts, let’s talk about the equipment you’ll need. Having the right tools can make all the difference, turning a good baking experience into a great one. Here’s a handy list of what you’ll need:
- Medium saucepan: This is where you’ll melt the butter and water for your choux pastry. A heavy-bottomed pan works best to distribute heat evenly.
- Wooden spoon: Perfect for stirring the dough and ensuring it comes together smoothly. If you have a silicone spatula, that works too!
- Piping bag with a star tip: This is essential for creating those beautiful cruller shapes. If you don’t have a piping bag, a resealable plastic bag with a corner snipped off can do the trick.
- Deep pot or fryer: You’ll need this for frying the donuts. A heavy pot is ideal, but if you have a deep fryer, it makes the process even easier.
- Thermometer: A kitchen thermometer is a must for checking the oil temperature. If you don’t have one, you can drop a small piece of dough into the oil; if it sizzles and rises, you’re good to go!
- Wire rack: This is where your glazed donuts will cool and set. If you don’t have one, a plate lined with paper towels will work in a pinch.
- Mixing bowls: You’ll need a couple of these for mixing your glaze and dough. A medium bowl for the glaze and a larger one for the dough will do just fine.
With these tools in hand, you’re all set to create your French cruller donuts. Remember, the right equipment can make the process smoother and more enjoyable. So, gather your gear, and let’s get cooking!
Variations of French Cruller Donuts Recipe
As a passionate home cook, I love to experiment with flavors and textures. French cruller donuts are a fantastic canvas for creativity! While the classic version is undeniably delicious, there are several fun variations you can try to keep things exciting. Here are a few of my favorites:
- Maple Glazed Crullers: Swap out the vanilla glaze for a rich maple glaze. Just mix powdered sugar with maple syrup and a splash of milk. The sweet, earthy flavor of maple pairs beautifully with the lightness of the cruller.
- Citrus Zest Crullers: Add a hint of lemon or orange zest to your glaze for a refreshing twist. The bright citrus notes will elevate the sweetness and add a delightful zing!
- Matcha Crullers: For a unique flavor, incorporate matcha powder into your glaze. This not only gives your crullers a beautiful green hue but also adds a subtle earthy taste that’s simply irresistible.
- Spiced Crullers: Mix in a pinch of nutmeg or cardamom into the choux pastry for a warm, spiced flavor. These spices can transform your crullers into a cozy treat, perfect for chilly mornings.
- Filled Crullers: Get adventurous by filling your crullers with pastry cream, whipped cream, or even fruit preserves. Just pipe the filling into the center after glazing for a delightful surprise!
These variations not only add a personal touch but also allow you to cater to different tastes. I often find that trying new flavors brings a sense of excitement to the kitchen. So, don’t hesitate to get creative and make these crullers your own!
Cooking Notes for French Cruller Donuts Recipe
As I’ve journeyed through the delightful world of French cruller donuts, I’ve gathered a few cooking notes that can help you achieve the best results. These little nuggets of wisdom can make a big difference in your cruller-making adventure!
- Temperature Matters: Always ensure your oil is at the right temperature before frying. If it’s too cool, your crullers will absorb excess oil and become greasy. If it’s too hot, they’ll burn on the outside while remaining raw inside. A thermometer is your best friend here!
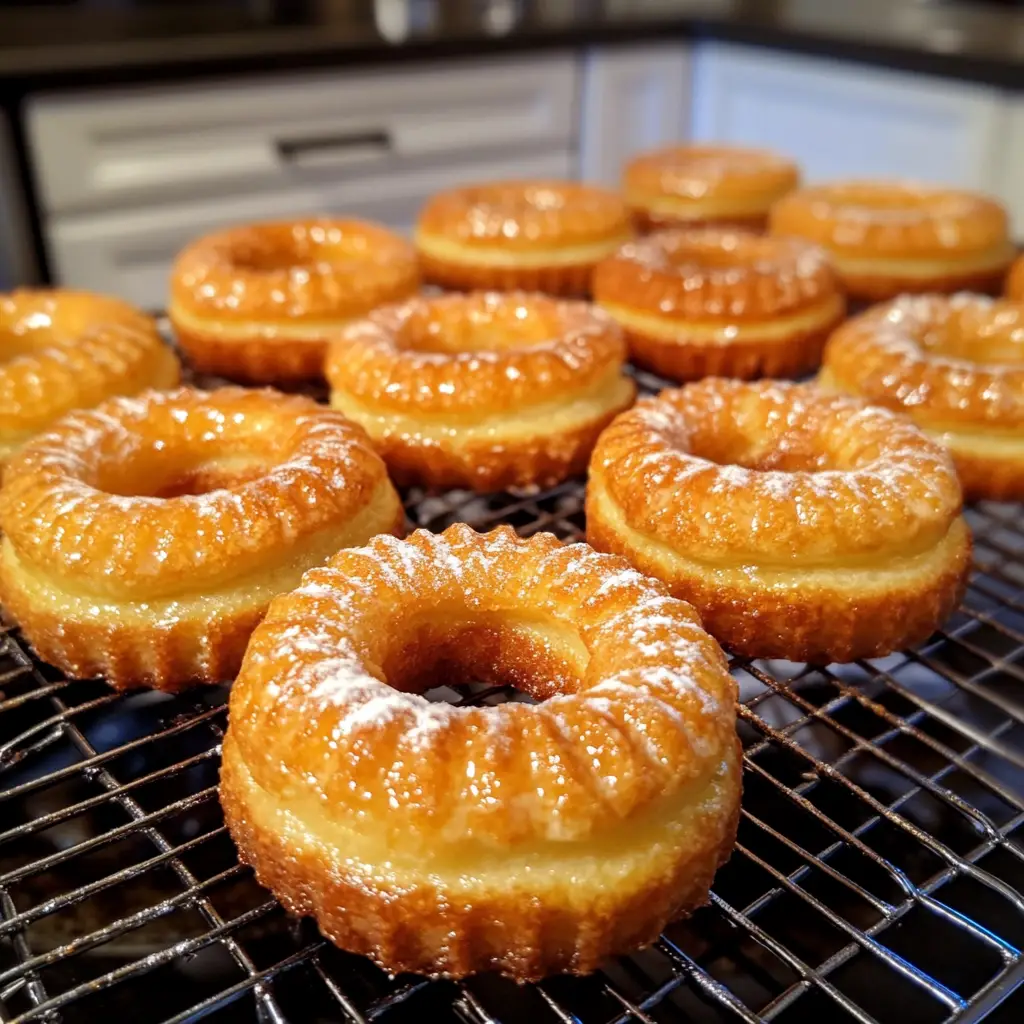
- Cooling Time: After frying, let your crullers cool on a wire rack. This allows air to circulate around them, preventing sogginess. Trust me, a little patience goes a long way!
- Storage Tips: If you have leftovers (which is rare in my house!), store them in an airtight container at room temperature. They’re best enjoyed fresh, but you can reheat them in the oven for a few minutes to bring back their crispiness.
- Experiment with Flavors: Don’t be afraid to play around with different extracts and spices. A dash of cinnamon or a splash of orange juice can transform your glaze and add a unique twist to your crullers.
- Practice Piping: If you’re new to piping, it might take a few tries to get the hang of it. Don’t be discouraged! Each cruller is a work of art, and even the imperfect ones taste delicious.
These cooking notes are like little breadcrumbs leading you to cruller perfection. With each batch, you’ll learn and grow as a home cook. So, embrace the process, and enjoy every moment spent in the kitchen!
Serving Suggestions for French Cruller Donuts Recipe
Now that you’ve crafted these delightful French cruller donuts, it’s time to think about how to serve them! Presentation can elevate your culinary creation from simple to spectacular. Here are some of my favorite serving suggestions that will make your crullers shine:
- With a Cup of Coffee: There’s nothing quite like enjoying a warm cruller with a steaming cup of coffee. The rich flavors of the coffee complement the sweetness of the donuts perfectly. I often brew a fresh pot of dark roast to enhance the experience.
- On a Dessert Platter: Arrange your crullers on a beautiful platter alongside other treats like cookies or mini pastries. This makes for a stunning dessert table at gatherings or brunches. Trust me, your guests will be impressed!
- With Fresh Fruit: Serve your crullers with a side of fresh berries or sliced fruit. The natural sweetness and acidity of the fruit balance the richness of the donuts, creating a delightful contrast.
- Drizzled with Extra Glaze: For those who can’t get enough sweetness, drizzle some extra glaze over the top of your crullers just before serving. It adds a beautiful shine and an extra layer of flavor!
- As a Breakfast Treat: Crullers make for a fantastic breakfast option. Pair them with yogurt and granola for a balanced meal that still feels indulgent. It’s a great way to start the day!
These serving suggestions not only enhance the enjoyment of your French cruller donuts but also allow you to share them in a way that feels special. Whether it’s a cozy morning at home or a festive gathering, these crullers are sure to bring smiles all around. So, gather your loved ones, serve them up, and watch the joy unfold!
Tips for Perfecting French Cruller Donuts Recipe
As I’ve whipped up countless batches of French cruller donuts, I’ve gathered a treasure trove of tips that can help you achieve cruller perfection. These little nuggets of wisdom can make all the difference in your baking journey. Here are my top tips to ensure your crullers turn out light, airy, and utterly delicious:
- Use Fresh Ingredients: Always opt for fresh eggs and high-quality butter. Fresh ingredients not only enhance flavor but also contribute to the overall texture of your crullers.
- Don’t Skip the Cooling: After making the choux pastry, let it cool slightly before adding the eggs. This prevents the eggs from cooking and ensures a smooth, glossy dough.
- Perfect Piping: When piping, keep the tip close to the surface to avoid air pockets. A steady hand will help you create those beautiful, uniform shapes that make crullers so appealing.
- Monitor Oil Temperature: Use a thermometer to keep the oil at a consistent 350°F (175°C). This ensures even cooking and prevents greasy donuts. If you don’t have a thermometer, drop a small piece of dough into the oil; it should sizzle and rise to the surface.
- Glaze While Warm: For the best glaze adherence, dip your crullers while they’re still warm. This allows the glaze to melt slightly and create a beautiful, shiny finish.
With these tips in your back pocket, you’ll be well on your way to mastering the art of French cruller donuts. Remember, practice makes perfect, and each batch is a chance to learn and grow. So, embrace the process, enjoy the journey, and savor every delicious bite!
Breakdown of Time for French Cruller Donuts Recipe
As a passionate home cook, I know that time management is key in the kitchen. When it comes to making French cruller donuts, having a clear idea of how long each step takes can help you plan your baking adventure. Here’s a handy breakdown of the time you’ll need:
- Prep Time: 20 minutes
- Cooking Time: 15 minutes
- Total Time: 35 minutes
During the prep time, you’ll gather your ingredients, make the choux pastry, and pipe those lovely donut shapes. The cooking time includes frying the donuts to golden perfection and preparing the glaze. With just 35 minutes from start to finish, you’ll have a batch of delightful French cruller donuts ready to enjoy!
So, whether you’re whipping these up for a cozy breakfast or a sweet treat to share, you’ll find that the time spent is well worth the delicious reward. Happy cooking!
Nutritional Information for French Cruller Donuts Recipe
As a passionate home cook, I believe that enjoying delicious treats like French cruller donuts can be part of a balanced lifestyle. While these donuts are undeniably indulgent, it’s good to know what you’re savoring. Here’s a general breakdown of the nutritional information for one cruller (without glaze):
- Calories: Approximately 150
- Protein: 2g
- Fat: 8g
- Carbohydrates: 18g
- Sugar: 1g
- Sodium: 100mg
Keep in mind that these values can vary based on the specific ingredients you use and the size of your crullers. If you choose to add a glaze or any optional toppings, the calorie count will increase. For instance, a simple vanilla glaze can add around 50 calories per donut.
While it’s tempting to indulge in these sweet treats, moderation is key. I often enjoy them as a special breakfast or dessert, sharing them with family and friends to spread the joy. Remember, it’s all about balance, and these delightful crullers are worth every bite!
Frequently Asked Questions about French Cruller Donuts Recipe
As I’ve shared my love for French cruller donuts, I’ve noticed that many home cooks have similar questions. It’s always great to connect with fellow baking enthusiasts! Here are some of the most frequently asked questions I’ve encountered, along with my answers to help you on your cruller-making journey.
Can I make the choux pastry ahead of time?
While it’s best to make the choux pastry fresh for the best texture, you can prepare it a few hours in advance. Just store it in an airtight container in the fridge. When you’re ready to pipe and fry, let it come to room temperature before proceeding. This way, you’ll still achieve that light and airy texture!
What if I don’t have a piping bag?
No worries! If you don’t have a piping bag, a resealable plastic bag works just as well. Simply fill the bag with the choux pastry, seal it, and snip off one corner to create a makeshift piping bag. It’s a handy trick that I often use when I’m in a pinch!
How do I know when the oil is hot enough for frying?
To check if your oil is ready, you can use a thermometer to reach 350°F (175°C). If you don’t have one, drop a small piece of dough into the oil. If it sizzles and rises to the surface, you’re good to go! Just be careful not to overcrowd the pot, as this can lower the oil temperature.
Can I bake these donuts instead of frying them?
While frying gives crullers their signature texture, you can bake them for a healthier alternative. Preheat your oven to 375°F (190°C) and place the piped donuts on a baking sheet lined with parchment paper. Bake for about 20-25 minutes or until golden brown. They won’t be quite the same, but they’ll still be delicious!
How should I store leftover crullers?
If you happen to have any crullers left (which is rare in my house!), store them in an airtight container at room temperature. They’re best enjoyed fresh, but you can reheat them in the oven for a few minutes to restore their crispiness. Just remember, the glaze may soften a bit, but they’ll still taste amazing!
These FAQs are just a glimpse into the wonderful world of French cruller donuts. I hope they help you feel more confident as you embark on your cruller-making adventure. Remember, every question is a step toward mastering this delightful treat, so don’t hesitate to reach out if you have more queries. Happy baking!
Conclusion on French Cruller Donuts Recipe
As I wrap up this delightful journey into the world of French cruller donuts, I can’t help but feel a sense of joy and accomplishment. These airy, sweet treats are not just a recipe; they are a celebration of creativity and love in the kitchen. The process of making crullers is a beautiful blend of art and science, where each step brings you closer to that perfect bite of fluffy goodness.
What I adore most about this French cruller donuts recipe is its versatility. Whether you stick to the classic vanilla glaze or venture into exciting variations, there’s always room for personal touch. Plus, the smiles on the faces of family and friends as they savor these treats are truly priceless. It’s a simple reminder that food has the power to bring people together.
So, whether you’re a seasoned baker or just starting your culinary adventure, I encourage you to give this recipe a try. Embrace the process, enjoy the little moments, and don’t forget to share your delicious creations with those you love. After all, the joy of cooking is best experienced when it’s shared. Happy baking, and may your crullers always be light, airy, and utterly delightful!
