
Introduction to Orange Cream Layer Dessert Recipe
As a passionate home cook, I find joy in creating desserts that not only taste delightful but also bring a smile to the faces of my loved ones. One of my all-time favorites is the Orange Cream Layer Dessert. This dessert is like a sunbeam on a plate, bursting with vibrant flavors and creamy textures that dance on your palate. I remember the first time I made it; the kitchen was filled with the sweet, citrusy aroma of fresh oranges, and I could hardly wait to dig in!
This recipe is perfect for any occasion, whether it’s a family gathering, a picnic, or just a cozy night in. The layers of creamy orange filling and a crunchy crust create a delightful contrast that keeps everyone coming back for more. Plus, it’s surprisingly easy to whip up! I love how this dessert can be made ahead of time, allowing the flavors to meld beautifully in the fridge. It’s like a little gift of sunshine waiting to be enjoyed.
In this article, I’ll guide you through the steps to create your very own Orange Cream Layer Dessert. I’ll share my personal tips and tricks that I’ve picked up along the way, ensuring that your dessert turns out just as delicious as mine. So, roll up your sleeves, and let’s embark on this culinary adventure together!
Ingredients for Orange Cream Layer Dessert Recipe
Before we dive into the delightful process of making the Orange Cream Layer Dessert, let’s gather our ingredients. Having everything ready makes the cooking experience smoother and more enjoyable. I always find that using fresh, high-quality ingredients elevates the flavors, so I recommend sourcing the best you can find. Here’s what you’ll need:
Main Ingredients
- 1 ½ cups of graham cracker crumbs
- ½ cup of unsalted butter, melted
- 1 cup of powdered sugar
- 8 oz cream cheese, softened
- 1 cup of heavy whipping cream
- 1 cup of fresh orange juice (about 3-4 oranges)
- 1 tablespoon of orange zest (from the same oranges)
- 1 teaspoon of vanilla extract
These ingredients come together to create a luscious dessert that’s both creamy and refreshing. The combination of cream cheese and heavy whipping cream gives it that dreamy texture, while the fresh orange juice and zest provide a burst of citrusy goodness. Trust me, the aroma alone will have your family flocking to the kitchen!
Optional Add-ons
- 1 cup of mini marshmallows for added texture
- ½ cup of chopped nuts (like walnuts or pecans) for a crunchy twist
- Fresh mint leaves for garnish
- Chocolate shavings for a decadent touch
Feel free to get creative with these optional add-ons! I often toss in mini marshmallows for a fun surprise in each bite. If you’re a nut lover like me, adding some chopped nuts gives a delightful crunch that contrasts beautifully with the creamy layers. And don’t forget the garnish! A sprig of fresh mint or a sprinkle of chocolate shavings can make your dessert look as good as it tastes.
Now that we have our ingredients ready, let’s move on to the fun part—preparing this delicious Orange Cream Layer Dessert!
How to Prepare Orange Cream Layer Dessert Recipe
Now that we have our ingredients ready, it’s time to roll up our sleeves and dive into the preparation of this delightful Orange Cream Layer Dessert. I always find that the process of making a dessert is just as enjoyable as eating it! Each step is like a little adventure, and I can’t wait to share it with you. Let’s get started!
Step 1: Prepare the Crust
First things first, we need to create a sturdy base for our dessert. The crust is the foundation, and it’s super easy to make!
- In a mixing bowl, combine the graham cracker crumbs and melted butter. Mix until the crumbs are evenly coated.
- Press the mixture firmly into the bottom of a 9×9 inch baking dish. Make sure it’s packed tightly to hold up the layers above.
Tips for Achieving the Perfect Crust
To get that perfect crust, I like to use the bottom of a measuring cup to press down the crumbs. It helps create an even layer. If you want a little extra flavor, you can add a pinch of cinnamon to the crumbs. It gives a warm, cozy touch!
Step 2: Make the Orange Cream Filling
Next up is the star of the show—the orange cream filling! This is where the magic happens.
- In a large mixing bowl, beat the softened cream cheese until smooth.
- Add in the powdered sugar, fresh orange juice, orange zest, and vanilla extract. Mix until everything is well combined and creamy.
- In another bowl, whip the heavy cream until stiff peaks form. Gently fold the whipped cream into the orange mixture until fully incorporated.
Tips for Flavor Enhancement
For an extra burst of flavor, consider adding a splash of orange liqueur if you’re feeling adventurous! It adds a lovely depth to the filling. Just remember to keep it balanced so the orange flavor shines through.
Step 3: Assemble the Layers
Now comes the fun part—layering! This is where your dessert starts to take shape.
- Spread half of the orange cream filling over the prepared crust, smoothing it out with a spatula.
- Repeat with the remaining filling, creating a beautiful layered effect.
Tips for Layering Effectively
To achieve those lovely layers, I like to use an offset spatula. It helps me spread the filling evenly without disturbing the crust. Take your time with this step; it’s worth it for that stunning presentation!
Step 4: Chill the Dessert
Once assembled, it’s time to let our dessert chill and set. This is the hardest part—waiting!
- Cover the dish with plastic wrap and place it in the refrigerator for at least 4 hours, or overnight if you can wait that long.
Tips for Optimal Chilling Time
The longer you let it chill, the better the flavors meld together. I often make this dessert the night before a gathering. It’s like a little surprise waiting to be unveiled!
And there you have it! The steps to create your very own Orange Cream Layer Dessert. I can already imagine the smiles on your loved ones’ faces when they take that first bite. Let’s move on to the equipment you’ll need to make this delicious treat!
Equipment Needed for Orange Cream Layer Dessert Recipe
Before we dive into the kitchen, let’s gather the essential tools for making the Orange Cream Layer Dessert. Having the right equipment on hand makes the process smoother and more enjoyable. Here’s what you’ll need:
- Mixing Bowls: A couple of medium-sized mixing bowls will do the trick. I love using glass bowls because they let me see the beautiful colors of my ingredients.
- Measuring Cups and Spoons: Accurate measurements are key to a successful dessert. I always keep a set of dry and liquid measuring cups handy.
- Electric Mixer: A hand mixer or stand mixer is perfect for beating the cream cheese and whipping the cream. If you don’t have one, a whisk will work, but it’ll take a bit more elbow grease!
- Spatula: A rubber spatula is essential for folding the whipped cream into the orange mixture. It helps keep the filling light and airy.
- 9×9 Inch Baking Dish: This is where all the magic happens! If you don’t have a square dish, a round one will work just fine.
- Plastic Wrap: To cover the dessert while it chills, ensuring it stays fresh and delicious.
And there you have it! With these tools in your kitchen arsenal, you’re all set to create your Orange Cream Layer Dessert. Let’s keep the momentum going and explore some delicious variations of this recipe!
Variations of Orange Cream Layer Dessert Recipe
As a home cook, I love experimenting with recipes to create new flavors and textures. The Orange Cream Layer Dessert is no exception! Here are a few fun variations that I’ve tried and absolutely adore:
- Berry Bliss: Swap out some of the orange juice for fresh berry puree, like strawberries or raspberries. The tartness of the berries adds a delightful twist to the creamy layers.
- Chocolate Orange Delight: Add a layer of chocolate ganache between the orange cream layers. The rich chocolate pairs beautifully with the citrus, creating a decadent dessert experience.
- Coconut Cream Layer: Mix in some shredded coconut into the orange cream filling for a tropical flair. It adds a lovely chewiness that complements the smoothness of the cream.
- Nutty Orange Crunch: Incorporate crushed nuts, like almonds or pistachios, into the crust for an extra crunch. It adds a delightful texture that contrasts with the creamy filling.
These variations not only keep things exciting but also allow you to tailor the dessert to your taste preferences or seasonal ingredients. I encourage you to get creative and make this recipe your own! Each twist brings a new adventure, and I can’t wait for you to try them out.
Cooking Notes for Orange Cream Layer Dessert Recipe
As I’ve journeyed through the delightful world of making the Orange Cream Layer Dessert, I’ve picked up a few cooking notes that can help you achieve the best results. These little nuggets of wisdom can make a big difference in your dessert-making experience!
- Room Temperature Ingredients: Make sure your cream cheese is at room temperature before mixing. It blends more smoothly, creating a creamy filling without lumps.
- Freshness Matters: Use fresh oranges for juice and zest. The vibrant flavor of fresh oranges elevates the dessert, making it taste like sunshine in every bite.
- Chill Time is Key: Don’t rush the chilling process! Allowing the dessert to set properly ensures that the layers hold together beautifully when you cut into it.
- Serving Size: This dessert is rich and creamy, so a little goes a long way. I like to serve it in small squares, allowing everyone to savor the flavors without feeling overwhelmed.
- Storage Tips: If you have leftovers (which is rare!), cover the dessert tightly and store it in the refrigerator. It stays fresh for up to three days, but I doubt it will last that long!
These cooking notes are like little treasures I’ve gathered over time. They help ensure that your Orange Cream Layer Dessert turns out as delightful as it can be. Now, let’s keep the momentum going and explore some serving suggestions that will make your dessert shine even brighter!
Serving Suggestions for Orange Cream Layer Dessert Recipe
When it comes to serving the Orange Cream Layer Dessert, presentation is key! I love to make my desserts not only taste good but look good too. Here are some delightful serving suggestions that will elevate your dessert experience:
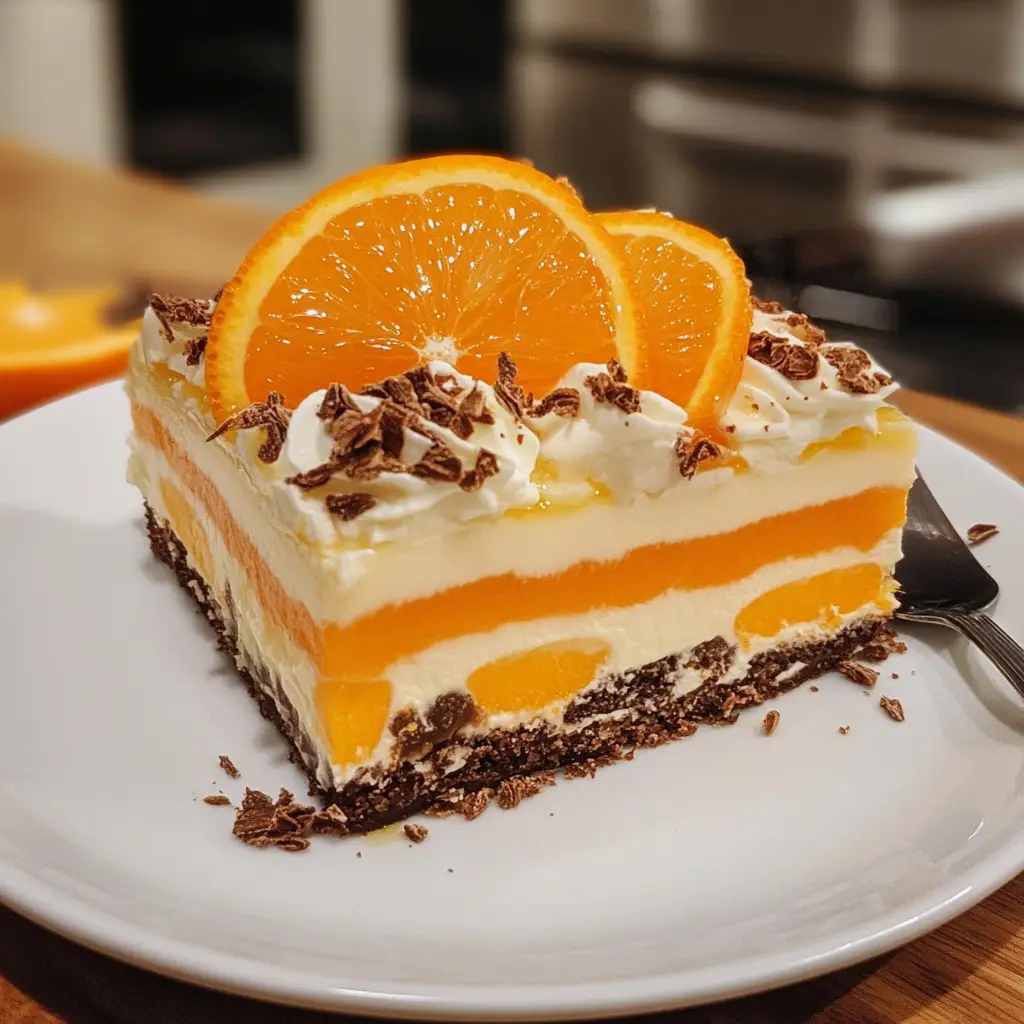
- Garnish with Fresh Fruit: Top each square with a slice of fresh orange or a few berries. The vibrant colors add a beautiful touch and hint at the flavors inside.
- Drizzle with Sauce: A light drizzle of chocolate or caramel sauce can add a touch of decadence. It’s like a cherry on top, making each bite even more indulgent!
- Serve with Whipped Cream: A dollop of freshly whipped cream on the side complements the creamy layers perfectly. It adds an extra layer of fluffiness that’s hard to resist.
- Use Dessert Cups: For a fun twist, serve the dessert in individual cups or jars. Layer the crust and filling in clear containers to showcase the beautiful layers.
- Pair with Tea or Coffee: This dessert pairs wonderfully with a cup of herbal tea or a rich coffee. The warm beverage balances the cool, creamy dessert beautifully.
These serving suggestions not only enhance the visual appeal but also add a little extra flair to your Orange Cream Layer Dessert. I can already picture the smiles on everyone’s faces as they dig into this delightful treat! Now, let’s move on to some tips for perfecting this recipe even further.
Tips for Perfecting Orange Cream Layer Dessert Recipe
As I’ve crafted my Orange Cream Layer Dessert over the years, I’ve discovered a few tips that can truly elevate your creation. These little gems of wisdom can make all the difference, ensuring that your dessert is not only delicious but also visually stunning. Here are my top tips for perfecting this delightful treat:
- Use Fresh Ingredients: Always opt for fresh oranges for juice and zest. The vibrant flavor of fresh fruit is unmatched and will make your dessert sing!
- Don’t Rush the Chilling: Patience is key! Allow the dessert to chill for at least 4 hours, or overnight if possible. This helps the layers set beautifully and enhances the flavors.
- Experiment with Textures: Consider adding a layer of crushed cookies or nuts between the orange cream layers for an exciting crunch. It adds a delightful surprise in every bite!
- Presentation Matters: When serving, use a sharp knife to cut clean squares. A little dusting of powdered sugar or a sprinkle of orange zest on top can make your dessert look extra special.
- Adjust Sweetness to Taste: If you prefer a less sweet dessert, feel free to reduce the powdered sugar in the filling. Taste as you go to find your perfect balance!
These tips are like little secrets I’ve gathered from my own kitchen adventures. They help ensure that your Orange Cream Layer Dessert turns out as delightful as it can be. Now, let’s take a look at the time breakdown for making this delicious treat!
Breakdown of Time for Orange Cream Layer Dessert Recipe
When it comes to making the Orange Cream Layer Dessert, timing is everything! I always find it helpful to have a clear idea of how long each step will take. This way, I can plan my day and ensure everything comes together perfectly. Here’s a quick breakdown of the time you’ll need:
- Prep Time: Approximately 30 minutes. This includes gathering your ingredients, preparing the crust, and making the orange cream filling. It’s a fun and engaging process that flies by!
- Chilling Time: At least 4 hours. This is the hardest part—waiting! But trust me, it’s worth it for the flavors to meld and the layers to set beautifully.
- Total Time: About 4 hours and 30 minutes. If you can, I recommend making it the night before. That way, you can wake up to a delightful dessert ready to impress!
With this time breakdown, you can easily fit the Orange Cream Layer Dessert into your schedule. I love how this dessert can be made ahead of time, allowing you to focus on other aspects of your gathering or simply enjoy some well-deserved relaxation. Now that we have our timing sorted, let’s move on to the nutritional information for this delicious treat!
Nutritional Information for Orange Cream Layer Dessert Recipe
As a passionate home cook, I believe it’s important to enjoy our treats while being mindful of what goes into them. The Orange Cream Layer Dessert is a delightful indulgence, and knowing its nutritional information can help you savor it even more. Here’s a general breakdown per serving, assuming the recipe yields about 12 servings:
- Calories: Approximately 250 calories
- Fat: 15g (of which saturated fat is 9g)
- Carbohydrates: 28g
- Fiber: 1g
- Sugar: 15g
- Protein: 3g
These values can vary based on the specific brands of ingredients you use and any optional add-ons you choose to include. For instance, if you decide to add nuts or chocolate, the nutritional content will change accordingly. I always encourage balance in our diets, so enjoy this dessert as a special treat among a variety of wholesome foods!
Now that we’ve covered the nutritional aspect, let’s move on to some frequently asked questions about the Orange Cream Layer Dessert!
Frequently Asked Questions about Orange Cream Layer Dessert Recipe
As I’ve shared my love for the Orange Cream Layer Dessert, I often get questions from fellow home cooks eager to try it out. Here are some of the most common queries I’ve encountered, along with my answers to help you on your culinary journey!
Can I use bottled orange juice instead of fresh?
While bottled orange juice is convenient, I highly recommend using fresh juice for the best flavor. Fresh oranges bring a vibrant taste that really makes this dessert shine. If you must use bottled juice, choose a high-quality brand without added sugars or preservatives.
How long can I store the Orange Cream Layer Dessert?
This dessert can be stored in the refrigerator for up to three days. Just make sure to cover it tightly with plastic wrap to keep it fresh. However, I doubt it will last that long—it’s just too delicious!
Can I make this dessert gluten-free?
Absolutely! To make a gluten-free version, simply substitute the graham cracker crumbs with gluten-free cookie crumbs or crushed gluten-free crackers. It’s a great way to ensure everyone can enjoy this delightful treat!
What can I use instead of cream cheese?
If you’re looking for a dairy-free option, you can use a vegan cream cheese alternative. Just make sure it has a similar texture to regular cream cheese for the best results. The flavor may vary slightly, but it will still be delicious!
Can I freeze the Orange Cream Layer Dessert?
While I recommend enjoying this dessert fresh, you can freeze it if needed. Just be sure to wrap it tightly in plastic wrap and then in aluminum foil. When you’re ready to enjoy it, let it thaw in the refrigerator overnight. The texture may change slightly, but it will still taste great!
These FAQs cover some of the most common concerns I’ve encountered while making the Orange Cream Layer Dessert. If you have any other questions, feel free to reach out! Now, let’s wrap up our delicious journey with a conclusion that highlights the appeal of this delightful dessert.
Conclusion on Orange Cream Layer Dessert Recipe
As we wrap up our delightful journey through the world of the Orange Cream Layer Dessert, I can’t help but feel a sense of joy and satisfaction. This dessert is more than just a sweet treat; it’s a celebration of flavors, textures, and memories shared with loved ones. The creamy orange filling, paired with the crunchy crust, creates a harmonious balance that dances on your taste buds, leaving you craving more.
What I love most about this recipe is its versatility. Whether you’re hosting a gathering, celebrating a special occasion, or simply treating yourself, the Orange Cream Layer Dessert fits the bill perfectly. It’s easy to prepare, can be made ahead of time, and offers endless possibilities for customization. Plus, the vibrant colors and refreshing flavors make it a showstopper on any dessert table!
So, I encourage you to give this recipe a try. Embrace the process, enjoy the little moments in the kitchen, and savor the smiles on your loved ones’ faces when they take that first bite. The Orange Cream Layer Dessert is not just a recipe; it’s a way to spread joy and create lasting memories. Happy cooking!
