
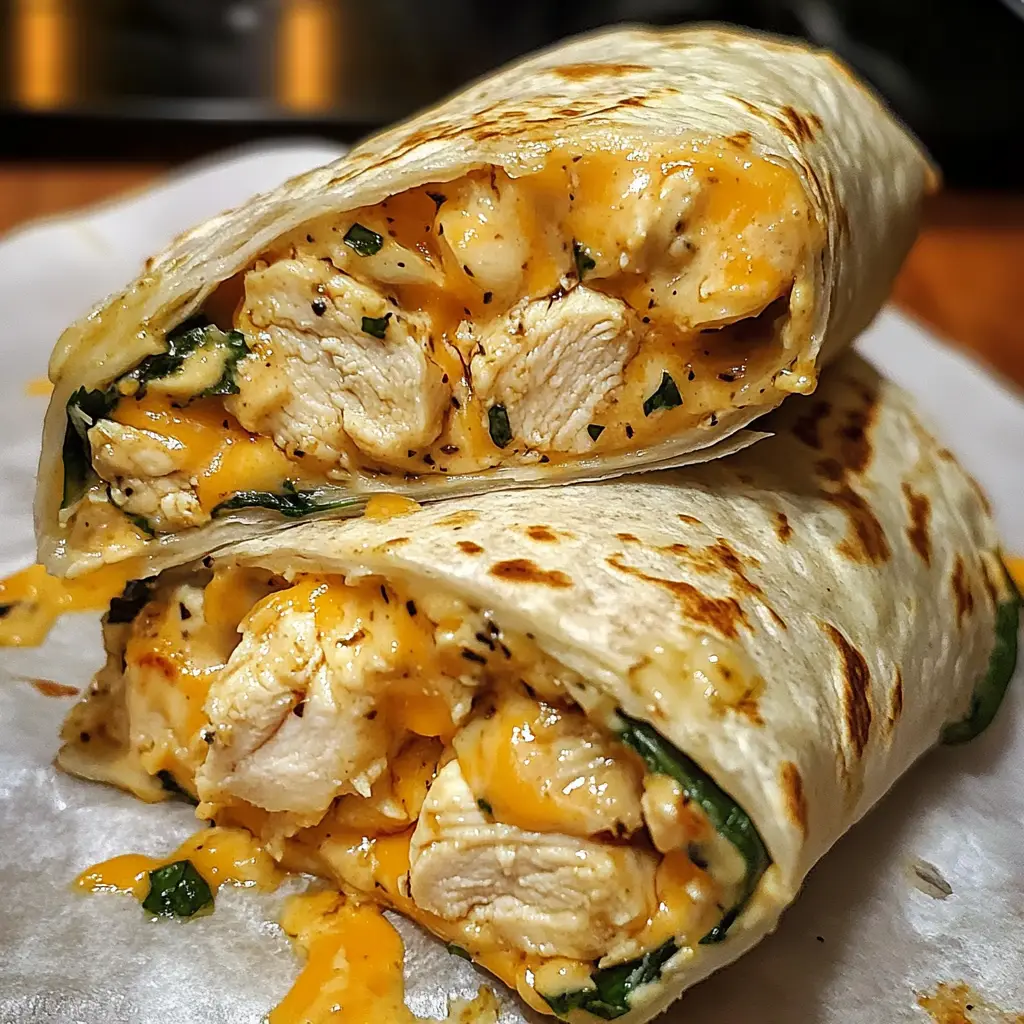
In a world full of grab-and-go meals, it’s rare to find one that is both quick and bursting with indulgent, homemade flavor. Enter the Cheesy Garlic Chicken Wrap—a warm, melty, flavor-packed dish that feels like a cozy comfort food hug in every bite. These wraps marry the savory depth of garlic, the creamy richness of three cheeses, and the tender succulence of shredded chicken, all neatly enveloped in a soft, golden tortilla. Whether you’re planning lunch on the fly, prepping for weeknight dinners, or simply need a dish that satisfies without fuss, this recipe delivers every single time. It’s the kind of wrap you’ll crave repeatedly, not just for its taste but also for its simplicity.
Garlic lovers rejoice—this wrap does not hold back on bold flavor. It’s got garlic in three different forms: minced fresh garlic sautéed in butter, garlic powder, and even an optional garlic aioli drizzle. The result is a deeply aromatic and irresistibly rich filling that balances beautifully with the creamy cheeses and seasoned chicken. This wrap is more than just a quick bite; it’s a full-on flavor experience, and it’s just as perfect for a solo meal as it is for family gatherings, school lunches, or midnight snacks.
Why is this recipe so popular?
The Cheesy Garlic Chicken Wraps recipe is so popular because it perfectly balances flavor, convenience, and comfort. Here’s why people keep coming back to it:
1. Irresistible Flavor Combination
Garlic and cheese are a match made in culinary heaven. Add in tender shredded chicken, buttery richness, and the optional tang of sauces or fresh veggies, and you get a deeply savory, creamy, and satisfying taste in every bite.
2. Quick and Easy to Make
In just 20 minutes, you can have a hot, hearty meal ready to go. It’s ideal for busy weeknights, lazy weekends, or even quick lunches between Zoom meetings or errands.
3. Highly Customizable
You can tailor it to your preferences—spice it up, make it vegetarian, switch up the cheese, or add fresh veggies. It works with whatever you have in your fridge.
4. Perfect for Meal Prep
Make a big batch, refrigerate or freeze them, and reheat for a fast, filling meal. They keep well and taste just as good the next day.
5. Kid-Friendly and Crowd-Pleasing
Mild, cheesy, and easy to eat with your hands—kids love it, picky eaters love it, and adults can dress it up to make it gourmet.
6. Comfort Food Without the Fuss
You get all the cozy, indulgent satisfaction of something like garlic bread or creamy pasta, but in a handheld, easy-to-eat format.
In short, it’s the ultimate comfort wrap: flavorful, fast, flexible, and filling. That’s the winning combo that makes it so beloved.
Why You’ll Love This Recipe
-
Full of Bold, Savory Flavor: Thanks to the use of garlic butter, cream cheese, cheddar, and mozzarella, every bite is bursting with mouthwatering flavor.
-
Quick to Prepare: Ready in under 30 minutes from start to finish, making it perfect for busy weekdays or lazy weekends.
-
Incredibly Versatile: You can switch up the protein, cheese blend, or tortilla based on what you have on hand.
-
Perfect for Meal Prep: These wraps refrigerate and reheat beautifully, making them ideal for lunchboxes, travel snacks, or storing in the freezer.
-
Family Favorite: Kid-friendly and adult-approved—this recipe is always a crowd-pleaser, no matter the setting.
-
Customizable: Add veggies, change the sauce, or spice things up—it’s endlessly adaptable to your taste.

Ingredients (Makes 4 Wraps)
For the Chicken Filling:
-
2 cups cooked, shredded chicken (rotisserie chicken recommended for ease and flavor)
-
1 cup shredded mozzarella cheese
-
1/2 cup shredded cheddar cheese
-
3 tablespoons cream cheese, softened
-
2 tablespoons butter
-
2 teaspoons minced garlic (fresh garlic adds unbeatable flavor)
-
1 teaspoon garlic powder
-
1/2 teaspoon onion powder
-
Salt and pepper to taste
Wrap Base:
-
4 large flour tortillas (10–12 inches wide, burrito-size)
Optional Add-ins and Toppings:
-
Fresh baby spinach or arugula (for a peppery bite)
-
Sliced tomatoes (adds moisture and freshness)
-
Ranch dressing, garlic aioli, or spicy mayo
-
Thinly sliced red onion or avocado
-
Pickled jalapeños or banana peppers for a tangy crunch
Preparation (Step-by-Step)
Step 1: Make the Garlic Butter Base
Melt the butter in a skillet over medium heat. Add the minced garlic and cook for 1–2 minutes until fragrant. Stir constantly to prevent burning. Once golden and aromatic, remove from heat and let it cool slightly. This garlic butter is the secret weapon—it infuses the entire dish with rich, toasty garlic flavor.
Step 2: Mix the Chicken Filling
In a large bowl, combine the shredded chicken, mozzarella, cheddar, cream cheese, garlic powder, onion powder, salt, pepper, and the prepared garlic butter. Use a spoon or clean hands to thoroughly mix everything until evenly combined. The heat from the garlic butter will slightly melt the cream cheese, making the mixture smooth and creamy.
Step 3: Warm the Tortillas
Heat each tortilla for 10–15 seconds in a dry skillet or microwave. This makes them flexible and prevents cracking when you fold the wraps.
Step 4: Assemble the Wraps
Lay out each tortilla and add about 1/4 of the cheesy chicken filling in the center. If desired, layer on spinach, tomato slices, or your favorite sauce. Be careful not to overstuff—this will make wrapping difficult and can lead to tearing.
Step 5: Wrap It Up
Fold the sides of the tortilla inwards, then roll from the bottom up, tucking the filling in tightly as you go. Set the wrap seam-side down.
Step 6: Toast (Optional but Recommended)
Heat a skillet or griddle over medium heat. Place the wraps seam-side down and toast for 2–3 minutes per side, or until golden and crisp. This step adds texture, seals the wrap, and melts the cheese even more—creating a satisfying bite from the outside in.
Step 7: Serve and Enjoy
Slice in half, plate, and serve warm. They pair well with a crunchy side like chips, fries, or a crisp garden salad.

Variation Ideas
-
Buffalo Style: Mix buffalo sauce into the filling and add blue cheese crumbles or ranch dressing.
-
BBQ Chicken Wrap: Replace garlic butter with BBQ sauce, use smoked cheddar, and add red onion and pickles.
-
Spicy Southwest Wrap: Add black beans, corn, chopped jalapeños, and a dusting of taco seasoning.
-
Veggie-Loaded: Include sautéed bell peppers, mushrooms, or spinach to up the nutrition without sacrificing flavor.
-
Bacon Ranch Edition: Toss in cooked, chopped bacon and a drizzle of ranch for a smoky, creamy twist.
Cooking Note
If you’re planning on making these ahead, you can prepare the chicken filling up to 3 days in advance. Store it in an airtight container in the fridge. Assemble the wraps when you’re ready to eat, or freeze pre-assembled wraps for up to 2 months. To reheat, place in a hot skillet from frozen and cook until heated through and crispy.
Serving Suggestions
-
With Dipping Sauces: Serve with extra garlic aioli, ranch dressing, chipotle mayo, or honey mustard.
-
Pair With Sides: Chips and salsa, coleslaw, potato salad, tomato soup, or a fresh cucumber salad all work beautifully.
-
For a Party Platter: Cut wraps into thirds, secure with cocktail picks, and serve with a trio of dipping sauces for a fun appetizer option.
Tips for Success
-
Use Warm Tortillas: Prevents tearing and makes wrapping smooth.
-
Don’t Overfill: Stick to about 1/2 cup filling per wrap for perfect folding.
-
Toast Them: Always toast or grill your wrap for added crunch and flavor.
-
Go for Quality Cheese: Freshly shredded cheese melts better and tastes superior to pre-shredded blends.
-
Double the Batch: You’ll thank yourself later when you’re craving a fast, homemade meal.
Prep Time: 10 minutes
Cook Time: 10 minutes
Total Time: 20 minutes
Nutritional Information (Per Wrap – Approximate)
-
Calories: 430
-
Protein: 28g
-
Carbohydrates: 28g
-
Fat: 25g
-
Sodium: 580mg
-
Fiber: 2g
-
Sugar: 2g
Note: Exact values will vary based on tortilla type, cheese used, and additional toppings.
FAQs
Can I use leftover chicken instead of rotisserie?
Absolutely! Any pre-cooked chicken will work—just be sure it’s shredded or chopped small for even mixing.
Can these be made vegetarian?
Yes! Substitute the chicken with sautéed mushrooms, chickpeas, or seasoned tofu crumbles for a meat-free version.
How long can they be stored in the fridge?
Assembled wraps can be refrigerated for up to 3 days. Reheat in a skillet or wrap in foil and bake at 350°F for 10–12 minutes.
Can I freeze these?
Yes! Wrap each one tightly in foil, place in a ziplock bag, and freeze for up to 2 months. Reheat from frozen in a toaster oven or skillet.
What’s the best way to reheat?
To preserve crispiness, reheat in a dry skillet over medium heat for 5–6 minutes, flipping halfway. For speed, microwave for 60–90 seconds (though this may soften the tortilla).
What sauces pair well with it?
Garlic aioli, ranch, chipotle mayo, honey mustard, or even marinara if you want a pizza-inspired twist.
Conclusion
The Cheesy Garlic Chicken Wrap is more than just a quick meal—it’s a culinary comfort blanket. With its rich, cheesy filling, bold garlic flavor, and customizable elements, this recipe is destined to be a repeat favorite in your kitchen. Whether you’re looking to wow your family on a busy weeknight, meal prep for the office, or indulge in a cheesy bite of joy after a long day, this wrap has your back. It’s quick, satisfying, and endlessly adaptable—exactly what modern home cooking is all about.
So go ahead—grab those tortillas, warm up the skillet, and let the magic happen. Once you take that first bite, you’ll understand why these Cheesy Garlic Chicken Wraps are pure lunchtime (or anytime) bliss.
Print
Cheesy Garlic Chicken Wraps Recipe
- Total Time: 20 minutes
Ingredients
For the Chicken Filling:
-
2 cups cooked, shredded chicken (rotisserie chicken recommended for ease and flavor)
-
1 cup shredded mozzarella cheese
-
1/2 cup shredded cheddar cheese
-
3 tablespoons cream cheese, softened
-
2 tablespoons butter
-
2 teaspoons minced garlic (fresh garlic adds unbeatable flavor)
-
1 teaspoon garlic powder
-
1/2 teaspoon onion powder
-
Salt and pepper to taste
Wrap Base:
-
4 large flour tortillas (10–12 inches wide, burrito-size)
Optional Add-ins and Toppings:
-
Fresh baby spinach or arugula (for a peppery bite)
-
Sliced tomatoes (adds moisture and freshness)
-
Ranch dressing, garlic aioli, or spicy mayo
-
Thinly sliced red onion or avocado
-
Pickled jalapeños or banana peppers for a tangy crunch
Instructions
Step 1: Make the Garlic Butter Base
Melt the butter in a skillet over medium heat. Add the minced garlic and cook for 1–2 minutes until fragrant. Stir constantly to prevent burning. Once golden and aromatic, remove from heat and let it cool slightly. This garlic butter is the secret weapon—it infuses the entire dish with rich, toasty garlic flavor.
Step 2: Mix the Chicken Filling
In a large bowl, combine the shredded chicken, mozzarella, cheddar, cream cheese, garlic powder, onion powder, salt, pepper, and the prepared garlic butter. Use a spoon or clean hands to thoroughly mix everything until evenly combined. The heat from the garlic butter will slightly melt the cream cheese, making the mixture smooth and creamy.
Step 3: Warm the Tortillas
Heat each tortilla for 10–15 seconds in a dry skillet or microwave. This makes them flexible and prevents cracking when you fold the wraps.
Step 4: Assemble the Wraps
Lay out each tortilla and add about 1/4 of the cheesy chicken filling in the center. If desired, layer on spinach, tomato slices, or your favorite sauce. Be careful not to overstuff—this will make wrapping difficult and can lead to tearing.
Step 5: Wrap It Up
Fold the sides of the tortilla inwards, then roll from the bottom up, tucking the filling in tightly as you go. Set the wrap seam-side down.
Step 6: Toast (Optional but Recommended)
Heat a skillet or griddle over medium heat. Place the wraps seam-side down and toast for 2–3 minutes per side, or until golden and crisp. This step adds texture, seals the wrap, and melts the cheese even more—creating a satisfying bite from the outside in.
Step 7: Serve and Enjoy
Slice in half, plate, and serve warm. They pair well with a crunchy side like chips, fries, or a crisp garden salad.
Notes
If you’re planning on making these ahead, you can prepare the chicken filling up to 3 days in advance. Store it in an airtight container in the fridge. Assemble the wraps when you’re ready to eat, or freeze pre-assembled wraps for up to 2 months. To reheat, place in a hot skillet from frozen and cook until heated through and crispy.
- Prep Time: 10 minutes
- Cook Time: 10 minutes
Nutrition
- Calories: 430
- Carbohydrates: 28g
- Protein: 28g
