
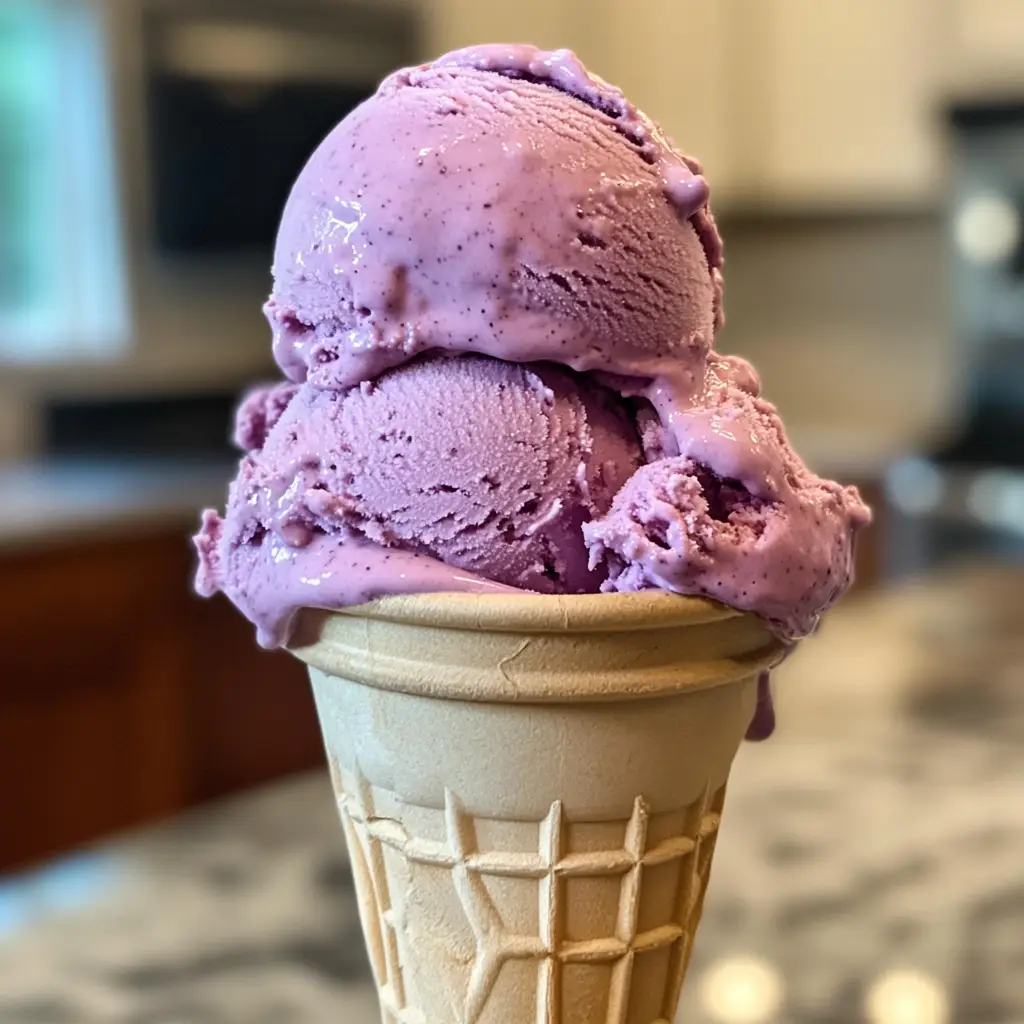
Introduction to Ube Ice Cream (No-Churn)
As a busy mom, I know how precious time can be, especially when it comes to whipping up something special for my family. That’s why I absolutely adore this Ube Ice Cream (No-Churn) recipe! It’s a delightful treat that requires minimal effort but delivers maximum flavor. Imagine creamy, dreamy ice cream that you can make without an ice cream maker. Perfect for those hot summer days or as a sweet surprise for your loved ones. Trust me, once you try this vibrant purple dessert, it will become a staple in your home!
Why You’ll Love This Ube Ice Cream (No-Churn)
This Ube Ice Cream (No-Churn) is a game-changer for busy days! It’s incredibly easy to make, requiring just a few simple ingredients and no fancy equipment. In just 15 minutes of prep, you can create a creamy, dreamy dessert that will impress everyone. Plus, the unique flavor of ube is a delightful twist that adds a pop of color and taste to your dessert table. You’ll be the star of any gathering!
Ingredients for Ube Ice Cream (No-Churn)
Gathering the right ingredients is the first step to creating your delicious Ube Ice Cream (No-Churn). Here’s what you’ll need:
- Heavy Cream: This is the star of the show! It gives the ice cream its rich and creamy texture. Make sure to use heavy cream for the best results.
- Sweetened Condensed Milk: This adds sweetness and creaminess. It’s a must-have for that luscious mouthfeel. You can also use low-fat versions if you prefer a lighter option.
- Ube Puree: The vibrant purple color and unique flavor come from this ingredient. You can find it in Asian grocery stores or online. If you can’t find it, you can substitute with purple sweet potato puree.
- Vanilla Extract: A splash of vanilla enhances the overall flavor. It’s like a warm hug for your taste buds!
- Salt: Just a pinch helps balance the sweetness and brings out the flavors. Don’t skip this step!
For exact measurements, check the bottom of the article where you can find everything listed for easy printing. Happy cooking!

How to Make Ube Ice Cream (No-Churn)
Now that you have your ingredients ready, let’s dive into the fun part: making your Ube Ice Cream (No-Churn)! Follow these simple steps, and you’ll be enjoying this creamy delight in no time.
Step 1: Whip the Heavy Cream
Start by pouring the heavy cream into a large mixing bowl. Using a hand mixer or a stand mixer, whip the cream on medium speed until stiff peaks form. This means the cream should hold its shape when you lift the beaters. This step is crucial for achieving that light and airy texture in your ice cream. Trust me, it makes all the difference!
Step 2: Mix the Ube Ingredients
In another bowl, combine the sweetened condensed milk, ube puree, vanilla extract, and salt. Stir everything together until it’s well blended. You want a smooth mixture that’s bursting with that beautiful ube flavor. The sweetened condensed milk adds a lovely creaminess that pairs perfectly with the ube.
Step 3: Fold the Mixtures Together
Now comes the fun part! Gently fold the ube mixture into the whipped cream. Use a spatula and make sure to scoop from the bottom of the bowl to keep the airiness intact. This folding technique is key to ensuring your ice cream stays light and fluffy. Be patient and take your time with this step!
Step 4: Transfer to Container
Once the mixtures are combined, it’s time to transfer everything into an airtight container. Smooth the top with your spatula to create an even surface. This helps with freezing and makes for a beautiful presentation later. Make sure the container is sealed tightly to prevent ice crystals from forming.
Step 5: Freeze the Mixture
Pop the container into the freezer and let it chill for at least 6 hours, or until it’s firm. To check for firmness, gently press the top with your finger. If it feels solid, you’re ready to scoop! If not, give it a little more time. Patience is key here!
Step 6: Serve and Enjoy
Once your Ube Ice Cream (No-Churn) is ready, scoop it into bowls or cones and enjoy! You can top it with some toasted coconut, sprinkles, or even a drizzle of chocolate sauce for an extra treat. This ice cream is not just a dessert; it’s a celebration of flavor!
Tips for Success
- Make sure your heavy cream is cold for better whipping results.
- Use a rubber spatula for folding; it helps maintain the airiness.
- For a creamier texture, let the ice cream sit at room temperature for a few minutes before scooping.
- Experiment with toppings like fresh fruit or nuts for added flavor.
- Don’t rush the freezing process; it’s essential for the perfect consistency.
Equipment Needed for Ube Ice Cream (No-Churn)
- Mixing Bowls: Use any large bowls you have on hand; glass or stainless steel works best.
- Hand Mixer or Stand Mixer: A whisk can work too, but it’ll take more elbow grease!
- Spatula: A rubber spatula is ideal for folding and scraping.
- Airtight Container: Any container with a tight seal will do for freezing.
Variations of Ube Ice Cream (No-Churn)
- Chocolate Ube Ice Cream: Add cocoa powder or melted dark chocolate to the ube mixture for a rich, chocolatey twist.
- Ube Coconut Ice Cream: Mix in coconut cream or shredded coconut for a tropical flavor that pairs beautifully with ube.
- Vegan Ube Ice Cream: Substitute heavy cream with full-fat coconut milk and use a plant-based sweetened condensed milk for a dairy-free version.
- Nutty Ube Ice Cream: Fold in crushed nuts like pistachios or almonds for added crunch and flavor.
- Fruit-Infused Ube Ice Cream: Blend in pureed fruits like mango or banana for a fruity twist that complements the ube.
Serving Suggestions for Ube Ice Cream (No-Churn)
- Serve with a sprinkle of toasted coconut for a delightful crunch.
- Pair with fresh fruit like mango or berries for a refreshing contrast.
- Drizzle with chocolate or caramel sauce for an indulgent touch.
- Top with crushed nuts for added texture and flavor.
- Present in colorful bowls or cones for a fun, festive look!
FAQs about Ube Ice Cream (No-Churn)
Can I use fresh ube instead of ube puree?
Absolutely! If you can find fresh ube, you can steam or boil it until tender, then mash it into a puree. Just make sure to let it cool before mixing it into your ice cream.
How long does Ube Ice Cream last in the freezer?
Your Ube Ice Cream (No-Churn) can last up to two weeks in the freezer. Just be sure to keep it in an airtight container to maintain its creamy texture.
Can I make this recipe dairy-free?
Yes! For a dairy-free version, substitute the heavy cream with full-fat coconut milk and use a plant-based sweetened condensed milk. It will still be delicious!
What can I do if my ice cream is too hard to scoop?
If your ice cream is too hard, let it sit at room temperature for about 5-10 minutes before scooping. This will soften it up just enough for easy serving.
Can I add mix-ins to my Ube Ice Cream?
Definitely! Feel free to fold in your favorite mix-ins like chocolate chips, nuts, or even fruit before freezing. It adds a fun twist to your No-Churn Ice Cream!
Final Thoughts on Ube Ice Cream (No-Churn)
Making Ube Ice Cream (No-Churn) is more than just a recipe; it’s a delightful experience that brings joy to your kitchen. The vibrant color and unique flavor of ube create a treat that’s not only delicious but also visually stunning. Whether you’re serving it at a family gathering or enjoying a quiet moment after a long day, this ice cream is sure to bring smiles. Plus, the simplicity of the no-churn method means you can whip it up anytime. So, grab your ingredients and let the magic of ube ice cream brighten your day!
Print
Ube Ice Cream (No-Churn) Recipe You’ll Love!
- Total Time: 6 hours 15 minutes
- Yield: 4 servings 1x
- Diet: Vegetarian
Description
A delicious and creamy no-churn ube ice cream that is easy to make and perfect for any occasion.
Ingredients
- 2 cups heavy cream
- 1 cup sweetened condensed milk
- 1 cup ube puree
- 1 teaspoon vanilla extract
- 1/4 teaspoon salt
Instructions
- In a large bowl, whip the heavy cream until stiff peaks form.
- In another bowl, mix together the sweetened condensed milk, ube puree, vanilla extract, and salt until well combined.
- Gently fold the ube mixture into the whipped cream until fully incorporated.
- Transfer the mixture to an airtight container and smooth the top.
- Freeze for at least 6 hours or until firm.
- Serve and enjoy your homemade ube ice cream!
Notes
- For a more intense ube flavor, use more ube puree.
- Make sure to use heavy cream for the best texture.
- Store any leftovers in the freezer for up to 2 weeks.
- Prep Time: 15 minutes
- Cook Time: 0 minutes
- Category: Dessert
- Method: No-Churn
- Cuisine: Filipino
Nutrition
- Serving Size: 1/2 cup
- Calories: 250
- Sugar: 20g
- Sodium: 50mg
- Fat: 15g
- Saturated Fat: 10g
- Unsaturated Fat: 3g
- Trans Fat: 0g
- Carbohydrates: 30g
- Fiber: 1g
- Protein: 3g
- Cholesterol: 60mg
Keywords: Ube Ice Cream, No-Churn Ice Cream, Filipino Dessert
