
Introduction to Almond Joy Magic Cookie Bars Recipe
As a passionate home cook, I find joy in creating desserts that not only taste amazing but also bring back fond memories. One of my all-time favorites is the Almond Joy Magic Cookie Bars. The moment I take a bite, I’m transported back to my childhood, where the sweet, nutty flavors of chocolate, coconut, and almonds danced on my taste buds. It’s like a little piece of heaven wrapped in a cookie bar!
These bars are a delightful twist on the classic Almond Joy candy bar. They’re easy to make and perfect for any occasion, whether it’s a family gathering, a potluck, or just a cozy night in. I remember the first time I made them; the aroma of melting chocolate and toasted coconut filled my kitchen, and my family couldn’t wait to dig in. Watching their faces light up with each bite was the best reward!
What I love most about this recipe is its versatility. You can customize it to suit your taste or dietary needs. Want to add a little more crunch? Toss in some chopped nuts! Prefer a richer chocolate flavor? Use dark chocolate chips instead. The possibilities are endless, and that’s what makes cooking so much fun!
So, grab your apron and let’s dive into this delicious adventure together. I promise you, once you try these Almond Joy Magic Cookie Bars, they’ll become a staple in your dessert repertoire. Let’s get started!
Ingredients for Almond Joy Magic Cookie Bars Recipe
Before we embark on our baking journey, let’s gather all the ingredients we need for these delightful Almond Joy Magic Cookie Bars. I always believe that the quality of ingredients can make a world of difference in the final product. So, let’s make sure we have the best of the best!
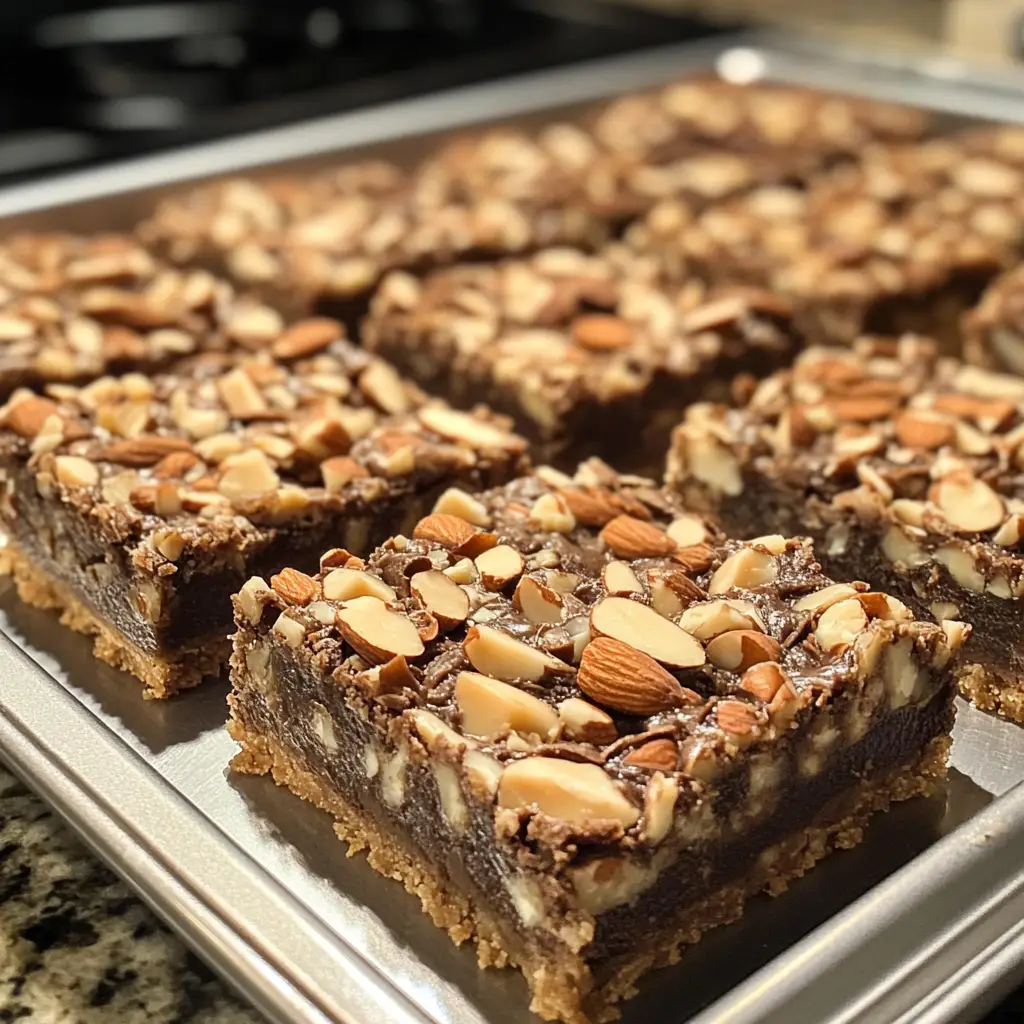
Main Ingredients
- 1 ½ cups graham cracker crumbs
- ½ cup unsalted butter, melted
- 1 cup sweetened shredded coconut
- 1 cup semi-sweet chocolate chips
- 1 cup chopped almonds
- 1 can (14 ounces) sweetened condensed milk
When I make these bars, I always opt for high-quality chocolate chips. The richer the chocolate, the more indulgent the bars will taste! I also prefer using fresh, unsweetened coconut for a more authentic flavor, but the sweetened version works just fine if that’s what you have on hand.
Optional Add-ons
- ½ cup dark chocolate chips for a richer flavor
- 1 teaspoon vanilla extract for added depth
- Chopped pecans or walnuts for extra crunch
- Sea salt for a touch of contrast
Feel free to get creative! I once added a sprinkle of sea salt on top before baking, and it took the flavor to a whole new level. It’s like a sweet and salty dance on your palate! You can also swap out the almonds for your favorite nuts or even add dried fruits for a chewy surprise. The beauty of this recipe is that it’s as flexible as your imagination allows!
How to Prepare Almond Joy Magic Cookie Bars Recipe
Now that we have all our ingredients ready, it’s time to roll up our sleeves and get baking! I love the process of creating these bars; it’s like a little culinary adventure in my kitchen. Follow these steps, and you’ll have a batch of Almond Joy Magic Cookie Bars that will make your taste buds sing!
Step 1: Preheat the Oven and Prepare the Baking Dish
First things first, let’s get that oven preheating to 350°F (175°C). This step is crucial because a hot oven ensures even baking. While the oven warms up, grab a 9×13-inch baking dish and line it with parchment paper. This will make it super easy to lift the bars out later.
Tips for Step 1
- Make sure to leave some parchment paper hanging over the edges. This will act as a handle when you want to remove the bars.
- If you don’t have parchment paper, you can grease the dish with a little butter or cooking spray.
Step 2: Create the Crust Layer
In a mixing bowl, combine the graham cracker crumbs and melted butter. Stir until the crumbs are well-coated and resemble wet sand. Then, press this mixture firmly into the bottom of your prepared baking dish. This crust is the foundation of our bars, so make sure it’s nice and compact!
Tips for Step 2
- Use the back of a measuring cup to press down the crust evenly. This will help it hold together better when baked.
- If you want a little extra flavor, consider adding a pinch of cinnamon to the graham cracker mixture.
Step 3: Add the Coconut Layer
Next, sprinkle the sweetened shredded coconut evenly over the crust. I love the way the coconut adds a tropical flair to these bars. It’s like a mini vacation in every bite! Make sure to spread it out so every piece gets that delicious coconut goodness.
Tips for Step 3
- For a toasted flavor, you can lightly toast the coconut in a dry skillet before adding it to the bars.
- Don’t be shy with the coconut! A generous layer makes for a more flavorful treat.
Step 4: Sprinkle Chocolate and Almonds
Now comes the fun part! Sprinkle the semi-sweet chocolate chips and chopped almonds over the coconut layer. The combination of chocolate and nuts is simply divine. I often find myself sneaking a few chocolate chips while I’m at it!
Tips for Step 4
- Feel free to mix in some dark chocolate chips for a richer taste. It’s like a little surprise in every bite!
- Chop the almonds roughly for a more rustic look and texture.
Step 5: Pour the Sweetened Condensed Milk
Grab that can of sweetened condensed milk and pour it evenly over the entire mixture. This magical ingredient binds everything together and adds a luscious sweetness. I love watching it drizzle down, covering all the layers like a warm hug!
Tips for Step 5
- To make pouring easier, you can warm the can slightly in hot water. This helps the milk flow out smoothly.
- Make sure to cover all the ingredients with the milk to ensure even baking.
Step 6: Bake the Bars
Finally, it’s time to bake! Place the baking dish in the preheated oven and let it bake for about 25-30 minutes. You’ll know they’re done when the edges are golden brown and the center is set. The aroma will fill your kitchen, and you might find it hard to resist peeking!
Tips for Step 6
- Keep an eye on the bars during the last few minutes of baking. Ovens can vary, and you don’t want them to overbake.
- Let the bars cool in the pan for at least 10 minutes before lifting them out. This helps them set up nicely.
And there you have it! Follow these steps, and you’ll create a batch of Almond Joy Magic Cookie Bars that are sure to impress. I can’t wait for you to taste them!
Equipment Needed for Almond Joy Magic Cookie Bars Recipe
Before we dive into the baking process, let’s make sure we have all the right tools at our fingertips. Having the right equipment can make your baking experience smoother and more enjoyable. Here’s what you’ll need to whip up these delightful Almond Joy Magic Cookie Bars:
- 9×13-inch baking dish: This is essential for holding all those delicious layers. If you don’t have one, a similar-sized dish will work, but keep an eye on the baking time.
- Parchment paper: Lining your baking dish with parchment paper makes it easy to lift the bars out later. If you’re out of parchment, greasing the dish with butter or cooking spray is a good alternative.
- Mixing bowls: You’ll need a couple of mixing bowls for combining the crust and layering the ingredients. I like to use one large bowl and one medium bowl for convenience.
- Measuring cups and spoons: Accurate measurements are key to baking success! Make sure you have these handy to measure out your ingredients.
- Rubber spatula or wooden spoon: These are perfect for mixing and spreading the ingredients evenly in the baking dish.
- Cooling rack: Once your bars are baked, transferring them to a cooling rack helps them cool evenly. If you don’t have one, just let them cool in the baking dish.
With these tools ready, you’re all set to create your Almond Joy Magic Cookie Bars! I always find that having everything organized makes the process more enjoyable. So, let’s get baking!
Variations of Almond Joy Magic Cookie Bars Recipe
As a home cook, I love experimenting with recipes to create new flavors and textures. The Almond Joy Magic Cookie Bars are no exception! Here are some fun variations that I’ve tried and absolutely adored:
- Peanut Butter Bliss: Swap out the almonds for crunchy peanut butter chips. The combination of chocolate and peanut butter is a classic that never disappoints!
- Minty Fresh: Add a teaspoon of peppermint extract to the sweetened condensed milk for a refreshing twist. It’s like a mint chocolate chip cookie bar!
- Fruit Fusion: Toss in some dried cranberries or chopped dried apricots along with the coconut. The fruity addition adds a delightful chewiness that complements the other flavors.
- Gluten-Free Delight: Use gluten-free graham crackers or almond flour for the crust. This way, everyone can enjoy these delicious bars without worry!
- Spiced Up: Add a pinch of nutmeg or ginger to the crust for a warm, spiced flavor. It’s a cozy twist that’s perfect for fall!
These variations not only keep things exciting but also allow you to tailor the bars to your taste preferences. I encourage you to get creative and make this recipe your own. Who knows? You might just stumble upon your new favorite version!
Cooking Notes for Almond Joy Magic Cookie Bars Recipe
As I’ve baked these Almond Joy Magic Cookie Bars time and time again, I’ve gathered a few cooking notes that can help you achieve the best results. These little tips can make a big difference in your baking journey!
- Cooling Time: After baking, it’s essential to let the bars cool completely in the pan. This helps them set properly and makes cutting them into neat squares much easier. I usually let them cool for at least an hour before slicing.
- Storage: If you have any leftovers (which is rare in my house!), store them in an airtight container at room temperature for up to a week. You can also refrigerate them for a longer shelf life, but I find they taste best at room temperature.
- Freezing: These bars freeze beautifully! Just wrap them tightly in plastic wrap and then in aluminum foil. They can last up to three months in the freezer. When you’re ready to enjoy, simply thaw them at room temperature.
- Layering: Make sure to layer the ingredients evenly. This ensures that every bite is packed with flavor. I like to take a moment to spread each layer out nicely before adding the next.
- Experiment with Toppings: Don’t hesitate to sprinkle some extra chocolate chips or nuts on top before baking. It adds a lovely finishing touch and makes the bars even more irresistible!
With these cooking notes in mind, you’ll be well on your way to creating the perfect Almond Joy Magic Cookie Bars. Happy baking!
Serving Suggestions for Almond Joy Magic Cookie Bars Recipe
Now that your Almond Joy Magic Cookie Bars are baked to perfection, it’s time to think about how to serve them! I always find that presentation can elevate a simple dessert into something truly special. Here are some of my favorite serving suggestions that will make your bars shine:
- Warm and Gooey: Serve the bars warm, straight from the oven. A scoop of vanilla ice cream on top creates a delightful contrast with the warm chocolate and coconut. It’s like a cozy hug on a plate!
- Drizzle of Chocolate: For an extra touch of indulgence, drizzle some melted chocolate over the top before serving. It adds a beautiful finish and makes each bite even more decadent.
- Garnish with Nuts: Sprinkle some extra chopped almonds or toasted coconut on top for a crunchy garnish. It not only looks appealing but also enhances the flavor.
- Pair with Coffee: These bars pair wonderfully with a cup of coffee or a glass of cold milk. The rich flavors complement each other perfectly, making for a delightful afternoon treat.
- Cut into Fun Shapes: Instead of traditional squares, use cookie cutters to cut the bars into fun shapes. This is especially great for parties or kids’ gatherings, adding a playful twist!
With these serving suggestions, you can turn your Almond Joy Magic Cookie Bars into a show-stopping dessert that everyone will love. I can’t wait for you to share these delicious treats with your family and friends. Enjoy every bite!
Tips for Making Almond Joy Magic Cookie Bars Recipe
As I’ve whipped up these Almond Joy Magic Cookie Bars countless times, I’ve gathered a treasure trove of tips that can help you achieve the best results. These little nuggets of wisdom can make your baking experience smoother and more enjoyable. Here are my top tips to keep in mind:
- Room Temperature Ingredients: Make sure your butter is melted but not too hot. If it’s too warm, it can affect the texture of the crust. Let it cool slightly before mixing!
- Don’t Rush the Layers: Take your time when layering the ingredients. A well-distributed layer of coconut, chocolate, and almonds ensures that every bite is packed with flavor. It’s worth the extra effort!
- Use Quality Ingredients: As I mentioned earlier, high-quality chocolate and fresh coconut can elevate the taste of your bars. It’s amazing how much of a difference it makes!
- Chill Before Cutting: If you can wait, let the bars chill in the fridge for a bit after they cool down. This makes cutting them into neat squares much easier and helps them hold their shape.
- Experiment with Flavors: Don’t hesitate to play around with different nuts, chocolates, or even spices. Each variation can bring a new twist to the classic recipe, making it uniquely yours!
With these tips in your back pocket, you’re all set to create Almond Joy Magic Cookie Bars that will impress everyone. Happy baking, and enjoy the delicious journey!
Breakdown of Time for Almond Joy Magic Cookie Bars Recipe
As a home cook, I know that time management is key when it comes to baking. Knowing how long each step takes can help you plan your baking adventure better. Here’s a quick breakdown of the time you’ll need for the Almond Joy Magic Cookie Bars:
- Prep Time: 15 minutes
- Cooking Time: 25-30 minutes
- Total Time: 40-45 minutes
In just under an hour, you can have these delicious bars ready to enjoy! I love how quick and easy they are to make, especially when I’m craving something sweet. Just imagine the delightful aroma wafting through your kitchen as they bake. It’s a treat that’s worth every minute spent!
Nutritional Information for Almond Joy Magic Cookie Bars Recipe
As a passionate home cook, I always find it helpful to know the nutritional information of the treats I bake. While these Almond Joy Magic Cookie Bars are undeniably indulgent, they also provide a delightful balance of flavors and textures. Here’s a general breakdown of the nutritional information per serving, assuming you cut the bars into 16 squares:
- Calories: Approximately 200 calories
- Fat: 10 grams (with about 5 grams of saturated fat)
- Carbohydrates: 27 grams
- Fiber: 1 gram
- Sugar: 15 grams
- Protein: 2 grams
Keep in mind that these values can vary based on the specific brands of ingredients you use and any optional add-ons you choose to include. For instance, using dark chocolate chips or adding nuts can slightly alter the nutritional profile. I always encourage balance, so enjoy these bars as a treat while savoring every delicious bite!
Whether you’re sharing them at a gathering or enjoying them as a sweet snack, knowing the nutritional information can help you appreciate the delightful flavors even more. Happy baking, and enjoy your Almond Joy Magic Cookie Bars!
Frequently Asked Questions about Almond Joy Magic Cookie Bars Recipe
As I’ve shared my love for Almond Joy Magic Cookie Bars, I often get questions from fellow home cooks eager to try this delightful recipe. I love connecting with others through cooking, and I’m here to help! Here are some of the most frequently asked questions I receive, along with my answers:
Can I make these bars ahead of time?
Absolutely! These bars are perfect for making ahead of time. You can bake them a day or two in advance and store them in an airtight container. Just remember to let them cool completely before cutting and storing. They taste just as delicious after a day or two!
Can I use different nuts?
Yes, you can! While almonds are a classic choice, feel free to swap them out for your favorite nuts. Pecans, walnuts, or even macadamia nuts can add a unique twist to the flavor. I once used hazelnuts, and it was a delightful surprise!
What if I don’t have graham crackers?
No worries! If you don’t have graham crackers, you can use crushed cookies like digestive biscuits or even vanilla wafers. Just make sure to adjust the amount of butter if the cookies are sweeter or richer. The crust will still be delicious!
How do I store leftovers?
To keep your Almond Joy Magic Cookie Bars fresh, store them in an airtight container at room temperature for up to a week. If you want to keep them longer, you can refrigerate them or even freeze them for up to three months. Just make sure to wrap them tightly!
Can I make these bars gluten-free?
Yes, you can! Simply use gluten-free graham crackers or almond flour for the crust. This way, everyone can enjoy these delicious bars without any worries. I’ve made them gluten-free for friends, and they loved them just as much!
What’s the best way to cut the bars?
To cut the bars neatly, I recommend letting them cool completely in the pan. Once cooled, use a sharp knife to slice them into squares. If you find them sticking, you can run the knife under hot water for a few seconds to help it glide through. A little patience goes a long way!
These questions reflect the curiosity and excitement that come with baking. I hope my answers help you feel more confident as you embark on your Almond Joy Magic Cookie Bars adventure. Happy baking, and enjoy every delicious moment!
Conclusion on Almond Joy Magic Cookie Bars Recipe
As I wrap up this delightful journey through the world of Almond Joy Magic Cookie Bars, I can’t help but feel a sense of excitement. These bars are not just a treat; they’re a celebration of flavors that come together in perfect harmony. The combination of chocolate, coconut, and almonds creates a symphony of taste that dances on your palate, making every bite a joyous experience.
What I love most about this recipe is its simplicity and versatility. Whether you’re baking for a special occasion or just indulging in a sweet craving, these bars are sure to impress. They’re easy to make, and the ingredients are often already in your pantry, making them a go-to dessert for any home cook.
Moreover, the ability to customize these bars means you can make them uniquely yours. From adding different nuts to experimenting with flavors, the possibilities are endless. I encourage you to embrace your creativity and make this recipe your own!
So, gather your ingredients, preheat that oven, and let the magic unfold. I can’t wait for you to experience the joy of baking and sharing these Almond Joy Magic Cookie Bars with your loved ones. Trust me, once you take that first bite, you’ll understand why they hold a special place in my heart. Happy baking!
