Introduction to Carmelita Cookies
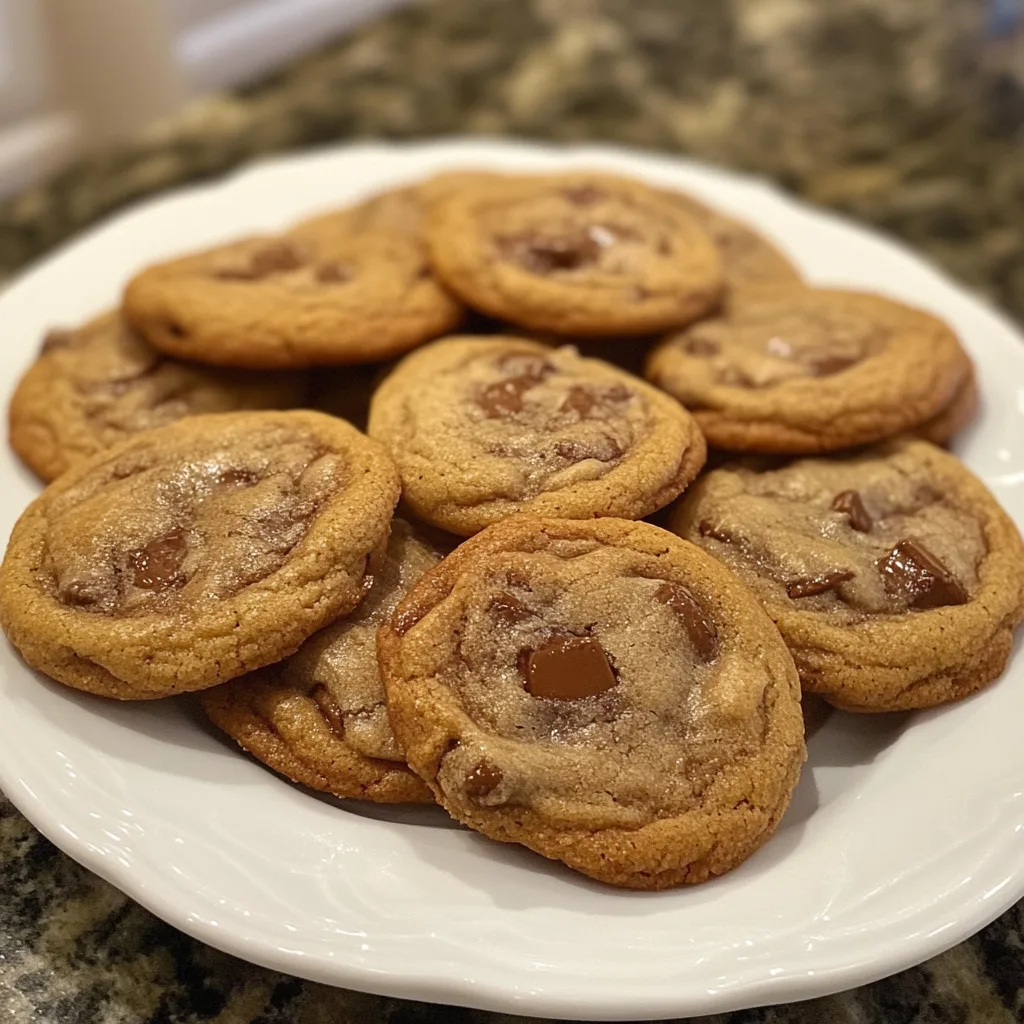
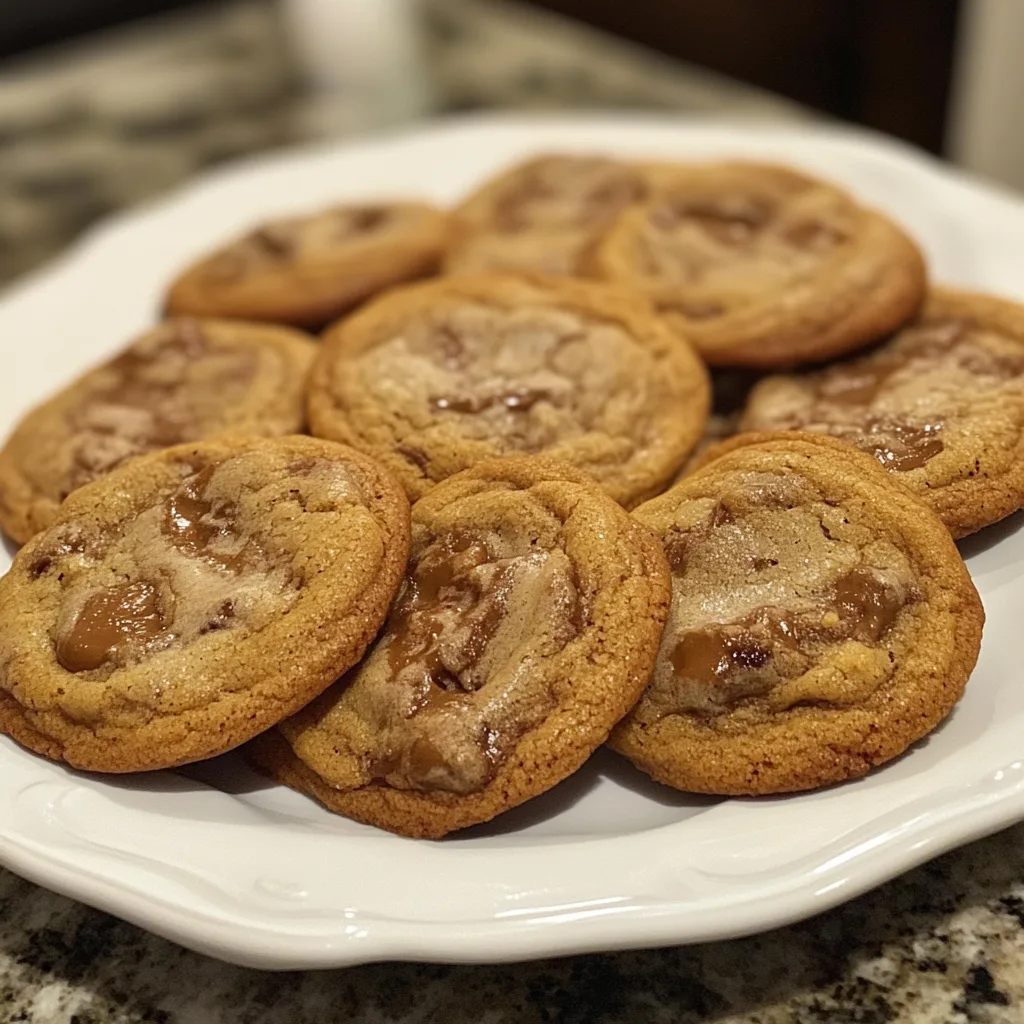
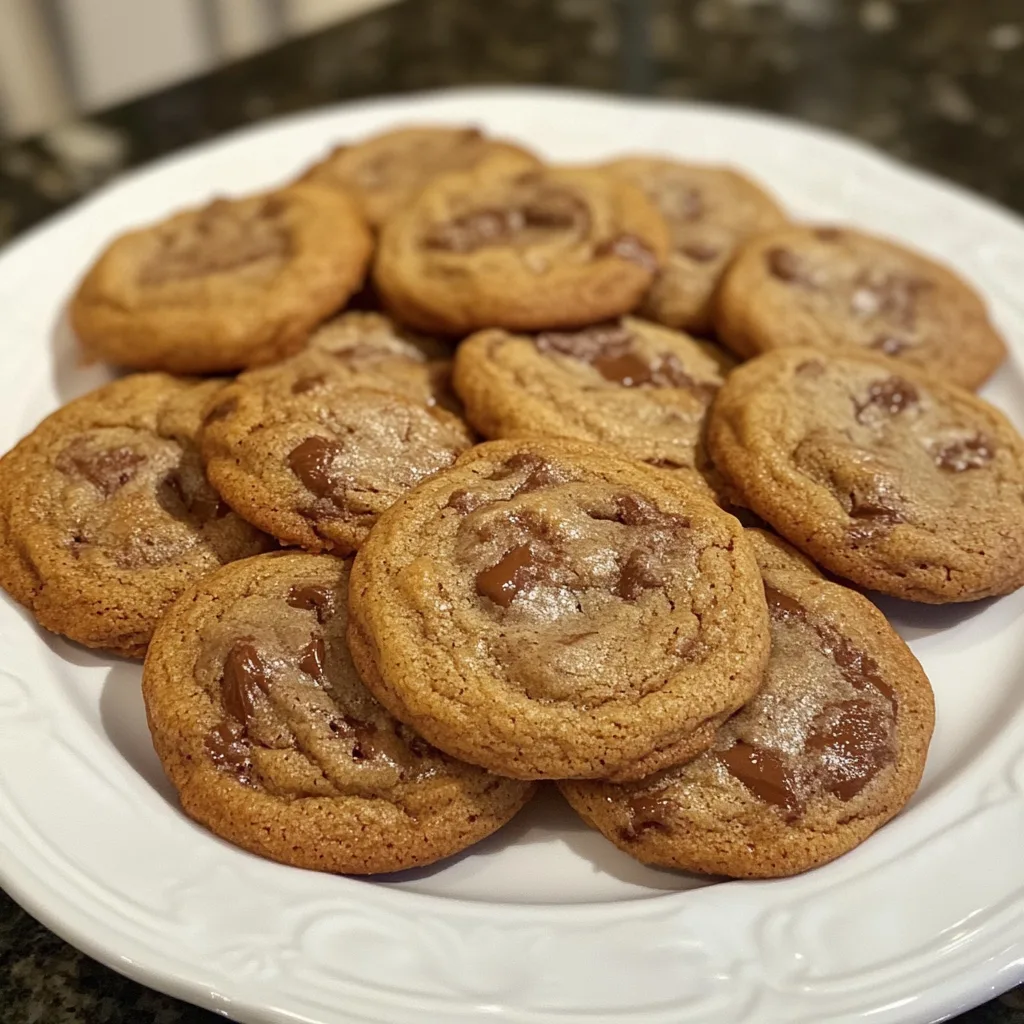
Welcome to the delightful world of Carmelita Cookies! If you’re like me, juggling a busy life while trying to whip up something special for your loved ones can feel overwhelming. These cookies are the perfect solution! They combine the rich flavors of caramel, chocolate, and oats into a chewy treat that’s sure to impress. Whether you need a quick dessert for a family gathering or a sweet pick-me-up after a long day, these cookies are here to save the day. Trust me, once you try them, you’ll be hooked!
Why You’ll Love This Carmelita Cookies
These Carmelita Cookies are a dream come true for busy moms and professionals alike. They come together in just 30 minutes, making them a quick and satisfying treat. The combination of chewy oats, rich caramel, and melty chocolate creates a flavor explosion that will have everyone asking for seconds. Plus, they’re perfect for sharing or enjoying all by yourself—no judgment here! You’ll love how easy they are to make and how delightful they taste!
Ingredients for Carmelita Cookies
Let’s gather our ingredients for these scrumptious Carmelita Cookies! Each component plays a vital role in creating that perfect blend of flavors and textures. Here’s what you’ll need:
- Unsalted Butter: This is the base of our cookies, providing richness and moisture. Softened butter helps achieve that perfect creamy texture.
- Brown Sugar: Packed brown sugar adds a deep, caramel-like flavor and contributes to the chewiness of the cookies.
- Granulated Sugar: This sugar balances the sweetness and helps the cookies spread nicely while baking.
- Vanilla Extract: A splash of vanilla enhances the overall flavor, making each bite more aromatic and delicious.
- All-Purpose Flour: The backbone of our cookie dough, flour gives structure and stability to the cookies.
- Rolled Oats: These add a delightful chewiness and a wholesome touch, making the cookies feel a bit heartier.
- Baking Soda: This leavening agent helps the cookies rise and become light and fluffy.
- Salt: Just a pinch enhances all the flavors, balancing the sweetness beautifully.
- Chocolate Chips: The star of the show! They melt into gooey pockets of chocolate goodness that everyone loves.
- Caramel Bits: These little gems bring that irresistible caramel flavor, making each bite a sweet surprise.
For those looking to switch things up, consider using dark chocolate chips for a richer taste or even adding nuts for a delightful crunch. You can find all the exact measurements at the bottom of the article, ready for printing!

How to Make Carmelita Cookies
Now that we have our ingredients ready, let’s dive into the fun part—making these delicious Carmelita Cookies! Follow these simple steps, and you’ll have a batch of cookies that will make your kitchen smell heavenly.
Step 1: Preheat the Oven
First things first, preheat your oven to 350°F (175°C). Preheating is crucial because it ensures that your cookies bake evenly. If you skip this step, your cookies might spread too much or not rise properly. Trust me, a well-preheated oven is the secret to cookie perfection!
Step 2: Cream the Butter and Sugars
In a large bowl, cream together the softened unsalted butter, brown sugar, and granulated sugar until smooth. This process is essential for creating a light and fluffy texture. The air you incorporate while creaming helps the cookies rise beautifully. Aim for a pale, creamy mixture that looks inviting!
Step 3: Add Vanilla Extract
Next, add in the vanilla extract and mix well. Vanilla is like the fairy dust of baking—it enhances the flavors and makes everything taste better. Just a teaspoon can transform your cookies from good to absolutely delightful!
Step 4: Combine Dry Ingredients
In another bowl, combine the all-purpose flour, rolled oats, baking soda, and salt. Mixing these dry ingredients separately helps ensure that the baking soda is evenly distributed. This step is key to achieving that perfect rise and texture in your Carmelita Cookies.
Step 5: Mix Wet and Dry Ingredients
Now, gradually add the dry mixture to the wet ingredients. Mix until just combined. Be careful not to overmix! Overmixing can lead to tough cookies, and we want them to be chewy and soft. A few flour streaks are perfectly fine!
Step 6: Fold in Chocolate Chips and Caramel Bits
Here comes the fun part! Gently fold in the chocolate chips and caramel bits. This is where the magic happens. The gooey chocolate and sweet caramel will create pockets of joy in every bite. I always get excited at this stage—who doesn’t love a good chocolate chip cookie?
Step 7: Scoop and Bake
Using a spoon or cookie scoop, drop spoonfuls of dough onto a baking sheet lined with parchment paper. Make sure to space them about two inches apart. This allows room for spreading. Bake for 12-15 minutes or until the edges are golden brown. Keep an eye on them; you want that perfect balance of chewy and crispy!
Step 8: Cool and Enjoy
Once baked, allow the cookies to cool on the baking sheet for a few minutes. This helps them set up nicely. Then, transfer them to a wire rack to cool completely. The cooling process is essential for achieving that perfect texture. Warm cookies are delightful, but cooled cookies are a treat!
Tips for Success
- Always use softened butter for easy creaming and a better texture.
- Measure your flour correctly—spoon it into the measuring cup and level it off.
- Don’t skip the cooling time; it helps the cookies firm up and enhances the flavor.
- Experiment with mix-ins like nuts or dried fruit for a unique twist.
- Store cookies in an airtight container to keep them fresh and chewy.

Equipment Needed
- Mixing Bowls: A large bowl for mixing and a smaller one for dry ingredients. Any size works!
- Electric Mixer: A hand mixer or stand mixer makes creaming easier, but a whisk works too.
- Baking Sheet: Use a standard baking sheet lined with parchment paper for easy cleanup.
- Cookie Scoop: A cookie scoop helps with even portions, but a spoon will do just fine!
- Wire Rack: For cooling cookies, but a plate works in a pinch.
Variations
- Nutty Delight: Add chopped walnuts or pecans for a crunchy texture that complements the chewy cookies.
- Gluten-Free Option: Substitute all-purpose flour with a gluten-free flour blend for a delicious gluten-free treat.
- Oatmeal Raisin Twist: Replace some chocolate chips with raisins for a classic oatmeal cookie flavor.
- Spiced Up: Add a teaspoon of cinnamon or nutmeg to the dry ingredients for a warm, spiced flavor.
- Vegan Version: Use coconut oil instead of butter and flax eggs as a substitute for eggs to make these cookies vegan-friendly.
Serving Suggestions
- Pair your Carmelita Cookies with a tall glass of cold milk for a classic treat.
- Serve them warm with a scoop of vanilla ice cream on top for an indulgent dessert.
- For a festive touch, arrange cookies on a decorative platter with fresh fruit.
- Enjoy with a cup of coffee or tea for a cozy afternoon snack.
- Wrap them in cellophane and tie with a ribbon for a delightful homemade gift.
FAQs about Carmelita Cookies
As you embark on your baking adventure with Carmelita Cookies, you might have a few questions. Here are some common queries that I often hear, along with helpful answers to guide you along the way!
Can I use different types of chocolate chips?
Absolutely! While I love the classic semi-sweet chocolate chips, you can experiment with dark chocolate or even white chocolate chips. Each type brings its own unique flavor to the cookies, making them even more delightful!
How should I store my Carmelita Cookies?
To keep your cookies fresh and chewy, store them in an airtight container at room temperature. They can last up to a week, but I doubt they’ll last that long once your family gets a taste!
Can I freeze Carmelita Cookies?
Yes, you can! These cookies freeze beautifully. Just place them in a freezer-safe container or bag, and they’ll stay fresh for up to three months. When you’re ready to enjoy, simply thaw them at room temperature or pop them in the microwave for a few seconds.
What can I substitute for caramel bits?
If you can’t find caramel bits, you can chop up soft caramel candies instead. Just make sure to cut them into small pieces so they melt nicely in the cookies. You could also try using toffee bits for a different flavor twist!
Are Carmelita Cookies suitable for special diets?
Yes! You can easily adapt this recipe for various dietary needs. For a gluten-free version, use a gluten-free flour blend. If you’re looking for a vegan option, substitute the butter with coconut oil and use flax eggs. Everyone deserves a taste of these delicious cookies!
Final Thoughts
Making Carmelita Cookies is more than just baking; it’s about creating sweet memories in your kitchen. The aroma of caramel and chocolate wafting through the air can brighten even the busiest of days. These cookies are perfect for sharing with family or enjoying during a quiet moment with a cup of tea. Each bite is a delightful reminder of the joy that simple ingredients can bring. So, roll up your sleeves, gather your loved ones, and dive into this delicious adventure. Trust me, once you taste these cookies, you’ll want to make them again and again!
Print
Carmelita Cookies: Indulge in Irresistible Flavor Today!
- Total Time: 30 minutes
- Yield: 24 cookies 1x
- Diet: Vegetarian
Description
Carmelita Cookies are a delicious treat that combines the rich flavors of caramel, chocolate, and oats, creating a chewy and indulgent dessert.
Ingredients
- 1 cup unsalted butter, softened
- 1 cup brown sugar, packed
- 1/2 cup granulated sugar
- 1 teaspoon vanilla extract
- 2 cups all-purpose flour
- 1 cup rolled oats
- 1 teaspoon baking soda
- 1/2 teaspoon salt
- 1 cup chocolate chips
- 1 cup caramel bits
Instructions
- Preheat the oven to 350°F (175°C).
- In a large bowl, cream together the butter, brown sugar, and granulated sugar until smooth.
- Add the vanilla extract and mix well.
- In another bowl, combine the flour, oats, baking soda, and salt.
- Gradually add the dry ingredients to the wet ingredients, mixing until just combined.
- Fold in the chocolate chips and caramel bits.
- Drop spoonfuls of dough onto a baking sheet lined with parchment paper.
- Bake for 12-15 minutes or until the edges are golden brown.
- Allow to cool on the baking sheet for a few minutes before transferring to a wire rack to cool completely.
Notes
- For a richer flavor, use dark chocolate chips.
- Store cookies in an airtight container to maintain freshness.
- These cookies can be frozen for up to 3 months.
- Prep Time: 15 minutes
- Cook Time: 15 minutes
- Category: Dessert
- Method: Baking
- Cuisine: American
Nutrition
- Serving Size: 1 cookie
- Calories: 180
- Sugar: 12g
- Sodium: 100mg
- Fat: 8g
- Saturated Fat: 5g
- Unsaturated Fat: 3g
- Trans Fat: 0g
- Carbohydrates: 24g
- Fiber: 1g
- Protein: 2g
- Cholesterol: 20mg
Keywords: Carmelita Cookies, dessert, cookies, caramel, chocolate, oats


