
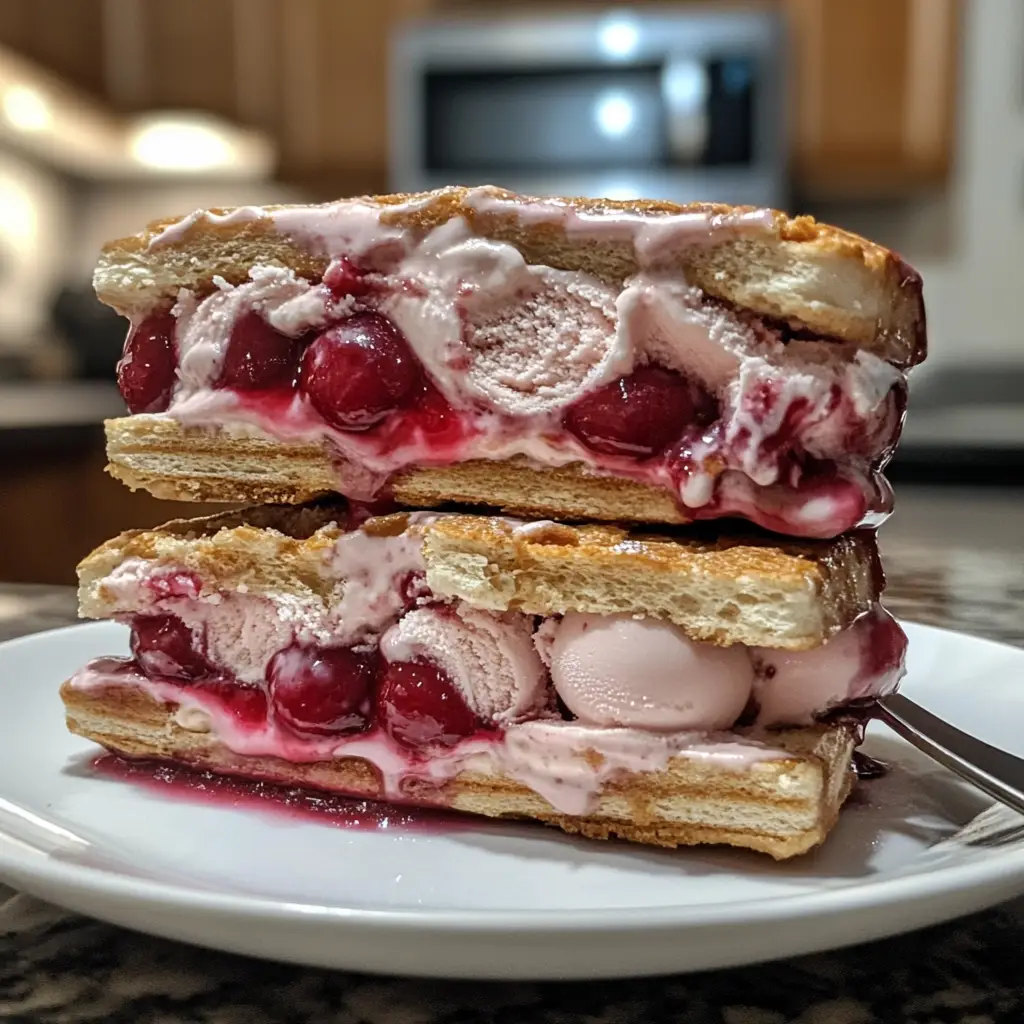
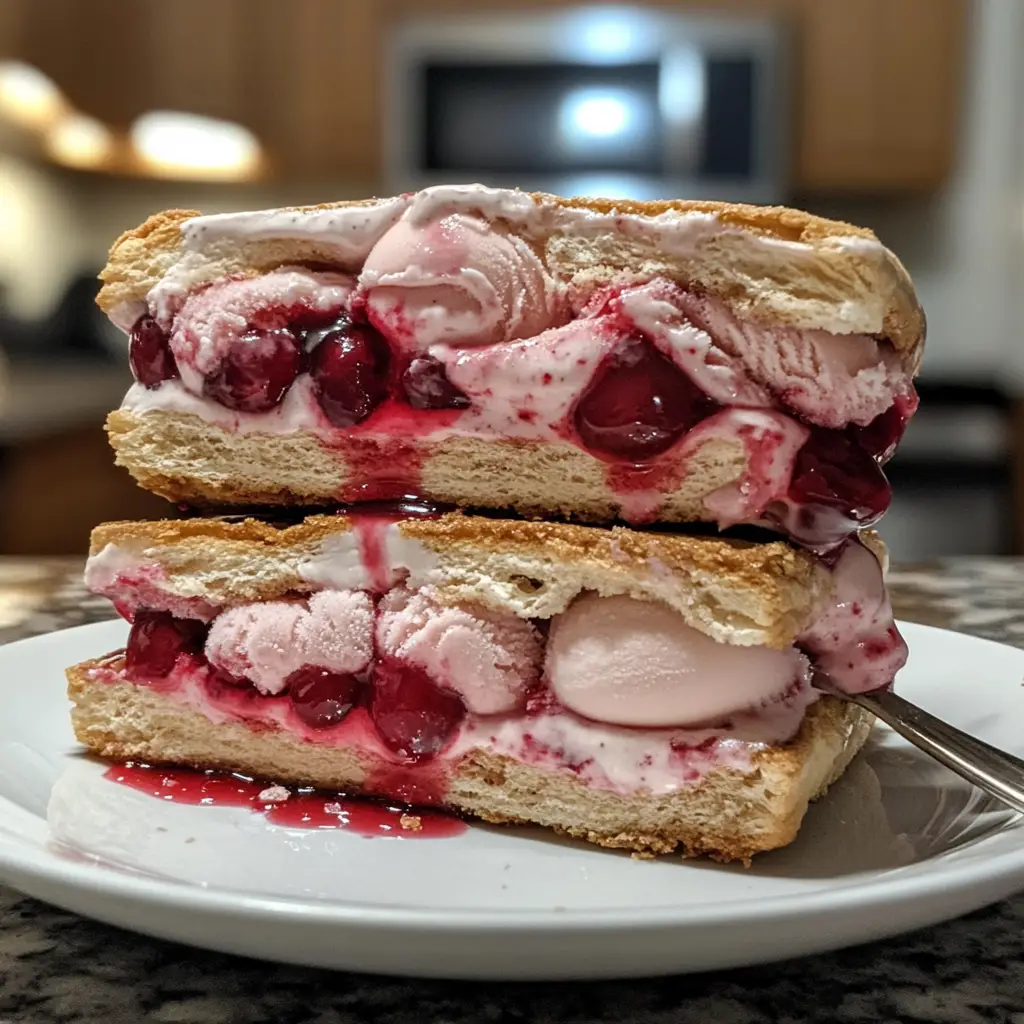
Introduction to Cherry Pie Ice Cream Sandwiches
Summer is the perfect time for indulgent treats, and what could be better than Cherry Pie Ice Cream Sandwiches? These delightful creations combine the sweet, tart flavor of cherry pie with creamy ice cream, all nestled between two soft cookies. As a busy mom, I know how precious those moments are when you can whip up something special without spending hours in the kitchen. This recipe is not just a quick solution for a hot day; it’s a way to impress your loved ones and create lasting memories. Let’s dive into this delicious adventure!
Why You’ll Love This Cherry Pie Ice Cream Sandwiches
These Cherry Pie Ice Cream Sandwiches are a dream come true for busy families. They’re quick to make, taking just over an hour from start to finish. The combination of flavors is simply irresistible, with the tart cherries and creamy ice cream dancing together in perfect harmony. Plus, they’re a fun way to get the kids involved in the kitchen, making memories while creating a delightful summer treat!
Ingredients for Cherry Pie Ice Cream Sandwiches
Gathering the right ingredients is the first step to creating these delightful Cherry Pie Ice Cream Sandwiches. Here’s what you’ll need:
- Fresh cherries: Sweet and juicy, they add a burst of flavor. Pitting and halving them makes for easy layering.
- Cherry pie filling: This is the shortcut to that classic cherry pie taste. You can use store-bought or homemade for a personal touch.
- Vanilla ice cream: Creamy and rich, it complements the tartness of the cherries beautifully. Feel free to experiment with other flavors!
- All-purpose flour: The base for your cookies, it provides structure and a soft texture.
- Unsalted butter: Softened butter creates a rich, tender cookie. Make sure it’s at room temperature for easy mixing.
- Granulated sugar: This sweetens the cookies and helps them spread while baking.
- Brown sugar: Adds moisture and a hint of caramel flavor, making your cookies extra delicious.
- Large egg: It binds the ingredients together and contributes to the cookie’s texture.
- Vanilla extract: A splash of this enhances the overall flavor, making your cookies taste homemade.
- Baking soda: This leavening agent helps the cookies rise and become fluffy.
- Salt: Just a pinch balances the sweetness and enhances the flavors.
For those looking to switch things up, consider using almond extract for a nutty twist or substituting other fruits like blueberries or peaches for a different flavor profile. You can find the exact quantities for each ingredient at the bottom of the article, ready for printing!
How to Make Cherry Pie Ice Cream Sandwiches
Now that we have our ingredients ready, let’s dive into the fun part: making these Cherry Pie Ice Cream Sandwiches! Follow these simple steps, and you’ll have a delightful treat that’s sure to impress.
Step 1: Preheat the Oven
First things first, preheat your oven to 350°F (175°C). This step is crucial because it ensures that your cookies bake evenly. If you skip this, your cookies might spread too much or not rise properly. Trust me, a well-preheated oven is the secret to cookie perfection!
Step 2: Cream the Butter and Sugars
In a mixing bowl, cream together the softened butter, granulated sugar, and brown sugar until smooth. This process is essential for creating a light and fluffy texture in your cookies. The sugar crystals help to aerate the butter, giving your cookies that perfect bite. It’s like giving your cookies a little spa treatment!
Step 3: Add Egg and Vanilla
Next, add in the egg and vanilla extract. These ingredients are the flavor powerhouses of your cookies. The egg binds everything together, while the vanilla adds a warm, inviting aroma. It’s like a hug for your taste buds!
Step 4: Combine Dry Ingredients
In another bowl, whisk together the flour, baking soda, and salt. Mixing dry ingredients separately is important because it ensures that the baking soda and salt are evenly distributed. This way, every bite of your cookie will have that perfect balance of flavors!
Step 5: Mix Wet and Dry Ingredients
Now, gradually add the dry ingredients to the wet mixture. Stir gently until just combined. Be careful not to overmix! Overmixing can lead to tough cookies, and we want them to be soft and chewy. Think of it as a gentle dance between the ingredients!
Step 6: Shape the Cookies
Using a spoon or cookie scoop, drop spoonfuls of dough onto a baking sheet lined with parchment paper. Make sure to leave some space between each cookie, as they will spread while baking. Think of them as little cookie friends that need their personal space!
Step 7: Bake the Cookies
Pop the baking sheet into the oven and bake for 10-12 minutes. Keep an eye on them! You want the edges to be golden brown while the centers remain soft. A good trick is to take them out when they look slightly underbaked; they’ll continue to cook on the baking sheet.
Step 8: Cool the Cookies
Once baked, let the cookies cool completely on a wire rack. This step is crucial because warm cookies can melt your ice cream, turning your sandwiches into a gooey mess. Patience is key here, my friend!
Step 9: Assemble the Sandwiches
Now comes the fun part! Take one cookie, spread a generous layer of vanilla ice cream on the bottom, and top it with cherry pie filling. Then, place another cookie on top to create your sandwich. It’s like building a delicious tower of joy!
Step 10: Freeze the Sandwiches
Finally, freeze the sandwiches for at least 1 hour before serving. This step is essential for achieving that perfect texture. The ice cream will firm up, making it easier to bite into your Cherry Pie Ice Cream Sandwiches without everything falling apart. Trust me, the wait will be worth it!
Tips for Success
- Use room temperature butter for easier creaming and a better cookie texture.
- Don’t skip the cooling step; it prevents melty ice cream disasters.
- Experiment with different ice cream flavors for a fun twist.
- For a crunchier cookie, bake a minute longer, but watch closely!
- Make extra cookies to enjoy on their own or freeze for later.
Equipment Needed
- Mixing bowls: A set of various sizes is handy; you can also use any large bowl you have.
- Electric mixer: This makes creaming easier, but a whisk works too if you’re feeling strong!
- Baking sheet: A standard one will do; line it with parchment paper for easy cleanup.
- Cookie scoop: This helps with portioning; a tablespoon works just as well.
- Wire rack: Essential for cooling; a plate can work in a pinch.
Variations
- Berry Medley: Swap out cherries for a mix of strawberries, blueberries, and raspberries for a colorful twist.
- Chocolate Chip Cookies: Use chocolate chip cookies instead of the basic cookie recipe for a decadent treat.
- Gluten-Free Option: Substitute all-purpose flour with a gluten-free blend to accommodate dietary needs.
- Vegan Version: Use plant-based butter and a flax egg to create a vegan-friendly cookie.
- Nutty Delight: Add chopped nuts like almonds or pecans to the cookie dough for extra crunch and flavor.
Serving Suggestions
- Pair your Cherry Pie Ice Cream Sandwiches with a refreshing glass of lemonade or iced tea for a perfect summer combo.
- Serve with a scoop of extra vanilla ice cream on the side for those who can’t get enough!
- Garnish with fresh mint leaves for a pop of color and flavor.
FAQs about Cherry Pie Ice Cream Sandwiches
Can I use frozen cherries instead of fresh?
Absolutely! Frozen cherries work just as well. Just make sure to thaw and drain them before using to avoid excess moisture in your sandwiches.
How do I store leftover Cherry Pie Ice Cream Sandwiches?
Store any leftovers in an airtight container in the freezer. They’ll keep well for up to a week, but I doubt they’ll last that long!
Can I make these sandwiches ahead of time?
Yes! You can prepare the cookies and assemble the sandwiches a day in advance. Just freeze them until you’re ready to serve. It’s a great way to save time on busy days!
What other flavors can I use for the ice cream?
The sky’s the limit! Try chocolate, strawberry, or even a swirl of caramel for a unique twist. Each flavor will bring its own delightful touch to your Cherry Pie Ice Cream Sandwiches.
Are these sandwiches suitable for a gluten-free diet?
Yes! Simply substitute the all-purpose flour with a gluten-free flour blend. Your friends with gluten sensitivities will thank you for this delicious treat!
Final Thoughts
Creating Cherry Pie Ice Cream Sandwiches is more than just a recipe; it’s an experience filled with joy and laughter. As you gather your loved ones in the kitchen, the delightful aroma of baking cookies fills the air, setting the stage for sweet memories. Each bite of these sandwiches brings together the nostalgic flavors of cherry pie and creamy ice cream, making them a perfect summer treat. Whether you’re enjoying them on a sunny afternoon or sharing them at a family gathering, these sandwiches are sure to bring smiles and satisfaction. So, roll up your sleeves and dive into this delicious adventure!
Print
Cherry Pie Ice Cream Sandwiches: A Delectable Summer Treat!
- Total Time: 1 hour 32 minutes
- Yield: 12 sandwiches 1x
- Diet: Vegetarian
Description
Cherry Pie Ice Cream Sandwiches are a delightful summer treat that combines the flavors of cherry pie with creamy ice cream, all sandwiched between two delicious cookies.
Ingredients
- 1 cup fresh cherries, pitted and halved
- 1 cup cherry pie filling
- 2 cups vanilla ice cream
- 1 cup all-purpose flour
- 1/2 cup unsalted butter, softened
- 1/2 cup granulated sugar
- 1/4 cup brown sugar
- 1 large egg
- 1 teaspoon vanilla extract
- 1/2 teaspoon baking soda
- 1/4 teaspoon salt
Instructions
- Preheat the oven to 350°F (175°C).
- In a bowl, cream together the softened butter, granulated sugar, and brown sugar until smooth.
- Add the egg and vanilla extract, mixing until well combined.
- In another bowl, whisk together the flour, baking soda, and salt.
- Gradually add the dry ingredients to the wet mixture, stirring until just combined.
- Drop spoonfuls of dough onto a baking sheet lined with parchment paper.
- Bake for 10-12 minutes or until the edges are golden brown.
- Let the cookies cool completely on a wire rack.
- Once cooled, spread a layer of vanilla ice cream on the bottom of one cookie, top with cherry pie filling, and then place another cookie on top to form a sandwich.
- Repeat with remaining cookies and filling.
- Freeze the sandwiches for at least 1 hour before serving.
Notes
- For a richer flavor, consider using almond extract in the cookie dough.
- These sandwiches can be made ahead of time and stored in the freezer.
- Feel free to substitute with other fruits or pie fillings as desired.
- Prep Time: 20 minutes
- Cook Time: 12 minutes
- Category: Dessert
- Method: Baking
- Cuisine: American
Nutrition
- Serving Size: 1 sandwich
- Calories: 250
- Sugar: 18g
- Sodium: 150mg
- Fat: 10g
- Saturated Fat: 5g
- Unsaturated Fat: 3g
- Trans Fat: 0g
- Carbohydrates: 35g
- Fiber: 1g
- Protein: 3g
- Cholesterol: 30mg
Keywords: Cherry Pie, Ice Cream, Sandwiches, Summer Treat, Dessert
