
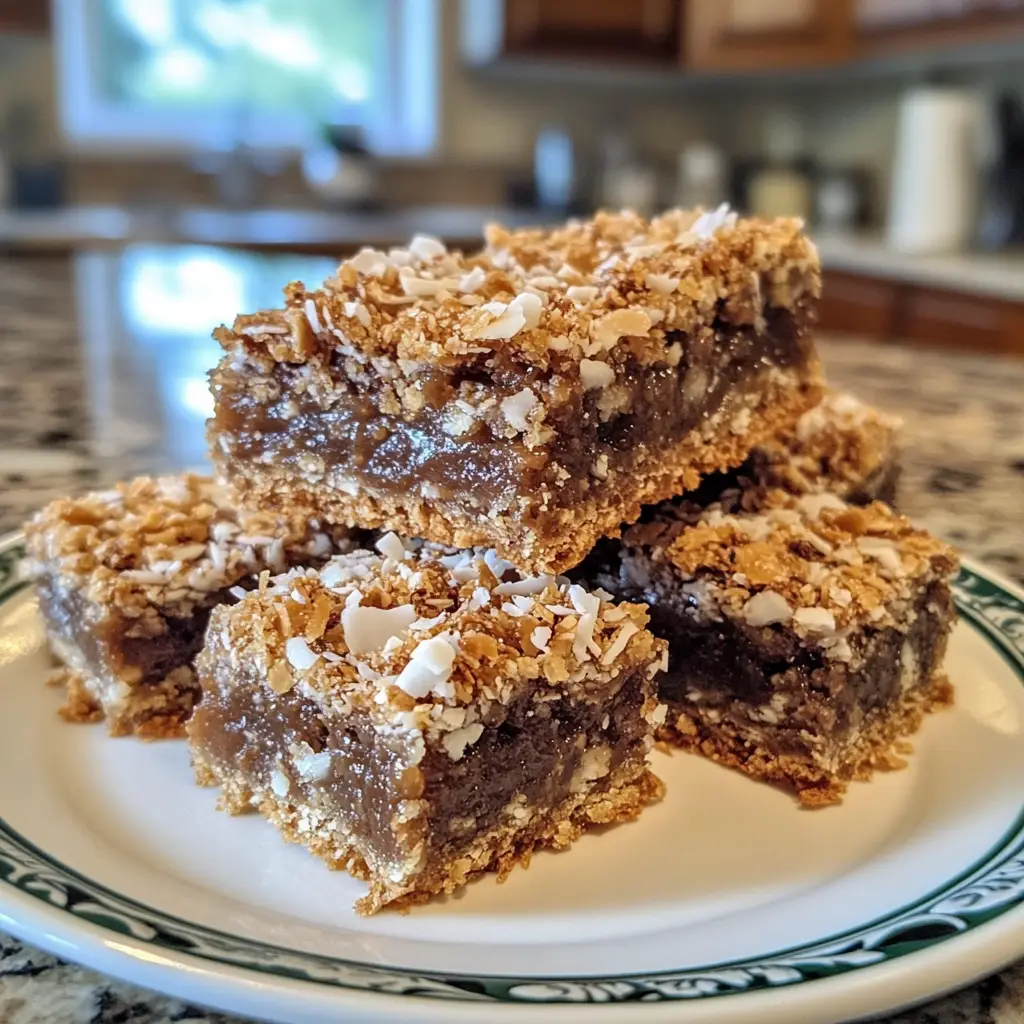
Introduction to Chewy Coconut Bars Recipe
As a passionate home cook, I often find myself reminiscing about the sweet treats that filled my childhood. One of my all-time favorites is the chewy coconut bar. The moment I take a bite, I’m transported back to sunny afternoons spent in my grandmother’s kitchen, where the air was thick with the scent of toasted coconut and warm vanilla. Those memories inspire me to recreate this delightful dessert, and I can’t wait to share my Chewy Coconut Bars Recipe with you!
These bars are not just a treat; they are a celebration of flavors and textures. The chewy coconut mingles beautifully with a hint of sweetness, creating a perfect balance that dances on your taste buds. I love how simple ingredients can come together to create something so delicious. Plus, they are incredibly easy to make, which means you can whip them up for any occasion—be it a family gathering, a cozy night in, or just because you deserve a little indulgence.
In this recipe, I’ll guide you through each step, sharing tips and tricks that I’ve learned along the way. Whether you’re a seasoned baker or a novice in the kitchen, I promise you’ll find joy in making these bars. So, grab your apron, and let’s embark on this sweet culinary adventure together!
Ingredients for Chewy Coconut Bars Recipe
Before we dive into the delightful process of making these chewy coconut bars, let’s gather our ingredients. I always believe that the quality of ingredients can make a world of difference in the final product. So, let’s make sure we have everything we need to create these scrumptious treats!
Main Ingredients
- 2 cups of shredded coconut (unsweetened for a more natural flavor)
- 1 cup of sweetened condensed milk
- 1/2 cup of all-purpose flour
- 1/4 cup of unsalted butter, melted
- 1 teaspoon of vanilla extract
- 1/4 teaspoon of salt
When choosing shredded coconut, I recommend looking for organic options if possible. The unsweetened variety allows you to control the sweetness of the bars, while the sweetened condensed milk adds that rich, creamy texture that makes these bars so irresistible. Trust me, the combination of these ingredients creates a symphony of flavors!
Optional Add-ons
- 1/2 cup of chocolate chips (for a chocolatey twist)
- 1/4 cup of chopped nuts (like almonds or walnuts for added crunch)
- 1/2 teaspoon of almond extract (for a nutty flavor)
- 1/4 cup of dried fruit (like cranberries or apricots for a fruity touch)
Feel free to get creative with these optional add-ons! I often toss in some chocolate chips because, let’s be honest, chocolate makes everything better. If you’re feeling adventurous, try adding a handful of dried fruit for a burst of flavor. The beauty of this recipe is that it’s versatile, allowing you to customize it to your liking.
Now that we have our ingredients ready, let’s move on to the next exciting step—preparing our chewy coconut bars!
How to Prepare Chewy Coconut Bars Recipe
Now that we have our ingredients all lined up, it’s time to roll up our sleeves and get cooking! Making these chewy coconut bars is a delightful process that fills your kitchen with warmth and sweetness. Let’s dive into the steps together!
Step 1: Preheat the Oven
The first step is to preheat your oven to 350°F (175°C). This ensures that your bars bake evenly and come out perfectly chewy.
Tips for Preheating
- Always preheat your oven before mixing your ingredients. This way, the oven is ready when you are!
- Use an oven thermometer to check the temperature. Sometimes, ovens can be a bit off, and you want to make sure you’re baking at the right heat.
Step 2: Prepare the Baking Dish
Next, grab an 8×8-inch baking dish. We need to prepare it so our bars don’t stick. Trust me, you want to avoid that sticky situation!
Tips for Lining the Dish
- Line the baking dish with parchment paper, leaving some overhang on the sides. This makes it super easy to lift the bars out later.
- For extra insurance against sticking, lightly grease the parchment paper with a bit of butter or cooking spray.
Step 3: Mix the Ingredients
Now comes the fun part—mixing everything together! In a large bowl, combine all your main ingredients: shredded coconut, sweetened condensed milk, flour, melted butter, vanilla extract, and salt.
Tips for Mixing
- Use a spatula or wooden spoon to mix. This helps combine the ingredients without overmixing, which can make the bars tough.
- Don’t be afraid to get your hands in there! Sometimes, using your hands is the best way to ensure everything is well combined.
Step 4: Bake the Bars
Once your mixture is ready, pour it into the prepared baking dish and spread it out evenly. Now, it’s time to bake!
Tips for Baking Time
- Bake for about 25-30 minutes, or until the edges are golden brown. Keep an eye on them, as ovens can vary.
- For a chewier texture, you can take them out a minute or two earlier. Just make sure they’re set in the middle!
Step 5: Cool and Cut
After baking, let the bars cool in the pan for about 10 minutes. Then, lift them out using the parchment paper and let them cool completely on a wire rack.
Tips for Cutting Bars
- Use a sharp knife to cut the bars into squares. Wipe the knife with a damp cloth between cuts for cleaner edges.
- For a fun presentation, dust the tops with a little powdered sugar or drizzle with melted chocolate!
And there you have it! Your chewy coconut bars are ready to be enjoyed. The aroma wafting through your kitchen will have everyone asking for a taste. Let’s move on to the next section, where I’ll share the equipment you’ll need for this delightful recipe!
Equipment Needed for Chewy Coconut Bars Recipe
Before we dive into the delicious world of chewy coconut bars, let’s make sure we have the right tools at our disposal. Having the right equipment can make the cooking process smoother and more enjoyable. Here’s what you’ll need:
- 8×8-inch Baking Dish: This is the perfect size for our bars. If you don’t have one, a 9×9-inch dish will work too; just keep an eye on the baking time.
- Parchment Paper: This is essential for lining the baking dish. If you’re out of parchment paper, you can use aluminum foil, but be sure to grease it well to prevent sticking.
- Mixing Bowl: A large bowl is needed to combine all the ingredients. If you have a stand mixer, feel free to use it, but a good old mixing bowl and spoon work just fine!
- Spatula or Wooden Spoon: These are great for mixing the ingredients together. A spatula is also handy for spreading the mixture evenly in the baking dish.
- Wire Rack: This is useful for cooling the bars after baking. If you don’t have one, you can simply place the bars on a cutting board or a plate.
- Sharp Knife: A sharp knife is key for cutting the bars into neat squares. A pizza cutter can also do the trick if you want to try something different!
With these tools in hand, you’re all set to create your chewy coconut bars. Remember, the joy of cooking comes not just from the ingredients but also from the experience of using your favorite kitchen tools. Let’s keep the momentum going and explore the variations of this delightful recipe!
Variations of Chewy Coconut Bars Recipe
One of the things I love most about my Chewy Coconut Bars Recipe is how versatile it is! You can easily switch things up to suit your taste or to use what you have on hand. Here are a few fun variations that I’ve tried and absolutely adored:
- Chocolate Coconut Bars: If you’re a chocolate lover like me, try adding a cup of chocolate chips to the mixture. The melty chocolate pairs perfectly with the chewy coconut, creating a decadent treat that’s hard to resist!
- Nutty Coconut Bars: For a delightful crunch, toss in some chopped nuts, like almonds or pecans. They add a lovely texture and a nutty flavor that complements the coconut beautifully.
- Fruity Coconut Bars: Want to add a burst of flavor? Mix in some dried fruits like cranberries or apricots. The sweetness of the fruit balances the coconut and adds a lovely chewiness.
- Almond Joy Bars: Channel your inner candy bar by adding shredded chocolate and a sprinkle of almond extract. It’s like having a mini Almond Joy in bar form!
- Spiced Coconut Bars: For a warm twist, add a pinch of cinnamon or nutmeg to the mixture. These spices bring a cozy flavor that’s perfect for fall or winter gatherings.
Feel free to experiment with these variations or come up with your own! The beauty of this recipe is that it welcomes creativity. Each twist brings a new flavor adventure, and I can’t wait for you to discover your favorite version!
Cooking Notes for Chewy Coconut Bars Recipe
As I’ve journeyed through the delightful process of making chewy coconut bars, I’ve picked up a few cooking notes that can help elevate your baking experience. These little tips can make a big difference in the outcome of your bars!
- Ingredient Temperature: Make sure your butter is melted but not too hot. If it’s too warm, it can cook the eggs if you decide to add any. Room temperature ingredients mix better, creating a smoother batter.
- Storage: Once your bars are cooled and cut, store them in an airtight container. They can last up to a week at room temperature, or you can refrigerate them for longer freshness. Just be sure to separate layers with parchment paper to prevent sticking!
- Freezing: If you want to make a batch ahead of time, these bars freeze beautifully! Wrap them tightly in plastic wrap and then place them in a freezer-safe bag. They can be frozen for up to three months. Just thaw them at room temperature when you’re ready to enjoy!
- Don’t Overbake: Keep an eye on your bars as they bake. Overbaking can lead to a dry texture. You want them to be golden on the edges but still soft in the center for that perfect chewiness.
- Experiment with Sweetness: If you prefer a less sweet bar, you can reduce the amount of sweetened condensed milk slightly. Just remember that this may affect the texture, so adjust accordingly!
These cooking notes are like little nuggets of wisdom I’ve gathered over time. They help ensure that every batch of chewy coconut bars turns out just right. Now, let’s keep the momentum going and explore some serving suggestions for these delightful treats!
Serving Suggestions for Chewy Coconut Bars Recipe
Now that your chewy coconut bars are baked to perfection, it’s time to think about how to serve them! Presentation can elevate your treats from simple snacks to show-stopping desserts. Here are some of my favorite serving suggestions that will make your bars even more delightful:
- With a Dusting of Powdered Sugar: A light sprinkle of powdered sugar on top adds a touch of elegance. It’s like giving your bars a little snow cap that makes them look extra special!
- Drizzled with Chocolate: Melt some chocolate and drizzle it over the bars for a rich, decadent finish. This adds a beautiful contrast and a burst of flavor that chocolate lovers will adore.
- Pair with Fresh Fruit: Serve your bars alongside fresh fruit like strawberries or raspberries. The tartness of the fruit complements the sweetness of the bars, creating a balanced dessert plate.
- With a Scoop of Ice Cream: For a truly indulgent treat, serve a warm bar with a scoop of vanilla or coconut ice cream. The creamy ice cream melts into the chewy bar, creating a heavenly combination!
- As Part of a Dessert Platter: Cut the bars into smaller squares and arrange them on a platter with other treats like brownies, cookies, or mini cupcakes. This makes for a fun dessert spread at parties or gatherings.
These serving suggestions not only enhance the visual appeal but also add layers of flavor that make each bite even more enjoyable. I love experimenting with different pairings, and I encourage you to get creative too! Whether it’s a casual family dessert or a fancy gathering, these chewy coconut bars are sure to impress.
Tips for Perfect Chewy Coconut Bars Recipe
As I’ve baked my fair share of chewy coconut bars, I’ve gathered a treasure trove of tips that can help you achieve perfection every time. These little nuggets of wisdom can make a world of difference in your baking journey. Let’s dive into my favorite tips!
- Measure Accurately: Baking is a science, so measuring your ingredients accurately is crucial. Use a kitchen scale for the best results, especially for the flour and coconut. A little too much or too little can change the texture!
- Don’t Skip the Salt: It may seem small, but a pinch of salt enhances the flavors of the bars. It balances the sweetness and brings out the coconut’s natural flavor. Trust me, it makes a difference!
- Let Them Cool: Patience is key! Allow the bars to cool completely before cutting. This helps them set properly and makes for cleaner cuts. I know it’s tempting to dig in right away, but the wait is worth it!
- Experiment with Texture: If you prefer a chewier bar, try using sweetened shredded coconut instead of unsweetened. It adds a delightful chewiness that’s hard to resist. Just remember to adjust the sweetness accordingly!
- Use Fresh Ingredients: Fresh ingredients can elevate your bars to a whole new level. Check the expiration dates on your baking supplies, especially the baking powder and vanilla extract. Freshness matters!
With these tips in your back pocket, you’re well on your way to creating the most delicious chewy coconut bars. Each batch will be a delightful treat that brings joy to your kitchen and your taste buds. Now, let’s move on to the breakdown of time for this scrumptious recipe!
Breakdown of Time for Chewy Coconut Bars Recipe
As a home cook, I know that time management in the kitchen is just as important as the ingredients we use. When it comes to my Chewy Coconut Bars Recipe, here’s a quick breakdown of the time you’ll need to whip up these delightful treats:
- Prep Time: 15 minutes
- Cooking Time: 25-30 minutes
- Total Time: 40-45 minutes
In just under an hour, you can have a batch of these chewy coconut bars ready to enjoy! The prep time is quick, allowing you to mix and measure your ingredients with ease. Then, while the bars are baking, you can take a moment to tidy up your kitchen or even sneak a taste of the batter (I won’t tell!). Before you know it, you’ll have a delicious treat that’s perfect for sharing—or keeping all to yourself!
Nutritional Information for Chewy Coconut Bars Recipe
As a passionate home cook, I always find it helpful to know the nutritional content of the treats I whip up. It allows me to enjoy them mindfully while also sharing them with family and friends. Here’s a quick overview of the nutritional information for one chewy coconut bar, assuming you cut the batch into 16 squares:
- Calories: Approximately 150
- Protein: 2g
- Fat: 7g
- Carbohydrates: 20g
- Fiber: 1g
- Sugar: 10g
Keep in mind that these values can vary based on the specific ingredients you use, especially if you opt for add-ons like chocolate chips or nuts. If you’re looking to make these bars a bit healthier, consider using less sweetened condensed milk or adding in some whole grain flour. It’s all about balance, and I believe that enjoying a sweet treat can fit into a healthy lifestyle!
Now that you have the nutritional scoop, let’s move on to some frequently asked questions about this delightful recipe!
Frequently Asked Questions about Chewy Coconut Bars Recipe
As I’ve shared my Chewy Coconut Bars Recipe with friends and family, I’ve noticed a few common questions pop up. I love that people are curious and eager to learn more about this delightful treat! Here are some of the most frequently asked questions, along with my answers:
- Can I use unsweetened coconut instead of sweetened? Absolutely! Unsweetened coconut gives a more natural flavor, but you may want to adjust the sweetness by adding a bit more sweetened condensed milk or sugar to taste.
- How do I store leftover bars? Store your chewy coconut bars in an airtight container at room temperature for up to a week. If you want to keep them longer, you can refrigerate them or freeze them for up to three months.
- Can I make these bars gluten-free? Yes! You can substitute the all-purpose flour with a gluten-free flour blend. Just make sure to check the blend’s instructions for the best results.
- What can I use instead of sweetened condensed milk? If you’re looking for a dairy-free option, you can use coconut cream or a homemade version of sweetened condensed milk made with coconut milk and sugar.
- Can I add fresh fruit to the bars? While fresh fruit can add moisture, it’s best to stick with dried fruits like cranberries or apricots. Fresh fruit may make the bars soggy, so I recommend saving those for a topping instead!
These questions reflect the curiosity and creativity that come with baking. I love how each inquiry opens up new possibilities for making these chewy coconut bars even more enjoyable. If you have any other questions, feel free to reach out—I’m always here to help fellow home cooks on their culinary adventures!
Conclusion on Chewy Coconut Bars Recipe
As we wrap up our delightful journey through the world of Chewy Coconut Bars, I can’t help but feel a sense of joy and satisfaction. These bars are more than just a sweet treat; they are a canvas for creativity, a way to connect with loved ones, and a reminder of the simple pleasures in life. Each bite is a celebration of flavors that can transport you back to cherished memories, just like they do for me.
Whether you choose to stick with the classic recipe or explore the various variations, I hope you find as much joy in making these bars as I do. They are perfect for any occasion, from casual family gatherings to festive celebrations. Plus, they are incredibly easy to whip up, making them a go-to recipe for both seasoned bakers and kitchen novices alike.
So, gather your ingredients, roll up your sleeves, and let the sweet aroma of chewy coconut bars fill your kitchen. I can’t wait for you to experience the magic of these treats. Remember, cooking is all about sharing love and creating memories, and I hope these bars become a part of your culinary adventures. Happy baking!
Conclusion on Chewy Coconut Bars Recipe
As we come to the end of our delightful exploration of Chewy Coconut Bars, I can’t help but feel a warm glow of satisfaction. These bars are not just a simple dessert; they are a celebration of flavors, memories, and creativity. Each bite is a reminder of the joy that comes from baking and sharing with loved ones.
What I love most about this recipe is its versatility. Whether you stick to the classic version or experiment with fun add-ins, there’s a chewy coconut bar for everyone. They are perfect for any occasion, from cozy family nights to festive gatherings. Plus, they are incredibly easy to make, making them a go-to recipe for both seasoned bakers and those just starting their culinary journey.
So, gather your ingredients, embrace the process, and let the sweet aroma of these chewy coconut bars fill your kitchen. I hope they bring as much joy to your home as they have to mine. Remember, cooking is about creating memories, and I can’t wait for you to share these delicious treats with your family and friends. Happy baking!
