
Introduction to Chilled Lemon Berry Dessert Bars
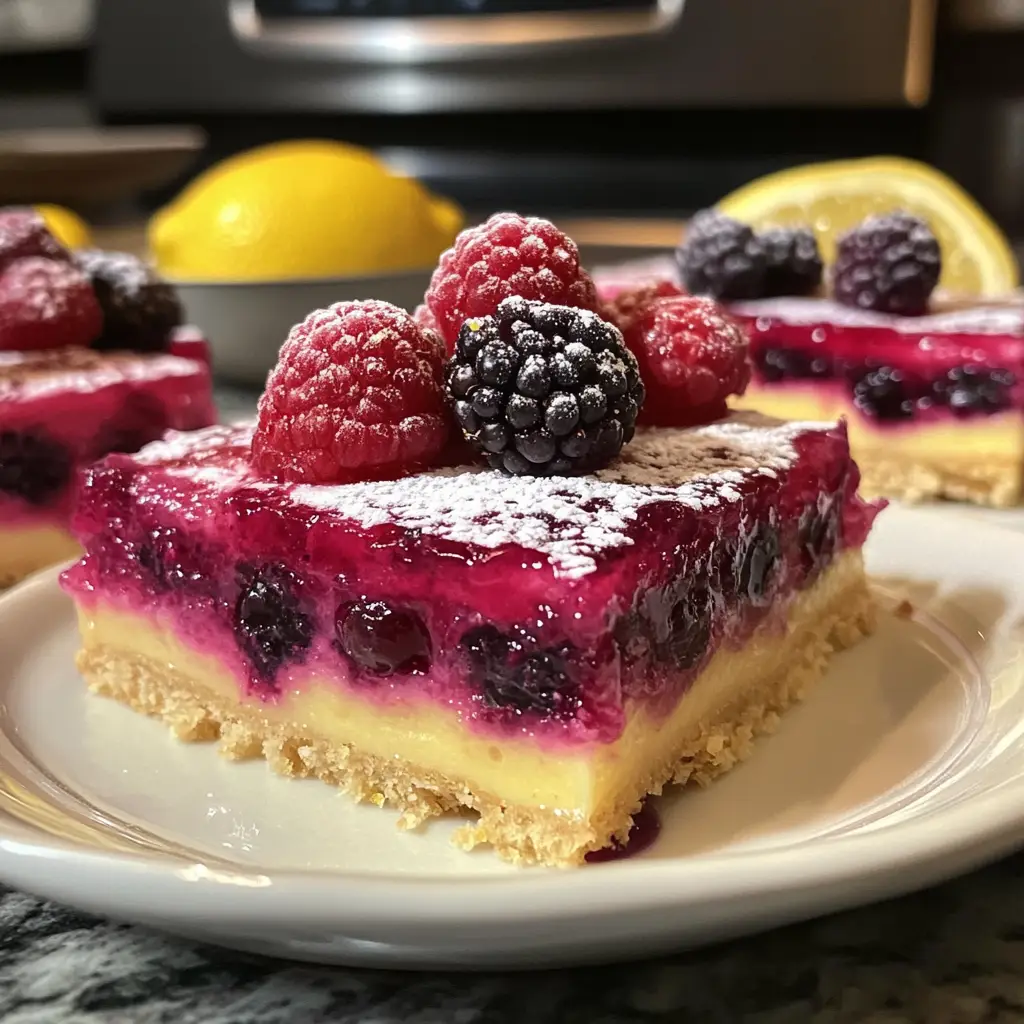
As a passionate home cook, I find joy in creating desserts that not only taste delightful but also bring a smile to the faces of my loved ones. One of my all-time favorites is the Chilled Lemon Berry Dessert Bars. These bars are like a burst of sunshine on a plate, perfect for warm days when you crave something refreshing and sweet.
Let me take you back to a sunny afternoon last summer. I was hosting a small gathering in my backyard, surrounded by laughter and the sweet scent of blooming flowers. I wanted to serve something that would complement the cheerful atmosphere. That’s when I decided to whip up these chilled bars. The combination of zesty lemon and juicy berries was a hit! Everyone kept asking for seconds, and I felt like a culinary rock star.
What I love most about these dessert bars is their versatility. You can use any berries you have on hand, whether it’s strawberries, blueberries, or raspberries. Each bite is a delightful dance of flavors, with the tartness of lemon balancing perfectly with the sweetness of the berries. Plus, they’re easy to make, which means you can spend less time in the kitchen and more time enjoying the company of your friends and family.
So, if you’re looking for a dessert that’s not only delicious but also visually stunning, you’ve come to the right place. Let’s dive into the world of Chilled Lemon Berry Dessert Bars and create something magical together!
Ingredients for Chilled Lemon Berry Dessert Bars
Before we embark on our culinary adventure, let’s gather all the ingredients we’ll need to create these delightful Chilled Lemon Berry Dessert Bars. I always believe that the quality of ingredients can make a world of difference in the final product. So, let’s make sure we’re using the best!
Main Ingredients
- 1 ½ cups of graham cracker crumbs
- ½ cup of unsalted butter, melted
- 1 cup of granulated sugar
- 2 large eggs
- 1 cup of freshly squeezed lemon juice (about 4-6 lemons)
- 1 tablespoon of lemon zest (for that extra zing!)
- 2 cups of mixed berries (strawberries, blueberries, raspberries, or blackberries)
- Powdered sugar for dusting (optional)
When it comes to the berries, I recommend using fresh ones if possible. They not only taste better but also add a vibrant color to your dessert. If you can’t find fresh berries, frozen ones work too—just make sure to thaw and drain them well before using.
Optional Add-ons
- 1 teaspoon of vanilla extract for a hint of warmth
- 1 tablespoon of cornstarch to thicken the lemon filling (if desired)
- Fresh mint leaves for garnish
Feel free to get creative! You can swap out the graham cracker crust for a cookie crust made from your favorite cookies, like Oreos or digestive biscuits. The possibilities are endless, and that’s what makes cooking so much fun!
Now that we have our ingredients ready, let’s move on to the next step and start preparing these delicious bars!
How to Prepare Chilled Lemon Berry Dessert Bars
Now that we have all our ingredients lined up like eager little soldiers, it’s time to roll up our sleeves and get cooking! Making Chilled Lemon Berry Dessert Bars is a delightful process, and I can’t wait to share the steps with you. Let’s dive right in!
Step 1: Prepare the Crust
First things first, we need to create a solid foundation for our dessert. The crust is like the cozy blanket that wraps around the delicious filling. Here’s how to do it:
- Preheat your oven to 350°F (175°C).
- In a mixing bowl, combine the graham cracker crumbs and melted butter. Stir until the crumbs are evenly coated.
- Press the mixture firmly into the bottom of a greased 9×9-inch baking pan. Make sure it’s packed tightly for a sturdy crust.
- Bake for about 10 minutes, or until it’s lightly golden. Let it cool while we prepare the filling.
Tips for a Perfect Crust
To achieve a perfect crust, I like to use the back of a measuring cup to press the crumbs down evenly. This ensures that every bite has that delightful crunch. If you want to add a little extra flavor, consider mixing in a pinch of cinnamon or nutmeg with the crumbs!
Step 2: Make the Lemon Filling
Next up is the star of the show—the lemon filling! This is where the magic happens, and the aroma will make your kitchen smell heavenly.
- In a large bowl, whisk together the granulated sugar and eggs until smooth.
- Add the freshly squeezed lemon juice and lemon zest, mixing until well combined.
- If you’re using cornstarch, whisk it in now to help thicken the filling.
- Pour the lemon mixture over the cooled crust, spreading it evenly.
Tips for Achieving the Right Consistency
For a silky-smooth filling, make sure to whisk the mixture thoroughly. I find that using a hand mixer can help achieve that perfect consistency. Just be careful not to overmix, as we want to keep it light and airy!
Step 3: Layer the Berries
Now comes the fun part—layering the berries! This is where you can get creative and make your dessert visually stunning.
- Once the lemon filling is set (about 20-25 minutes in the oven), remove the pan from the oven.
- Carefully scatter the mixed berries over the lemon filling, pressing them in slightly.
Tips for Choosing the Best Berries
When selecting berries, look for ones that are plump and vibrant. I love using a mix of colors for a beautiful presentation. If you’re using strawberries, slice them into smaller pieces to make them easier to eat. Remember, fresh is best, but frozen can work in a pinch!
Step 4: Assemble and Chill
We’re almost there! Now it’s time to bring everything together and let it chill.
- Return the pan to the oven and bake for an additional 15-20 minutes, or until the filling is set.
- Once baked, let it cool at room temperature for about 30 minutes.
- Cover the pan with plastic wrap and refrigerate for at least 2 hours, or until completely chilled.
Tips for Proper Chilling
Chilling is crucial for the flavors to meld together. I like to make these bars a day ahead of time, allowing them to chill overnight. This way, they’re perfectly set and ready to impress when it’s time to serve!
And there you have it! The steps to create your very own Chilled Lemon Berry Dessert Bars. I can already imagine the smiles on your friends’ faces when you serve these delightful treats!
Equipment Needed for Chilled Lemon Berry Dessert Bars
Before we dive into the kitchen, let’s gather the essential tools that will help us create these scrumptious Chilled Lemon Berry Dessert Bars. Having the right equipment makes the process smoother and more enjoyable. Here’s what you’ll need:
- 9×9-inch baking pan: This is the perfect size for our dessert bars. If you don’t have one, a similar-sized dish will work just fine.
- Mixing bowls: A couple of medium-sized bowls will help you mix the crust and filling separately.
- Whisk: A good whisk is essential for blending the filling smoothly. If you don’t have one, a fork can do the trick!
- Measuring cups and spoons: Accurate measurements are key to a successful recipe, so make sure you have these handy.
- Rubber spatula: This will help you spread the lemon filling evenly over the crust and layer the berries beautifully.
- Plastic wrap: You’ll need this to cover the pan while it chills in the refrigerator.
And there you have it! With these tools at your side, you’re all set to create your delicious Chilled Lemon Berry Dessert Bars. If you’re missing any of these items, don’t worry! You can often find alternatives around the kitchen. For example, a pie dish can substitute for the baking pan, and a spoon can replace a spatula in a pinch. Let’s get cooking!
Variations of Chilled Lemon Berry Dessert Bars
One of the things I adore about Chilled Lemon Berry Dessert Bars is their flexibility. You can easily switch things up to suit your taste or the season. Here are a few delightful variations that I’ve tried and loved:
- Berry Medley: Instead of just one type of berry, mix it up! Use a combination of strawberries, blueberries, and raspberries for a colorful and flavorful twist.
- Citrus Twist: Add a splash of orange or lime juice to the lemon filling for a zesty kick. It brightens the flavor and adds a fun twist!
- Chocolate Drizzle: For the chocolate lovers out there, melt some dark chocolate and drizzle it over the chilled bars before serving. It adds a rich contrast to the tart lemon.
- Nutty Crust: Swap out the graham cracker crust for a nut-based crust using almonds or pecans. Just blend the nuts with a bit of butter and press them into the pan for a crunchy base.
- Vegan Version: Replace the eggs with flaxseed meal mixed with water and use a plant-based butter alternative. You can also substitute the sugar with maple syrup for a healthier option.
These variations not only keep things exciting but also allow you to cater to different dietary preferences. I love experimenting with new flavors, and I encourage you to do the same! The beauty of cooking is that it’s all about creativity and making it your own.
Cooking Notes for Chilled Lemon Berry Dessert Bars
As I’ve learned through my culinary adventures, a few cooking notes can make all the difference when preparing Chilled Lemon Berry Dessert Bars. Here are some tips that I’ve gathered over time to ensure your dessert turns out perfectly every time:
- Fresh Ingredients: Always opt for fresh lemons and berries. The vibrant flavors of fresh produce elevate the taste of your dessert, making it truly unforgettable.
- Room Temperature Eggs: Using eggs at room temperature helps them blend more easily into the filling. I usually take them out of the fridge about 30 minutes before I start cooking.
- Cooling Time: Patience is key! Allow the bars to cool completely before refrigerating. This helps the filling set properly and prevents any sogginess.
- Storage: These bars can be stored in the refrigerator for up to a week. Just make sure to cover them well to keep them fresh. I often use plastic wrap or an airtight container.
- Serving Temperature: For the best experience, serve the bars chilled but not too cold. Let them sit at room temperature for about 10 minutes before serving to enhance the flavors.
With these cooking notes in mind, you’ll be well on your way to creating a batch of Chilled Lemon Berry Dessert Bars that will impress everyone at your gathering. Happy cooking!
Serving Suggestions for Chilled Lemon Berry Dessert Bars
Now that we’ve crafted our delightful Chilled Lemon Berry Dessert Bars, it’s time to think about how to serve them up! Presentation can elevate your dessert from delicious to dazzling, and I love to get a little creative when it comes to serving. Here are some of my favorite serving suggestions:
- Dust with Powdered Sugar: A light sprinkle of powdered sugar on top adds a touch of elegance. It looks like a soft blanket of snow, making the bars even more inviting!
- Garnish with Fresh Mint: A sprig of fresh mint not only adds a pop of color but also a refreshing aroma. It’s like a little garden on your plate!
- Serve with Whipped Cream: A dollop of freshly whipped cream on the side complements the tartness of the lemon beautifully. It’s a match made in dessert heaven!
- Pair with Ice Cream: For an extra indulgent treat, serve the bars alongside a scoop of vanilla or lemon sorbet. The cold creaminess pairs perfectly with the zesty bars.
- Use Fun Plates: I love to serve these bars on colorful or patterned plates. It adds a cheerful vibe to the table and makes the dessert even more appealing.
These serving suggestions not only enhance the visual appeal but also add layers of flavor and texture to your dessert experience. Whether it’s a casual family dinner or a festive gathering, these Chilled Lemon Berry Dessert Bars are sure to steal the show!
Tips for Making Chilled Lemon Berry Dessert Bars
As I’ve whipped up countless batches of Chilled Lemon Berry Dessert Bars, I’ve gathered a treasure trove of tips that can help you achieve dessert perfection. Here are some of my favorite nuggets of wisdom to ensure your bars turn out just right:
- Prep Ahead: If you’re planning for a gathering, consider making these bars a day in advance. The flavors deepen overnight, and you’ll save time on the day of your event.
- Use a Food Processor: For a quick and easy crust, toss the graham cracker crumbs and melted butter into a food processor. It saves time and ensures an even mixture!
- Don’t Skip the Zest: The lemon zest is like a secret ingredient that adds a burst of flavor. It’s the little things that make a big difference!
- Check for Doneness: When baking the filling, it should be set but still slightly jiggly in the center. It will firm up as it cools, so don’t overbake!
- Experiment with Sweetness: If you prefer a sweeter dessert, feel free to adjust the sugar in the lemon filling. Just remember to taste as you go!
With these tips in your back pocket, you’ll be well-equipped to create a batch of Chilled Lemon Berry Dessert Bars that will leave everyone asking for the recipe. Happy baking!
Breakdown of Time for Chilled Lemon Berry Dessert Bars
When it comes to making Chilled Lemon Berry Dessert Bars, timing is everything! I always like to plan ahead, so I know exactly how much time to set aside for each step. Here’s a quick breakdown of the time you’ll need:
- Prep Time: Approximately 20 minutes. This includes gathering your ingredients, preparing the crust, and mixing the lemon filling.
- Cooking Time: About 30-35 minutes. This covers the baking time for the crust and the lemon filling.
- Chilling Time: At least 2 hours. This is crucial for the bars to set properly and for the flavors to meld together. I often recommend chilling them overnight for the best results!
Total Time: Roughly 2 hours and 55 minutes, including prep, cooking, and chilling. However, if you choose to chill them overnight, you can easily make them a day in advance, which is a great time-saver!
With this time breakdown, you can plan your cooking session efficiently. I love knowing that in just a few hours, I can create a dessert that’s not only delicious but also a showstopper at any gathering!
Nutritional Information for Chilled Lemon Berry Dessert Bars
As a home cook, I always find it helpful to know the nutritional content of the dishes I prepare. It allows me to enjoy my creations while being mindful of what I’m serving to my family and friends. Here’s a quick overview of the nutritional information for a single serving of Chilled Lemon Berry Dessert Bars (based on a 9×9-inch pan cut into 16 bars):
- Calories: Approximately 150
- Protein: 2g
- Fat: 7g
- Carbohydrates: 22g
- Fiber: 1g
- Sugar: 10g
- Sodium: 50mg
Keep in mind that these values can vary based on the specific ingredients you use and any optional add-ons you choose to include. For instance, using a different type of crust or adding more berries can change the nutritional profile. I always encourage balance, so enjoy these bars as a delightful treat in moderation!
With this information, you can savor your Chilled Lemon Berry Dessert Bars while feeling good about what you’re eating. Happy indulging!
Frequently Asked Questions about Chilled Lemon Berry Dessert Bars
As I’ve shared my love for Chilled Lemon Berry Dessert Bars, I often get questions from fellow home cooks eager to try their hand at this delightful treat. Here are some of the most common questions I’ve encountered, along with my answers to help you on your culinary journey!
Can I use different types of berries?
Absolutely! One of the best things about these bars is their versatility. You can mix and match your favorite berries, whether it’s strawberries, blueberries, raspberries, or even blackberries. Each combination brings a unique flavor and color to the dessert!
How do I store leftover bars?
To keep your Chilled Lemon Berry Dessert Bars fresh, store them in an airtight container in the refrigerator. They can last up to a week, but I doubt they’ll last that long once your family gets a taste!
Can I make these bars gluten-free?
Yes! You can easily make a gluten-free version by using gluten-free graham crackers or almond flour for the crust. Just make sure to check the labels to ensure all your ingredients are gluten-free.
What if I don’t have fresh lemons?
If fresh lemons aren’t available, you can use bottled lemon juice as a substitute. However, I always recommend fresh juice for the best flavor. If you do use bottled juice, look for one that’s 100% lemon juice without added sugars or preservatives.
Can I freeze these dessert bars?
Yes, you can freeze Chilled Lemon Berry Dessert Bars! Just make sure to wrap them tightly in plastic wrap and then place them in an airtight container. They can be frozen for up to three months. When you’re ready to enjoy them, simply thaw them in the refrigerator overnight.
These FAQs should help clear up any uncertainties you might have as you embark on making your own Chilled Lemon Berry Dessert Bars. Remember, cooking is all about experimenting and having fun, so don’t hesitate to make this recipe your own!
Conclusion on Chilled Lemon Berry Dessert Bars
As we wrap up our delightful journey into the world of Chilled Lemon Berry Dessert Bars, I can’t help but feel a sense of excitement. These bars are not just a treat; they’re a celebration of flavors, colors, and memories. The zesty lemon filling paired with the juicy berries creates a symphony of taste that dances on your palate, making every bite a joyful experience.
What I love most about this recipe is its simplicity and versatility. Whether you’re hosting a summer barbecue, celebrating a birthday, or just craving something sweet, these bars fit the bill perfectly. They’re easy to prepare, and the vibrant presentation makes them a showstopper at any gathering. Plus, with the option to customize the ingredients, you can make them your own!
So, gather your loved ones, whip up a batch of these Chilled Lemon Berry Dessert Bars, and watch as smiles light up the room. I promise, they’ll become a favorite in your home, just as they have in mine. Happy baking, and may your kitchen always be filled with love and laughter!
