
Sensory-Rich Introduction with Immediate Craving
Imagine walking into a warm kitchen, the air thick with the sweet aroma of freshly baked chocolate chip cookies. As you approach the oven, you can see the golden-brown edges, perfectly crisp, giving way to a soft, gooey center that promises a delightful explosion of rich chocolate flavor. Each cookie is a masterpiece, inviting you to take that first bite, where the contrasting textures of chewy and crunchy dance on your palate.
Growing up, baking cookies was a cherished family tradition in my home. I remember the laughter and chatter as my siblings and I gathered around the kitchen counter, flour dusting our noses and chocolate chips mysteriously disappearing into our mouths. My grandmother would guide us, her hands expertly mixing the ingredients while sharing stories of her own childhood baking adventures. Those moments were filled with love, warmth, and the sweet anticipation of indulging in our creations.
There’s something incredibly comforting about homemade cookies. They evoke feelings of nostalgia, reminding us of simpler times spent with loved ones. Whether it’s a cozy night in with a good book, a family gathering where everyone shares their favorite treats, or surprising a friend with a batch of warm cookies, these little delights have a way of bringing people together. They are more than just a dessert; they are a symbol of love, comfort, and the joy of sharing something delicious.
So, let’s roll up our sleeves and get ready to create these irresistible chocolate chip cookies that will not only satisfy your sweet tooth but also fill your home with the delightful aroma of baking. Trust me, your kitchen will become the heart of your home, and these cookies will be the star of the show!
Why You’ll Love This Chocolate Chip Cookies
Let me tell you, there’s a reason why chocolate chip cookies hold a special place in our hearts and kitchens. They are not just any cookie; they are a delightful experience that tantalizes your taste buds and warms your soul. Here’s why you’ll absolutely adore these cookies:
- Texture Contrast: Picture this: you take a bite, and the first thing you notice is the delightful crunch of the edges, giving way to a soft, gooey center that melts in your mouth. It’s a textural symphony that keeps you coming back for more!
- Flavor Balance: The rich chocolate flavor is perfectly complemented by a hint of vanilla and a sprinkle of sea salt. This balance creates a flavor explosion that dances on your palate, making each cookie a little piece of heaven.
- Versatility: Whether you’re hosting a casual get-together, celebrating a special occasion, or simply indulging in a late-night snack, these cookies fit the bill. They are perfect for any occasion, bringing joy and sweetness wherever they go.
- Ease: With simple ingredients and straightforward steps, this recipe is accessible for all skill levels. Even if you’re a novice baker, you’ll find that whipping up a batch of these cookies is a breeze!
- Universal Appeal: Loved by kids and adults alike, chocolate chip cookies are a timeless treat that transcends generations. They have a magical way of bringing people together, making them a go-to dessert for everyone.
So, whether you’re baking for yourself or sharing with loved ones, these chocolate chip cookies are sure to bring smiles and satisfaction. Let’s keep the momentum going and dive into the ingredients that make this deliciousness possible!
Essential Tools & Preparation Strategy
Before diving into the delightful world of baking chocolate chip cookies, let’s gather our essential tools. Having the right equipment not only makes the process smoother but also enhances the final product. Trust me, a well-equipped kitchen is like a well-tuned orchestra; everything comes together beautifully!
- Mixing Bowls: You’ll need a couple of these to keep your wet and dry ingredients separate. I recommend using glass or stainless steel for durability.
- Whisk: This handy tool is essential for aerating your dry ingredients, ensuring a smooth batter that bakes evenly.
- Electric Mixer: While you can mix by hand, an electric mixer makes creaming the butter and sugars a breeze, especially if you’re making a double batch!
- Baking Sheets: A good quality baking sheet provides a flat surface for even baking. I prefer using heavy-duty ones that won’t warp in the oven.
- Parchment Paper: This is a game-changer! It prevents sticking and makes cleanup a snap. Plus, it helps your cookies bake evenly.
- Cookie Scoop: For uniform cookie sizes, a cookie scoop is your best friend. It ensures that all your cookies bake at the same rate, giving you that perfect batch.
- Cooling Rack: Allowing your cookies to cool on a rack prevents them from becoming soggy. Trust me, you want that perfect chewy texture!
Preparation Strategy
Now that we have our tools ready, let’s talk about preparation. Here’s a little tip from my kitchen to yours: Read through the entire recipe before starting. It’s like a roadmap that helps you navigate the baking journey without any detours!
- Gather all your ingredients and tools before you start. This will save you from scrambling around the kitchen mid-recipe.
- Measure your ingredients accurately. Baking is a science, and precision is key to achieving that perfect cookie.
- Consider setting out your butter and eggs ahead of time to reach room temperature. This will help them blend more easily into your batter.
- If you’re short on time, you can prepare the dough ahead of time and refrigerate it for up to 3 days. Just remember to let it sit at room temperature for a few minutes before scooping!
With these tools and preparation strategies in place, you’re well on your way to baking the most delicious chocolate chip cookies. Let’s get those ovens preheated and dive into the next steps!
Ingredients & Their Roles in This Chocolate Chip Cookies
Understanding the ingredients in your chocolate chip cookies is like knowing the notes in a beautiful melody. Each component plays a vital role in creating that perfect balance of flavor and texture. Let’s break it down:
Dry Ingredients
- All-purpose flour: This is the backbone of your cookies, providing the necessary structure. It gives the cookies their shape and chewiness, ensuring they don’t crumble apart.
- Baking soda: Acting as a leavening agent, baking soda helps your cookies rise and become light and fluffy. It also contributes to that lovely golden-brown color.
- Salt: A pinch of salt enhances the overall flavor, balancing the sweetness and bringing out the rich chocolate notes. It’s a small but mighty ingredient!
Wet Ingredients
- Unsalted butter: This is where the magic begins! Butter adds richness and moisture, creating that melt-in-your-mouth texture we all crave. Make sure it’s softened to room temperature for easy mixing.
- Granulated sugar: This sweetener not only adds sweetness but also contributes to the cookie’s texture, helping to create that delightful crispiness on the edges.
- Brown sugar: With its molasses content, brown sugar adds moisture and depth of flavor, giving your cookies a chewy center that’s simply irresistible.
- Vanilla extract: This aromatic flavor enhancer elevates the overall taste, adding warmth and complexity to your cookies. It’s like a hug in a bottle!
- Eggs: Eggs bind all the ingredients together, providing moisture and richness. They also help the cookies rise, contributing to that perfect texture.
Mix-ins
- Semi-sweet chocolate chips: The star of the show! These little morsels bring sweetness and richness, melting beautifully into the cookie dough. Feel free to use more or less depending on your chocolate cravings!
Substitutions
If you’re looking to mix things up or accommodate dietary preferences, here are a couple of substitutions:
- Dark chocolate chips: For a richer flavor, swap out semi-sweet for dark chocolate chips. They add a sophisticated touch to your cookies.
- Coconut oil: If you’re aiming for a dairy-free option, replace half the butter with coconut oil. It adds a subtle coconut flavor and keeps the cookies moist.
With these ingredients in hand, you’re well on your way to creating chocolate chip cookies that are not only delicious but also a true reflection of your baking prowess. Let’s move on to the step-by-step guide to bring these ingredients to life!
Step-by-Step Guide to Perfect Chocolate Chip Cookies
Now that we have our ingredients ready, it’s time to bring them together and create the magic of chocolate chip cookies! Follow these steps closely, and you’ll be rewarded with a batch of cookies that are warm, chewy, and utterly irresistible.
- Preheat your oven: Start by preheating your oven to 375°F (190°C). This is crucial for achieving that perfect golden-brown color and chewy texture.
- Whisk the dry ingredients: In a medium bowl, whisk together 2 1/4 cups of all-purpose flour, 1 teaspoon of baking soda, and 1 teaspoon of salt. This step helps to aerate the flour and evenly distribute the leavening agent. Set this mixture aside for later.
- Cream the wet ingredients: In a large bowl, cream together 1 cup of softened unsalted butter, 3/4 cup of granulated sugar, 3/4 cup of packed brown sugar, and 1 teaspoon of vanilla extract until smooth and fluffy, about 2-3 minutes. The mixture should be light in color and texture, which means you’re on the right track!
- Add the eggs: Crack in 2 large eggs, adding them one at a time. Mix well after each addition until fully incorporated. This step is essential for binding the ingredients together and adding moisture.
- Combine dry and wet ingredients: Gradually blend in the dry ingredients until just combined. Be careful not to overmix; you want to maintain that tender texture!
- Fold in the chocolate chips: Gently fold in 2 cups of semi-sweet chocolate chips until they are evenly distributed throughout the dough. This is where the magic happens—each bite will be filled with gooey chocolate goodness!
- Prepare for baking: Using a cookie scoop or rounded tablespoons, drop the dough onto ungreased baking sheets, spacing them about 2 inches apart. This allows room for the cookies to spread as they bake.
- Bake to perfection: Place the baking sheets in the preheated oven and bake for 9-11 minutes, or until the edges are golden brown but the centers are still soft. Remember, they will continue to cook slightly after being removed from the oven!
- Cool and enjoy: Once baked, remove the cookies from the oven and let them cool on the baking sheets for 5 minutes. This resting time allows them to set before transferring them to wire racks to cool completely. Trust me, the aroma wafting through your kitchen will be worth the wait!
With these steps, you’re well on your way to creating the most delicious chocolate chip cookies. The anticipation of that first bite is almost as sweet as the cookies themselves! Let’s keep the momentum going and explore some chef’s notes and pro tips for flawless results.
Chef’s Notes & Pro Tips for Flawless Results
As you embark on your chocolate chip cookie journey, here are some invaluable tips and notes from my kitchen to ensure your cookies turn out perfectly every time. Trust me, these little nuggets of wisdom can make all the difference!
- Make-ahead: If you’re planning for a busy week or want to have fresh cookies on hand, prepare the dough ahead of time and refrigerate it for up to 3 days. Just remember to let it sit at room temperature for a few minutes before scooping and baking!
- Storage: Once your cookies are baked to perfection, keep them in an airtight container at room temperature for up to 1 week. This will help maintain their chewy texture and delicious flavor. If they last that long, that is!
- Equipment recommendations: For those of you who love to bake in larger batches (or just want to save some elbow grease), I highly recommend using a stand mixer. It makes creaming the butter and sugars a breeze, allowing you to whip up cookie dough in no time!
- Customization options: Don’t be afraid to get creative! You can add chopped nuts, dried fruits, or even a sprinkle of your favorite spices to the dough for unique flavors. Think walnuts for crunch, dried cranberries for a tart twist, or a dash of cinnamon for warmth. The possibilities are endless!
With these tips in your back pocket, you’re well-equipped to tackle any cookie challenge that comes your way. Now, let’s move on to some common mistakes to avoid, ensuring your chocolate chip cookies are nothing short of spectacular!
Avoid These Common Cooking Mistakes
Even the most seasoned bakers can run into a few hiccups when making chocolate chip cookies. But fear not! I’ve compiled a list of common mistakes to avoid, ensuring your cookies turn out perfectly every time. Let’s dive in!
- Overmixing the dough: This is a classic pitfall that can lead to tough cookies. Remember, mix until just combined. You want to maintain that tender texture that makes cookies so delightful!
- Incorrect flour measurement: Too much flour can dry out your cookies, leaving you with a crumbly mess. Use the spoon and level method for accurate measurements—trust me, it makes a world of difference!
- Baking at the wrong temperature: Ensure your oven is preheated to 375°F (190°C). This is crucial for achieving that perfect golden-brown color and chewy texture. An oven thermometer can be a handy tool to ensure accuracy!
- Using cold butter: Cold butter can prevent proper creaming, resulting in a less-than-ideal texture. Always use softened butter for the best results. If you forget to take it out ahead of time, you can cut it into small pieces to speed up the softening process.
- Not chilling the dough: If your dough is too soft, it can result in flat cookies. Chill the dough for at least 30 minutes before baking to help maintain their shape and achieve that perfect chewiness.
- Overbaking: Cookies should be slightly underbaked for that chewy texture we all love. Remove them from the oven when the edges are golden but the centers are still soft. They will continue to cook as they cool!
- Not using parchment paper: This can lead to sticking and uneven baking. Always line your baking sheets with parchment paper for easy removal and cleanup. It’s a small step that makes a big difference!
By keeping these common mistakes in mind, you’ll be well on your way to baking chocolate chip cookies that are not only delicious but also a true reflection of your baking skills. Now, let’s explore some creative variations and customizations to take your cookies to the next level!
Creative Variations & Customizations
One of the best things about chocolate chip cookies is their versatility. You can easily customize the base recipe to suit your taste or dietary preferences. Here are some delightful variations that will elevate your cookie game and keep things exciting in the kitchen:
- Nutty Chocolate Chip Cookies: For those who love a bit of crunch, add 1 cup of chopped walnuts or pecans to the dough. The nuts not only provide texture but also a rich, earthy flavor that complements the chocolate beautifully.
- Oatmeal Chocolate Chip Cookies: Incorporate 1 cup of rolled oats into the dough for added texture and a heartier cookie. The oats lend a delightful chewiness and a wholesome feel, making these cookies a bit more filling.
- Double Chocolate Chip Cookies: If you’re a chocolate lover, this one’s for you! Add 1/2 cup of unsweetened cocoa powder to the dry ingredients. This will give your cookies a rich chocolate flavor and a darker hue, making them even more indulgent.
- Seasonal Spices: Embrace the flavors of the season by adding 1 teaspoon of cinnamon or nutmeg to the dough. These warm spices are perfect for fall and winter, adding a cozy aroma and flavor that will make your cookies feel extra special.
- Vegan Chocolate Chip Cookies: For a dairy-free option, substitute the 1 cup of unsalted butter with 1 cup of coconut oil and replace the 2 large eggs with 2 tablespoons of flaxseed meal mixed with 6 tablespoons of water (let it sit for a few minutes to thicken). This will create a deliciously moist cookie that everyone can enjoy!
These creative variations not only add unique flavors and textures but also allow you to express your culinary creativity. Feel free to mix and match these ideas to create your own signature chocolate chip cookie! Now, let’s explore the perfect pairings to enjoy with your freshly baked cookies.
Perfect Pairings: What to Serve With Chocolate Chip Cookies
Now that you’ve baked a batch of warm, chewy chocolate chip cookies, it’s time to think about how to elevate your cookie experience even further. The right pairing can enhance the flavors and make your treat even more enjoyable. Here are some delightful options to consider:
- Cold Milk: You can’t go wrong with this classic pairing! A tall glass of cold milk complements the sweetness of the cookies and helps balance the richness of the chocolate. It’s like a match made in heaven!
- Vanilla Ice Cream: For an indulgent twist, sandwich a warm cookie between two scoops of creamy vanilla ice cream. This decadent dessert sandwich is sure to impress and satisfy your sweet tooth.
- Coffee or Espresso: If you’re looking for a delightful afternoon treat, pair your cookies with a cup of coffee or a shot of espresso. The bitterness of the coffee beautifully balances the sweetness of the cookies, creating a harmonious flavor experience.
- Fresh Berries: For a refreshing contrast, serve your cookies alongside a handful of fresh berries. The tartness of strawberries, raspberries, or blueberries cuts through the sweetness, adding a burst of flavor that brightens up your dessert.
- Peanut Butter: If you’re a fan of rich flavors, try spreading a layer of peanut butter on your cookie. The creamy, nutty goodness pairs perfectly with the chocolate, creating a deliciously satisfying combination.
- Caramel Sauce: Drizzle some warm caramel sauce over your cookies for an extra indulgent touch. The sweet, buttery flavor of caramel enhances the chocolate and adds a luxurious element to your treat.
- Whipped Cream: For a fun twist, top your cookies with a dollop of whipped cream. This light and airy addition adds a delightful creaminess that complements the chewy texture of the cookies.
- Fruit Smoothie: For a balanced snack option, enjoy your cookies with a refreshing fruit smoothie. The fruity flavors and creamy texture of the smoothie provide a nice contrast to the rich chocolate chip cookies.
These pairings not only enhance the enjoyment of your chocolate chip cookies but also allow you to get creative in the kitchen. So, gather your favorite accompaniments and indulge in the ultimate cookie experience!
Storage & Meal Prep Instructions
Now that you’ve baked a delicious batch of chocolate chip cookies, it’s important to know how to store them properly to maintain their freshness and flavor. Here are some handy tips for storage and meal prep that will keep your cookies delightful for days to come!
Fridge Storage
To keep your baked cookies fresh, store them in an airtight container at room temperature for up to 1 week. This will help maintain their chewy texture and delicious flavor. If you live in a particularly humid environment, consider placing a piece of bread in the container to help absorb moisture and keep the cookies soft.
Freezer Storage
If you want to prepare ahead of time or simply have some cookie dough on hand for a spontaneous baking session, freezing is a fantastic option. Here’s how to do it:
- Freeze unbaked dough: Scoop the cookie dough into rounded balls and place them on a baking sheet lined with parchment paper. Freeze until solid, then transfer the dough balls to a freezer-safe bag or container. They can be stored for up to 3 months.
- Bake from frozen: When you’re ready to enjoy fresh cookies, simply preheat your oven to 375°F (190°C) and bake the frozen dough balls directly from the freezer. Just add a minute or two to the baking time, and you’ll have warm, gooey cookies in no time!
Reheating Methods
If you have leftover cookies that need a little revival, here are a couple of effective reheating methods:
- Microwave: Place a cookie on a microwave-safe plate and heat it for just a few seconds (about 10-15 seconds should do the trick). This will warm the cookie and make it soft and gooey again.
- Oven: Preheat your oven to a low temperature (around 300°F (150°C)). Place the cookies on a baking sheet and warm them for about 5-10 minutes. This method helps restore that freshly baked texture and aroma.
With these storage and meal prep instructions, you can enjoy your chocolate chip cookies at their best, whether you’re savoring them fresh out of the oven or indulging in a sweet treat later in the week. Happy baking!
Nutrition Facts & Health Insights
As we indulge in the delightful world of chocolate chip cookies, it’s essential to be mindful of their nutritional content. While these cookies are a treat, understanding their nutritional profile can help you enjoy them in moderation. Here’s a breakdown of the nutrition facts per cookie:
| Nutrient | Amount per Cookie |
|---|---|
| Calories | 150 |
| Sugar | 10 grams |
| Sodium | 150 milligrams |
| Fat | 7 grams |
| Saturated Fat | 4 grams |
| Unsaturated Fat | 2 grams |
| Trans Fat | 0 grams |
| Carbohydrates | 20 grams |
| Fiber | 1 gram |
| Protein | 2 grams |
| Cholesterol | 20 milligrams |
Now, let’s talk about the health benefits of one of the star ingredients: dark chocolate. Dark chocolate is not only delicious but also packed with antioxidants, which can help combat oxidative stress in the body. It contains flavonoids that may improve heart health by enhancing blood flow and lowering blood pressure. Plus, the rich flavor of dark chocolate can satisfy your sweet cravings with less sugar than milk chocolate, making it a more health-conscious choice.
However, moderation is key! While chocolate chip cookies can be a delightful treat, it’s important to enjoy them as part of a balanced diet. Pairing them with fresh fruit or a glass of milk can help create a more satisfying snack that balances sweetness with nutrition. So, go ahead and indulge in these warm, chewy cookies, but remember to savor each bite and enjoy them in moderation!
Frequently Asked Questions
As you embark on your chocolate chip cookie baking adventure, you might have a few questions along the way. Don’t worry; I’ve got you covered! Here are some of the most frequently asked questions about making these delightful treats:
- Can I use whole wheat flour instead of all-purpose flour?
Absolutely! Whole wheat flour can be used as a substitute for all-purpose flour, but keep in mind that it may result in a denser cookie. If you want to maintain a lighter texture, consider using a blend of half whole wheat and half all-purpose flour. - How do I know when my cookies are done baking?
The best way to tell if your cookies are done is to look for golden-brown edges while the centers remain slightly soft. They will continue to cook as they cool, so it’s better to err on the side of underbaking for that perfect chewy texture! - What can I substitute for eggs in this recipe?
If you’re looking for an egg substitute, you can use 1/4 cup of unsweetened applesauce or 1/4 cup of mashed banana for each egg. Alternatively, 2 tablespoons of flaxseed meal mixed with 6 tablespoons of water (let it sit for a few minutes to thicken) works well too! - Can I freeze the baked cookies?
Yes, you can freeze baked cookies! Place them in an airtight container or freezer bag, separating layers with parchment paper to prevent sticking. They can be stored in the freezer for up to 3 months. When you’re ready to enjoy them, simply thaw at room temperature or warm them in the oven. - How do I store cookie dough?
To store cookie dough, wrap it tightly in plastic wrap or place it in an airtight container. You can refrigerate it for up to 3 days or freeze it for up to 3 months. If freezing, scoop the dough into balls before freezing for easy baking later! - What if my dough is too sticky?
If your dough is too sticky to handle, it may be due to warm ingredients or too much moisture. Chill the dough in the refrigerator for about 30 minutes to firm it up. If it’s still sticky, you can gradually add a little more flour until it reaches the desired consistency. - Can I add other mix-ins like dried fruit or nuts?
Absolutely! Feel free to get creative with your mix-ins. Chopped nuts, dried fruits, or even different types of chocolate can add unique flavors and textures to your cookies. Just be sure to keep the total amount of mix-ins around 2 cups to maintain the right dough consistency. - How do I make these cookies gluten-free?
To make gluten-free chocolate chip cookies, substitute the all-purpose flour with a gluten-free flour blend. Look for a blend that includes xanthan gum, which helps mimic the texture of traditional flour. You may need to adjust the liquid slightly, so keep an eye on the dough consistency!
With these FAQs answered, you’re well-equipped to tackle any challenges that may arise while baking your chocolate chip cookies. Remember, baking is all about experimentation and having fun, so don’t hesitate to make these cookies your own!
Final Inspiration & Kitchen Confidence
As you take a moment to savor the delightful aroma of your freshly baked chocolate chip cookies, let’s celebrate the joy of baking! There’s something truly magical about transforming simple ingredients into a warm, chewy treat that brings smiles to faces and fills hearts with happiness. Each batch you create is not just a recipe followed; it’s a testament to your creativity and passion in the kitchen.
Remember, every cookie you bake is a step towards mastering the art of cookie-making. Whether they turn out perfectly or have a few quirks, each experience teaches you something new. Embrace the process, and don’t be afraid to experiment with flavors and techniques. After all, the best bakers are those who learn from their adventures in the kitchen!
Now, I invite you to share your cookie creations and experiences with our community. Snap a photo of your delicious cookies, share your favorite variations, or tell us about the memories you’ve created while baking. Let’s foster a sense of togetherness and inspire one another to keep baking and enjoying the sweet moments life has to offer. Happy baking, and may your kitchen always be filled with warmth and joy!
Print
Chocolate Chip Cookies: Warm, Chewy, Irresistibly Decadent!
- Total Time: 25 minutes
- Yield: 24 cookies 1x
- Diet: Vegetarian
Description
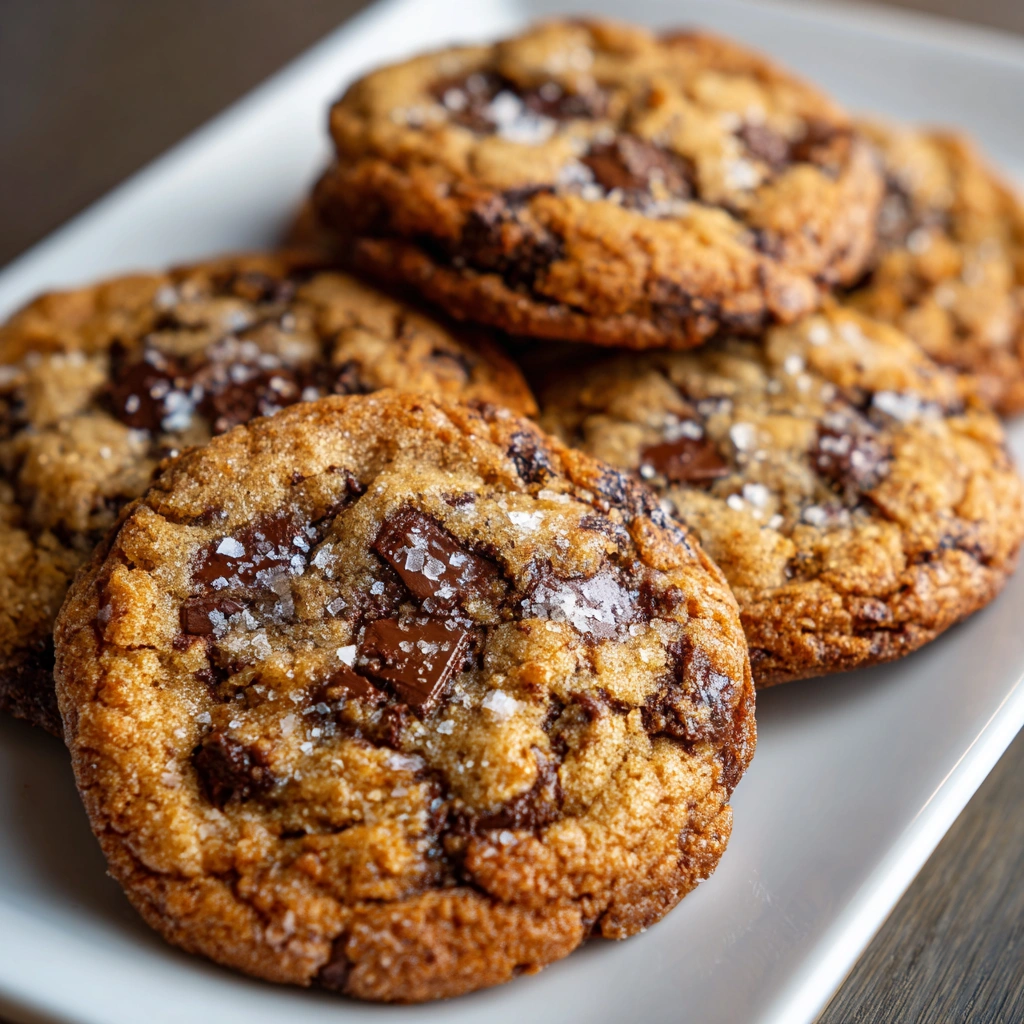
These chocolate chip cookies are warm and chewy, with a golden-brown exterior that gives way to a soft, gooey center. Each bite is a delightful explosion of rich chocolate flavor, perfectly balanced with a hint of vanilla and a touch of sea salt that enhances the sweetness.
Ingredients
- Dry Ingredients:
- 2 1/4 cups all-purpose flour
- 1 teaspoon baking soda
- 1 teaspoon salt
- Wet Ingredients:
- 1 cup unsalted butter, softened
- 3/4 cup granulated sugar
- 3/4 cup packed brown sugar
- 1 teaspoon vanilla extract
- 2 large eggs
- Mix-ins:
- 2 cups semi-sweet chocolate chips
Instructions
- Preheat your oven to 375°F (190°C).
- In a medium bowl, whisk together the flour, baking soda, and salt; set aside.
- In a large bowl, cream together the softened butter, granulated sugar, brown sugar, and vanilla extract until smooth and fluffy, about 2-3 minutes.
- Add the eggs one at a time, mixing well after each addition.
- Gradually blend in the dry ingredients until just combined.
- Fold in the chocolate chips until evenly distributed.
- Drop rounded tablespoons of dough onto ungreased baking sheets, spacing them about 2 inches apart.
- Bake for 9-11 minutes, or until the edges are golden brown but the centers are still soft.
- Remove from the oven and let cool on the baking sheets for 5 minutes before transferring to wire racks to cool completely.
Notes
- Make-ahead: The cookie dough can be prepared and refrigerated for up to 3 days before baking.
- Storage: Store baked cookies in an airtight container at room temperature for up to 1 week.
- Substitutions: Use dark chocolate chips for a richer flavor or substitute half the butter with coconut oil for a dairy-free option.
- Prep Time: 15 minutes
- Cook Time: 10 minutes
- Category: desserts
- Method: baking
- Cuisine: American
Nutrition
- Serving Size: 1 cookie
- Calories: 150
- Sugar: 10 grams
- Sodium: 150 milligrams
- Fat: 7 grams
- Saturated Fat: 4 grams
- Unsaturated Fat: 2 grams
- Trans Fat: 0 grams
- Carbohydrates: 20 grams
- Fiber: 1 gram
- Protein: 2 grams
- Cholesterol: 20 milligrams
Keywords: Chocolate Chip Cookies, chewy cookies, dessert recipes, baking, homemade cookies, classic cookies, easy cookie recipe, sweet treats, chocolate desserts, American desserts, cookie dough, vanilla cookies, family recipes, comfort food, indulgent snacks
