
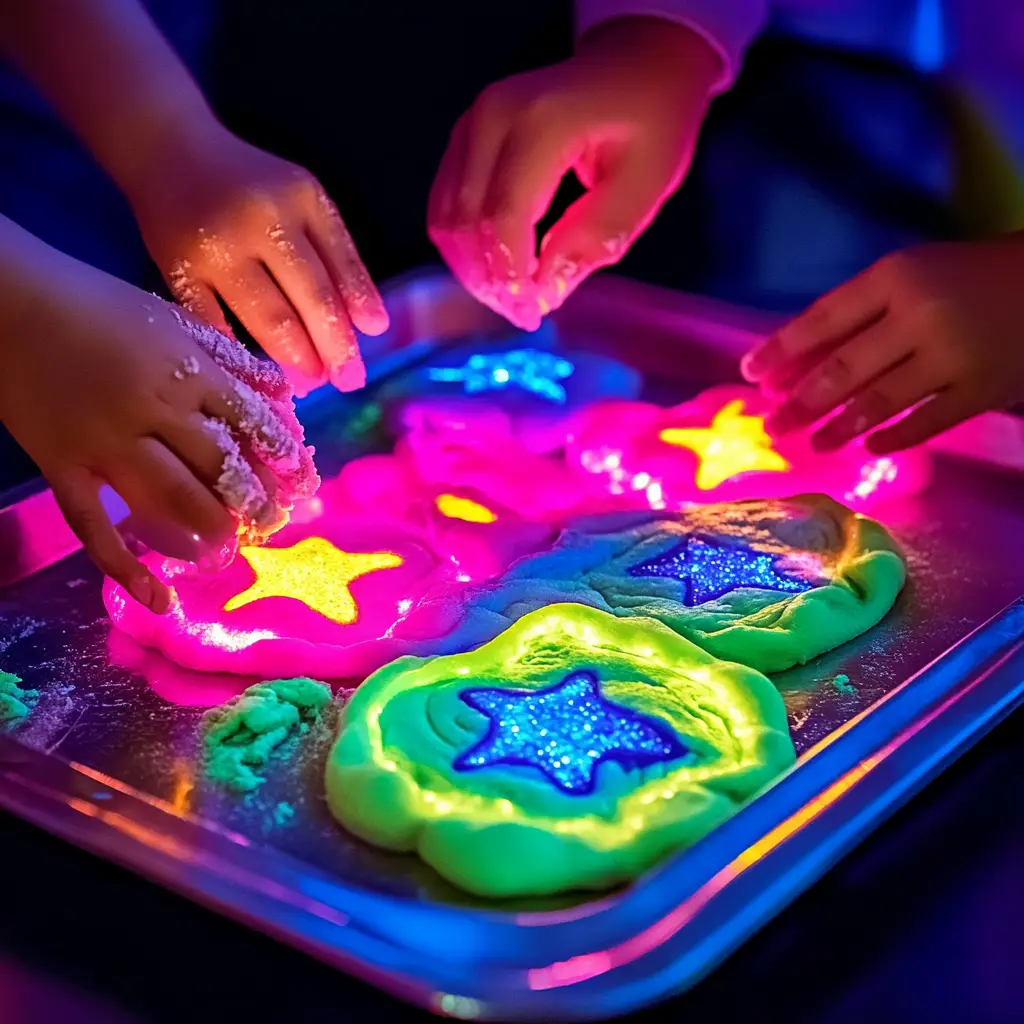
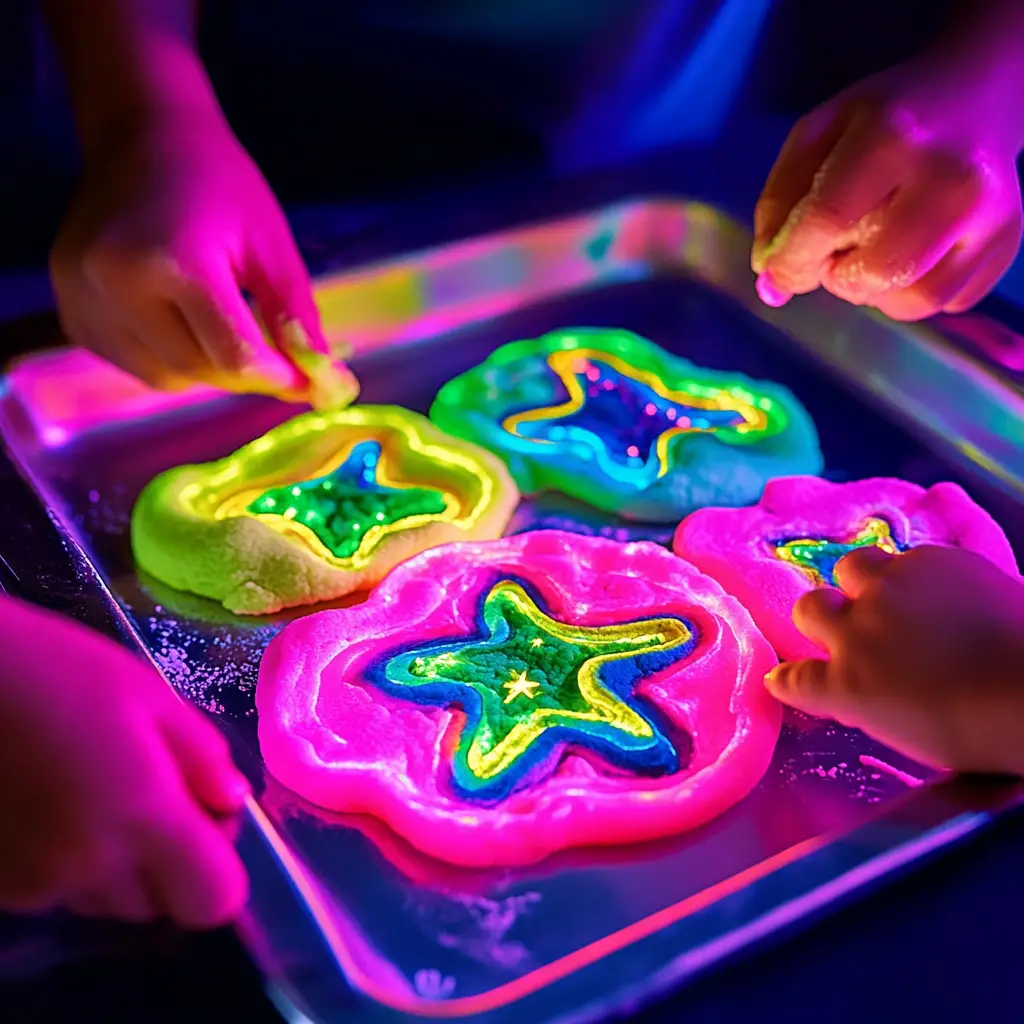
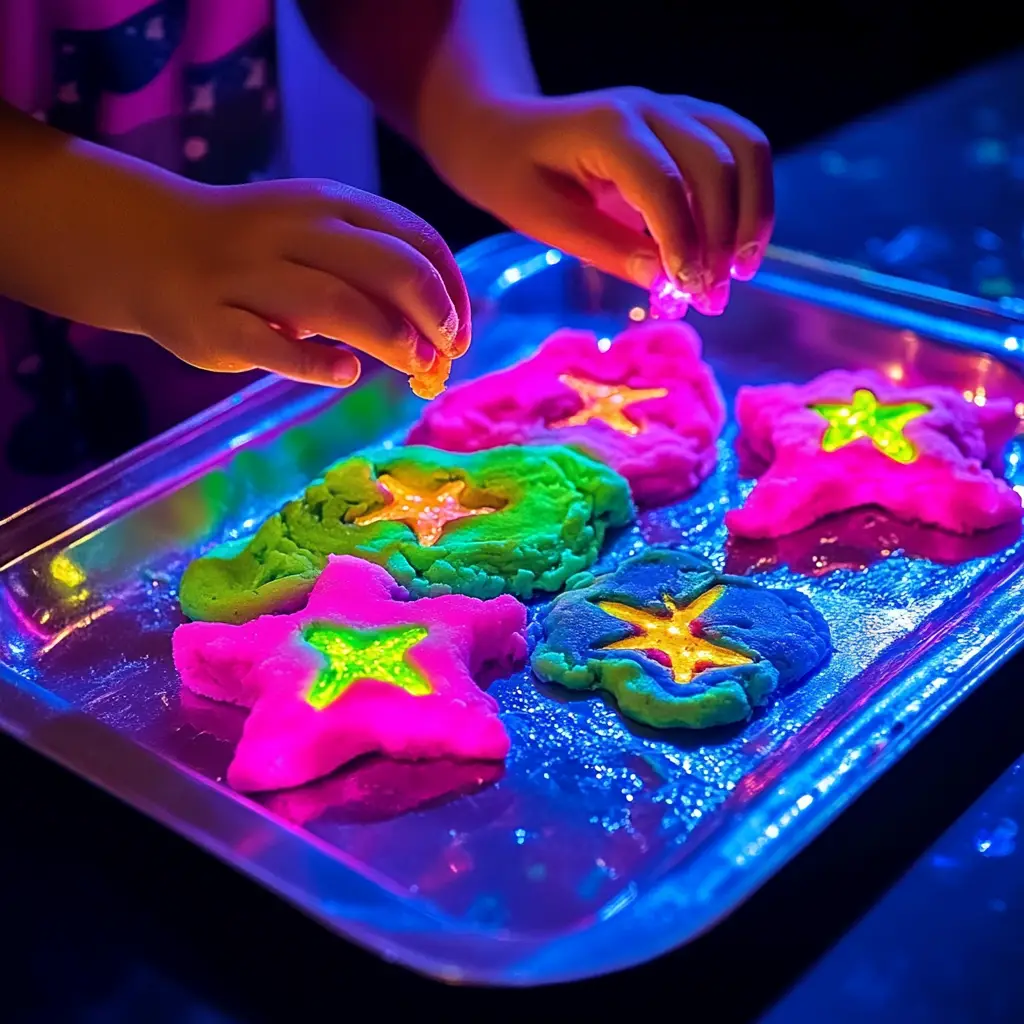
Imaginative play and sensory experiences are critical to a child’s development. From improving motor skills to engaging the senses, creative activities like crafting dough can offer more than just entertainment. Now imagine combining this classic childhood favorite with a magical, glowing twist. Glow in the Dark Playdough takes the sensory fun of traditional playdough to a whole new level. It captivates kids and adults alike with its vibrant, luminous appearance, especially under UV light or in a dark room after being “charged” under bright light.
Ideal for Halloween activities, sensory bins, educational science experiments, or unique glow-themed parties, this playdough is simple to make at home with everyday ingredients. Safe, soft, and glowing with potential, it invites creativity, curiosity, and hours of tactile play.
Why You’ll Love This Recipe
This isn’t just any playdough recipe. It’s a combination of hands-on crafting, science exploration, and endless entertainment. Here are the reasons why you and your kids will fall in love with this glow-in-the-dark version:
-
Engaging Visual Appeal: The glowing effect transforms play into something magical. Children are naturally drawn to things that light up, making this recipe an instant favorite.
-
Easy and Affordable: All ingredients are inexpensive and easy to find. You likely already have most of them in your kitchen or craft supplies.
-
Customizable Colors and Scents: Add food coloring or flavored Kool-Aid packets for vibrant color and pleasant scents. Each batch can be personalized to match a season, theme, or your child’s favorite color.
-
Safe and Non-Toxic: This recipe is made with kid-safe, non-toxic ingredients. It’s not edible, but it’s safe for touch-based play under supervision.
-
Sensory and Developmental Benefits: Playdough supports the development of fine motor skills, hand strength, and creativity. The glowing component also introduces scientific curiosity about light, reflection, and phosphorescence.
-
Perfect for Parties and Classrooms: Great for group activities or themed party stations. It’s especially popular at Halloween or for glow-in-the-dark birthday parties.
Ingredients
Creating your own glow-in-the-dark playdough is simple and customizable. The core ingredients are the same as traditional homemade playdough, with the addition of a glowing element:
-
1 cup all-purpose flour
-
½ cup salt
-
2 teaspoons cream of tartar
-
1 tablespoon vegetable oil
-
1 cup warm water
-
2 teaspoons washable fluorescent paint (glow-in-the-dark or UV-reactive)
-
Food coloring or dry Kool-Aid packets (optional, for added color and scent)
-
Sprinkles (optional, for added texture and fun)
Preparation (Step-by-Step Instructions)
Step 1: Mix Dry Ingredients
Start by combining the flour, salt, and cream of tartar in a large saucepan. Mix thoroughly to ensure the ingredients are evenly distributed. The salt helps preserve the playdough, the flour provides structure, and the cream of tartar gives the dough elasticity, making it pliable and long-lasting.
Step 2: Add Liquids and Glow Agent
Pour in the vegetable oil, warm water, and fluorescent paint. If you’d like to include food coloring or Kool-Aid for color and scent, add them at this stage. Stir the mixture well. The paint is what gives the dough its glowing effect, so be sure to choose a paint that is labeled as UV-reactive or glow-in-the-dark and safe for kids.
Step 3: Cook the Mixture
Place the saucepan over medium heat. Stir constantly. As the mixture heats, it will begin to thicken. After about two to three minutes, the dough should start to pull away from the sides of the pan and form a ball. Be careful not to overcook it, as this can lead to a crumbly texture.
Step 4: Knead the Dough
Once the dough has reached the right consistency, remove it from the heat and let it cool slightly. When it’s cool enough to touch, knead it on a clean surface for several minutes until smooth. This step is crucial for achieving a soft, uniform texture and evenly distributing the glow properties.
Step 5 (Optional): Add Sprinkles
If you want to add a touch of fun texture and color, mix in sprinkles during the kneading phase. This makes the dough visually stimulating and even more engaging for sensory play.
Step 6: Charge and Play
To activate the glowing effect, charge the dough under a bright light for a few minutes or play with it under a UV blacklight. The dough will glow more vividly the more it is exposed to light. For best results, use a UV blacklight for an instant and brilliant glow.
Variations
The base recipe is adaptable. Here are a few creative ways to make your playdough even more exciting:
-
Rainbow Glow Dough: Divide the dough into smaller portions and color each one differently using food coloring or Kool-Aid packets. This creates a glowing rainbow when kids mix and mold the dough.
-
Galaxy-Themed Dough: Use deep blue or black food coloring, add glitter and star-shaped confetti, and pair it with the glow paint for a galaxy look.
-
Scented Dough: Use scented Kool-Aid packets or add a few drops of essential oil (like lavender or orange) for a calming or energizing scent.
-
Glitter Glow Dough: Add fine glitter to give your dough extra sparkle. Just ensure it’s cosmetic or craft-grade glitter and safe for kids.
-
Slimy Glow Mix: For a gooier texture, reduce the amount of flour slightly and increase the water to create a slime-like consistency that still glows.
Crafting Note
While this playdough is made from non-toxic materials, it is not edible. Always supervise young children during play, especially those under three years of age. Avoid using it near carpeted areas, and keep it away from fabrics and furniture to prevent staining from the fluorescent paint or food coloring.
For kids with sensitive skin, do a small patch test to ensure they don’t react to the paint or coloring. Most washable fluorescent paints are designed for kids and are labeled as non-toxic, but it’s always best to double-check product safety labels.
Serving Suggestions (Creative Play Ideas)
Glow in the Dark Playdough isn’t just a craft—it’s a versatile tool for imaginative play. Here are a few ideas for using your glowing creation:
-
Sensory Bins: Pair with plastic bugs, glow sticks, mini skeletons, or small Halloween decorations to create a spooky sensory bin.
-
Glow Alphabet & Numbers: Shape the dough into letters or numbers for early learning in a fun, glowing format.
-
Glow Art Sculptures: Encourage kids to make animals, monsters, or scenes using only the glowing dough. Under a blacklight, it turns into an interactive light show.
-
Themed Party Stations: Perfect for birthdays or Halloween events. Set up a glow dough station with UV blacklights and cookie cutters for kids to explore.
-
Science Meets Art: Use the playdough to discuss phosphorescence, reflection, and how UV light works. Turn it into a mini science experiment.
Tips for Best Results
To ensure your playdough turns out perfect every time, keep these expert tips in mind:
-
Use White Flour: Dark flours or whole grains may affect the color vibrancy and reduce the glow.
-
Use Quality Fluorescent Paint: Not all glow paints are equal. For best results, use a washable UV-reactive or glow-in-the-dark paint designed for children.
-
Store in an Airtight Container: Keep your dough fresh by storing it in a sealed container or zip-top bag at room temperature. Avoid refrigeration, which can dry it out.
-
Revive with Water: If the dough begins to dry out, add a drop or two of warm water and knead until soft again.
-
Protect Surfaces: Use a playmat or tray to avoid messes, especially when using colored dough.
Prep Time: 10 minutes
Cook Time: 3 minutes
Total Time: 13 minutes
Nutritional Information
This dough is not intended for consumption, but for safety-conscious parents or educators, here’s a brief overview of its components:
-
Calories: Not applicable
-
Protein: Minimal (from flour only)
-
Sodium: High (due to salt content, which also acts as a preservative)
-
Allergens: Contains wheat (gluten); check labels on paint and Kool-Aid for any additional allergens
Frequently Asked Questions (FAQs)
Can I make glow dough without paint?
Technically yes, but the glow effect won’t be present. If you can find glow-in-the-dark powder or glow pigment that is non-toxic, you can substitute that for paint.
Is it safe for toddlers?
Yes, under supervision. The dough is non-toxic, but it is not edible. Always supervise young children and avoid allowing them to put it in their mouths.
Can I store it for future use?
Absolutely. Keep it in an airtight container and store in a cool, dry place. It will last for up to two weeks. Discard if it begins to smell bad or becomes moldy.
Can I use actual glow-in-the-dark powder instead of paint?
Yes, as long as the powder is non-toxic and labeled safe for children. Mix it in well during the kneading phase for even distribution.
How can I make the glow stronger?
Play in a dark room under a blacklight for the most vibrant glow. If using glow-in-the-dark paint (instead of UV paint), charge the dough under a bright lamp or the sun for a few minutes before turning off the lights.
Conclusion
Glow in the Dark Playdough is more than just a craft project—it’s a full sensory experience that combines tactile exploration, creative expression, and visual wonder. With a simple list of ingredients and a few easy steps, you can create a glowing world of fun right in your kitchen or classroom. This project is ideal for holidays, parties, science lessons, or just a fun activity on a rainy afternoon.
Whether you’re a parent, teacher, or caregiver, this luminous dough offers a safe, budget-friendly way to light up playtime. So gather your ingredients, charge up your blacklight, and get ready to glow!
Let the magical creations begin.
