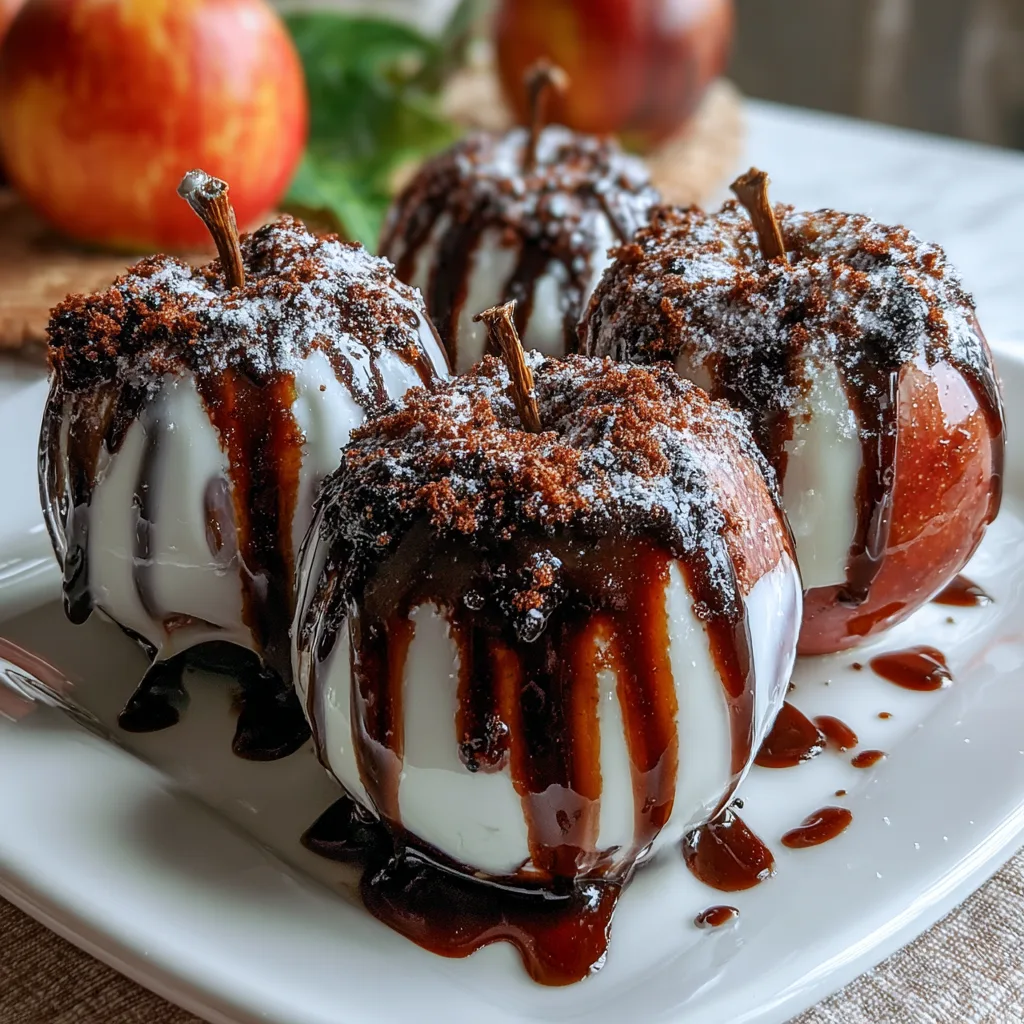
Introduction to Halloween Chocolate-Covered Apples
As the leaves turn and the air gets crisp, I can’t help but get excited about Halloween. One of my favorite treats to whip up is Halloween Chocolate-Covered Apples. They’re not just delicious; they’re a fun way to bring a festive spirit to your home. If you’re a busy mom or professional like me, you’ll appreciate how quick and easy this recipe is. In just 20 minutes, you can create a stunning dessert that will wow your guests and delight your family. Trust me, these chocolate-covered apples are sure to become a Halloween tradition!
Why You’ll Love This Halloween Chocolate-Covered Apples
These Halloween Chocolate-Covered Apples are a delightful blend of simplicity and flavor. They come together in just 20 minutes, making them perfect for busy schedules. The tartness of the apples paired with rich chocolate creates a taste sensation that’s hard to resist. Plus, they’re customizable! You can add your favorite toppings, making each apple a unique treat. It’s a fun, festive way to celebrate Halloween with minimal fuss!
Ingredients for Halloween Chocolate-Covered Apples
Gathering the right ingredients is the first step to creating these delightful Halloween Chocolate-Covered Apples. Here’s what you’ll need:
- Apples: Choose medium-sized apples, like Granny Smith, for a tart contrast to the sweet chocolate. Their firm texture holds up well when dipped.
- Chocolate Chips: I love using semi-sweet chocolate chips for a classic flavor. You can also try dark or milk chocolate for a different twist.
- Coconut Oil: This helps the chocolate melt smoothly and gives it a nice sheen. If you don’t have coconut oil, vegetable oil works too!
- Sprinkles or Crushed Nuts: These are optional but add a festive touch. Get creative! Use crushed cookies, candy, or even edible glitter for a spooky flair.
For exact measurements, check the bottom of the article where you can find everything listed for easy printing. Happy cooking!
How to Make Halloween Chocolate-Covered Apples
Now that you have your ingredients ready, let’s dive into the fun part—making these Halloween Chocolate-Covered Apples! Follow these simple steps, and you’ll have a delicious treat in no time.
Step 1: Prepare the Apples
Start by washing your apples thoroughly under cool running water. This removes any wax or residue. After washing, dry them completely with a clean towel. A dry surface helps the chocolate stick better, ensuring a perfect coating.
Step 2: Insert Sticks
Next, take a wooden stick and gently insert it into the top of each apple. Aim for the center, pushing it about halfway in. This will serve as your handle, making it easy to dip and enjoy your chocolate-covered apples.
Step 3: Melt the Chocolate
In a microwave-safe bowl, combine your chocolate chips and coconut oil. The oil helps the chocolate melt smoothly and gives it a lovely shine. Microwave the mixture in 30-second intervals, stirring in between. Keep going until it’s completely melted and smooth. Be careful not to overheat!
Step 4: Dip the Apples
Now comes the fun part! Hold each apple by the stick and dip it into the melted chocolate. Make sure to coat it fully, giving it a nice, thick layer. You can even twist the apple a bit to ensure even coverage. Let any excess chocolate drip off before moving to the next step.
Step 5: Drip and Decorate
Place the dipped apples on a parchment-lined baking sheet. This prevents them from sticking. While the chocolate is still wet, sprinkle your favorite toppings over the apples. Get creative! Use sprinkles, crushed nuts, or even colorful candy for a festive touch.
Step 6: Chill to Set
Finally, pop the baking sheet into the refrigerator for about 30 minutes. This allows the chocolate to harden perfectly. Once set, your Halloween Chocolate-Covered Apples are ready to impress!
Tips for Success
- Use room temperature apples for better chocolate adherence.
- Don’t rush the melting process; stir often to avoid burning the chocolate.
- Experiment with different toppings to keep things exciting!
- For a smoother finish, let the chocolate cool slightly before dipping.
- Store your chocolate-covered apples in the fridge to keep them fresh.
Equipment Needed
- Microwave-safe bowl: Any heatproof bowl will do if you don’t have one.
- Wooden sticks: You can use popsicle sticks or even sturdy skewers as alternatives.
- Parchment paper: Wax paper works too for lining your baking sheet.
- Clean towel: A paper towel can also help dry your apples effectively.
Variations of Halloween Chocolate-Covered Apples
- Nutty Delight: Roll your chocolate-covered apples in crushed nuts like almonds or pecans for a crunchy texture.
- Cookie Crumble: Use crushed Oreos or graham crackers as a topping for a fun twist.
- Spooky Sprinkles: Opt for Halloween-themed sprinkles, like ghosts or pumpkins, to add a festive flair.
- Caramel Layer: Drizzle warm caramel over the chocolate for an extra layer of sweetness.
- Dark Chocolate: Swap semi-sweet chocolate for dark chocolate for a richer flavor.
- Vegan Option: Use dairy-free chocolate chips and coconut oil to make these apples vegan-friendly.
Serving Suggestions for Halloween Chocolate-Covered Apples
- Pair your chocolate-covered apples with a warm cup of spiced cider for a cozy treat.
- Serve them on a festive platter with Halloween-themed decorations for a spooky presentation.
- Offer a side of caramel or chocolate sauce for dipping to enhance the experience.
- Include a variety of toppings on the side, allowing guests to customize their apples.
FAQs about Halloween Chocolate-Covered Apples
Can I use different types of chocolate for my Halloween Chocolate-Covered Apples?
Absolutely! You can use dark, milk, or even white chocolate. Each type brings its own unique flavor, so feel free to experiment and find your favorite!
How do I store leftover chocolate-covered apples?
Store your Halloween Chocolate-Covered Apples in the refrigerator. They’ll stay fresh for up to three days. Just make sure to keep them in an airtight container to prevent them from getting soggy.
Can I make these chocolate-covered apples ahead of time?
Yes! You can prepare them a day in advance. Just keep them refrigerated until you’re ready to serve. They make a great last-minute treat for unexpected guests!
What if my chocolate isn’t melting smoothly?
If your chocolate isn’t melting well, it might be overheating. Try reducing the microwave time and stirring more frequently. Adding a bit more coconut oil can also help achieve that smooth consistency.
Are there any allergy-friendly options for toppings?
Definitely! You can use seeds, dried fruits, or even dairy-free chocolate chips for a nut-free and allergy-friendly treat. Just check labels to ensure they meet your dietary needs.
Final Thoughts
Making Halloween Chocolate-Covered Apples is more than just a recipe; it’s a delightful experience that brings joy to both the cook and the lucky eaters. The smiles on my family’s faces as they bite into the sweet, chocolatey goodness are priceless. This treat is perfect for gatherings, parties, or simply a cozy night in. Plus, the creativity involved in decorating each apple adds a personal touch that makes it even more special. So, gather your loved ones, get those apples ready, and let the Halloween festivities begin! You’ll create delicious memories that last long after the treats are gone.
Print
Halloween Chocolate-Covered Apples that Wow Your Guests!
- Total Time: 20 minutes
- Yield: 4 servings 1x
- Diet: Vegetarian
Description
Delicious and festive chocolate-covered apples perfect for Halloween celebrations.
Ingredients
- 4 medium apples
- 2 cups chocolate chips
- 1 tablespoon coconut oil
- Sprinkles or crushed nuts for decoration
Instructions
- Wash and dry the apples thoroughly.
- Insert a wooden stick into the top of each apple.
- In a microwave-safe bowl, combine chocolate chips and coconut oil.
- Microwave in 30-second intervals, stirring until smooth.
- Dip each apple into the melted chocolate, ensuring it’s fully coated.
- Allow excess chocolate to drip off and place on a parchment-lined baking sheet.
- Sprinkle with decorations before the chocolate sets.
- Refrigerate for 30 minutes to harden the chocolate.
Notes
- Use tart apples like Granny Smith for a nice contrast with the sweet chocolate.
- Feel free to experiment with different toppings like crushed cookies or candy.
- Store in the refrigerator for up to 3 days.
- Prep Time: 15 minutes
- Cook Time: 5 minutes
- Category: Dessert
- Method: No-bake
- Cuisine: American
Nutrition
- Serving Size: 1 apple
- Calories: 250
- Sugar: 30g
- Sodium: 50mg
- Fat: 12g
- Saturated Fat: 7g
- Unsaturated Fat: 3g
- Trans Fat: 0g
- Carbohydrates: 35g
- Fiber: 3g
- Protein: 2g
- Cholesterol: 0mg
Keywords: Halloween, Chocolate-Covered Apples, Dessert, Party Treats


