
Introduction to Homemade Vanilla Beignets
Ah, the delightful aroma of freshly fried beignets wafting through the air! It takes me back to my childhood, where I would eagerly await the weekends, dreaming of fluffy, pillowy bites dusted with powdered sugar. Homemade vanilla beignets are not just a treat; they are a celebration of joy, warmth, and a sprinkle of nostalgia. Each bite is like a soft cloud, melting in your mouth and leaving you with a sweet smile.
My love for these little pastries began during a family trip to New Orleans. The vibrant streets were alive with music, laughter, and the irresistible scent of beignets from Café du Monde. I remember the first time I took a bite; it was as if I had discovered a hidden treasure. The crispy exterior gave way to a soft, airy center, and the powdered sugar danced on my tongue like a sweet fairy. From that moment on, I was determined to recreate that magic in my own kitchen.
Making homemade vanilla beignets is not just about following a recipe; it’s about crafting memories. Whether you’re hosting a brunch, celebrating a special occasion, or simply indulging in a sweet treat, these beignets are sure to impress. They are surprisingly easy to make, and the joy of sharing them with family and friends is truly priceless.
In this article, I’ll guide you through the process of making these delightful pastries from scratch. From the ingredients to the frying techniques, I’ll share my personal tips and tricks to ensure your beignets turn out perfectly every time. So, roll up your sleeves, and let’s embark on this delicious culinary adventure together!
Ingredients for Homemade Vanilla Beignets
Before we dive into the delightful world of homemade vanilla beignets, let’s gather our ingredients. Having everything ready makes the cooking process smoother and more enjoyable. Trust me, there’s nothing quite like the feeling of being fully prepared, like a chef in a bustling kitchen! Here’s what you’ll need:
Main Ingredients
- 2 cups all-purpose flour
- 1/4 cup granulated sugar
- 1 tablespoon baking powder
- 1/2 teaspoon salt
- 1/2 cup whole milk
- 2 large eggs
- 1 teaspoon pure vanilla extract
- 1/4 cup unsalted butter, melted
- Vegetable oil for frying
When it comes to the flour, I always opt for high-quality all-purpose flour. It makes a noticeable difference in texture. And don’t skimp on the vanilla extract! Using pure vanilla extract instead of imitation will elevate the flavor of your beignets to heavenly heights.
Optional Add-ons
- 1/2 teaspoon ground cinnamon (for a warm spice kick)
- Chocolate chips or fruit preserves (for a sweet surprise inside)
- Additional powdered sugar for dusting
Feel free to get creative! I love adding a sprinkle of cinnamon to the dough for a cozy twist. And if you’re feeling adventurous, why not tuck a few chocolate chips inside before frying? It’s like a little treasure waiting to be discovered!
Now that we have our ingredients lined up, we’re one step closer to making those fluffy, dreamy beignets. Let’s keep the momentum going and move on to the next exciting part: preparing the dough!
How to Prepare Homemade Vanilla Beignets
Now that we have our ingredients ready, it’s time to roll up our sleeves and dive into the fun part—preparing the dough! Making homemade vanilla beignets is a delightful process, and I can’t wait to share my step-by-step guide with you. Let’s get started!
Step 1: Mixing the Dough
First things first, let’s mix our dough! In a large mixing bowl, combine the flour, sugar, baking powder, and salt. I like to whisk these dry ingredients together to ensure they’re well blended. Then, in a separate bowl, whisk together the milk, eggs, melted butter, and vanilla extract. Once that’s done, pour the wet ingredients into the dry ingredients.
Now, here’s a little tip: use a spatula to gently fold the mixture together. You want to combine everything until just mixed. Overmixing can lead to tough beignets, and we want them to be light and fluffy!
Tips for Mixing the Dough
- Make sure your butter is melted but not too hot; it should be warm to the touch.
- Don’t worry if the dough looks a bit lumpy; that’s perfectly fine!
Step 2: Chilling the Dough
Once your dough is mixed, it’s time to chill it. Cover the bowl with plastic wrap and place it in the refrigerator for at least 30 minutes. Chilling the dough is crucial because it helps the gluten relax, making the beignets tender and airy.
Importance of Chilling
Chilling also makes the dough easier to roll out later. Plus, it gives the flavors a chance to meld together, enhancing the overall taste. Trust me, this step is worth the wait!
Step 3: Rolling and Cutting the Beignets
After the dough has chilled, it’s time to roll it out! Lightly flour your work surface and turn the dough out onto it. Using a rolling pin, roll the dough to about 1/4 inch thick. Then, grab a sharp knife or a pizza cutter and cut the dough into squares, about 2 inches by 2 inches.
Tips for Rolling and Cutting
- Keep your work surface floured to prevent sticking.
- For perfectly shaped beignets, use a ruler to measure your squares.
Step 4: Frying the Beignets
Now comes the exciting part—frying! In a deep pot or a heavy skillet, heat about 2 inches of vegetable oil to 350°F (175°C). Carefully drop a few beignet squares into the hot oil, making sure not to overcrowd the pot. Fry them for about 2-3 minutes on each side, or until they’re golden brown and puffed up.
Tips for Perfect Frying
- Use a thermometer to keep an eye on the oil temperature; too hot, and they’ll burn; too cool, and they’ll absorb too much oil.
- Once fried, place the beignets on a paper towel-lined plate to drain excess oil.
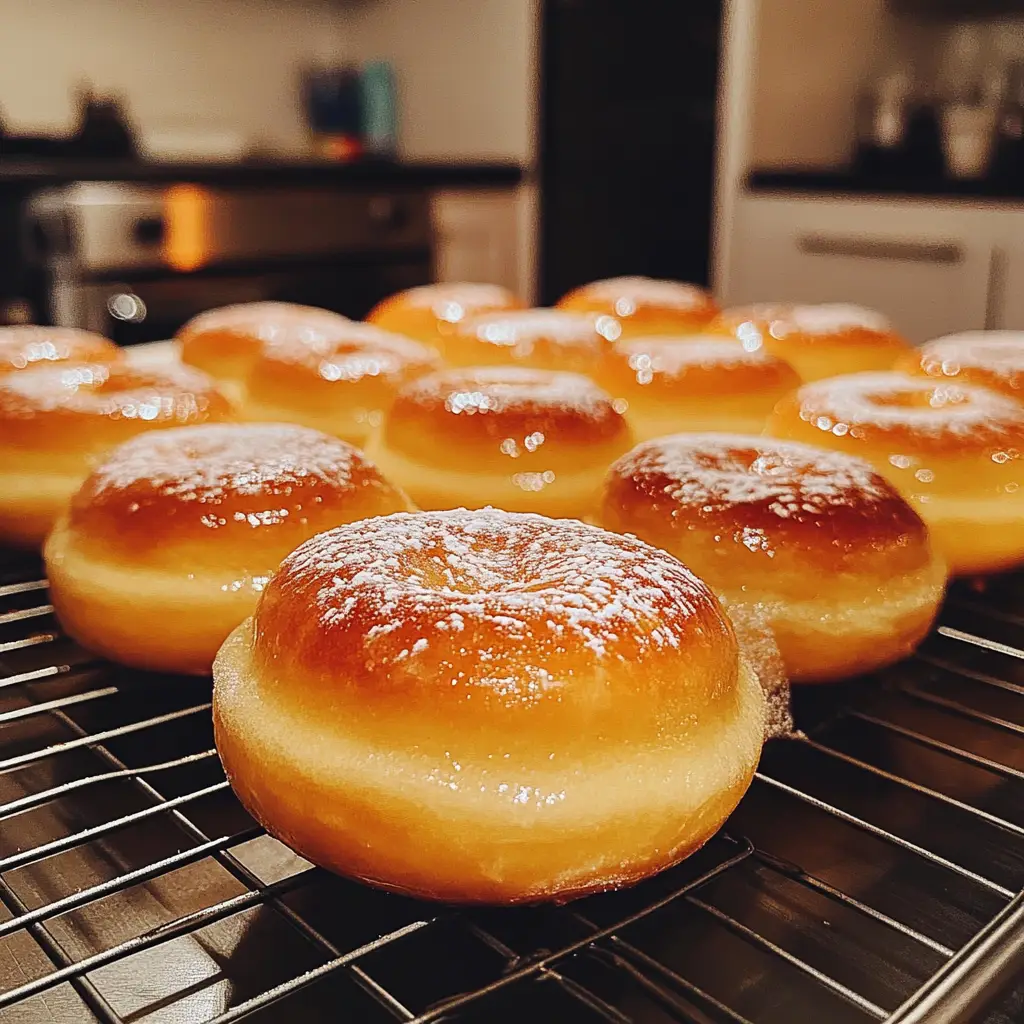
Step 5: Dusting with Powdered Sugar
Finally, it’s time for the finishing touch! While the beignets are still warm, dust them generously with powdered sugar. I like to use a fine mesh sieve for an even coating. The powdered sugar adds a sweet touch and makes them look oh-so-tempting!
Tips for Dusting
- Don’t be shy with the powdered sugar; it’s part of the charm!
- For an extra special treat, serve them with a side of chocolate sauce or fruit preserves for dipping.
And there you have it! Your homemade vanilla beignets are ready to be devoured. The process may seem a bit involved, but trust me, the end result is worth every moment spent in the kitchen. Let’s keep the momentum going and explore the equipment needed for this delightful recipe!
Equipment Needed for Homemade Vanilla Beignets
Before we dive into the frying frenzy, let’s make sure we have all the right tools at our fingertips. Having the right equipment can make the process smoother and more enjoyable. Here’s what you’ll need to whip up those delightful homemade vanilla beignets:
- Mixing Bowls: A large mixing bowl for combining the ingredients and a smaller bowl for whisking the wet ingredients.
- Whisk: A whisk is essential for blending the wet ingredients smoothly. If you don’t have one, a fork will do the trick!
- Rolling Pin: This will help you roll out the dough to the perfect thickness. If you don’t have a rolling pin, a clean wine bottle can work in a pinch.
- Sharp Knife or Pizza Cutter: For cutting the dough into squares. A pizza cutter makes this step super quick and easy!
- Deep Pot or Heavy Skillet: You’ll need something to fry the beignets in. A deep pot is ideal for preventing oil splatter, but a heavy skillet can work too.
- Thermometer: A kitchen thermometer is key for checking the oil temperature. If you don’t have one, you can drop a small piece of dough into the oil; if it sizzles and rises, you’re good to go!
- Slotted Spoon: This handy tool will help you remove the beignets from the hot oil without making a mess.
- Paper Towels: For draining excess oil after frying. You can also use a wire rack if you have one!
- Fine Mesh Sieve: Perfect for dusting the beignets with powdered sugar evenly. If you don’t have one, a simple sifter will work just as well.
With these tools in hand, you’re all set to create your own batch of fluffy, sweet beignets. Remember, cooking is all about improvisation, so don’t hesitate to get creative with what you have! Now, let’s move on to the fun part—exploring variations of these delicious treats!
Variations of Homemade Vanilla Beignets
While the classic homemade vanilla beignets are a delightful treat on their own, there’s always room for creativity in the kitchen! I love experimenting with different flavors and fillings to keep things exciting. Here are a few variations that you might want to try:
- Cinnamon Sugar Beignets: After frying, toss the warm beignets in a mixture of cinnamon and granulated sugar. It adds a warm, cozy flavor that’s perfect for chilly mornings.
- Chocolate-Filled Beignets: For a decadent twist, place a few chocolate chips in the center of each square before frying. The melted chocolate inside is a delightful surprise!
- Fruit-Filled Beignets: Try adding a spoonful of fruit preserves or jam inside the dough before frying. Raspberry or strawberry preserves work wonderfully, giving a burst of fruity flavor.
- Maple Glazed Beignets: Instead of powdered sugar, drizzle a maple glaze over the beignets after frying. Just mix powdered sugar with maple syrup and a splash of milk for a sweet, sticky topping.
- Matcha Beignets: For a unique flavor, add a teaspoon of matcha powder to the dry ingredients. It gives the beignets a lovely green hue and a subtle earthy taste.
These variations not only add a fun twist to the classic recipe but also allow you to cater to different tastes and preferences. I encourage you to get creative and make these beignets your own! Now, let’s move on to some essential cooking notes to ensure your beignets turn out perfectly every time.
Cooking Notes for Homemade Vanilla Beignets
As I’ve learned through my culinary adventures, a few key cooking notes can make all the difference when it comes to perfecting homemade vanilla beignets. Here are some tips that I always keep in mind:
- Fresh Ingredients: Always use fresh ingredients, especially the baking powder. Stale baking powder can lead to flat beignets, and we want them to rise beautifully!
- Temperature Matters: Ensure your oil is at the right temperature before frying. If it’s too hot, the beignets will burn; too cool, and they’ll absorb too much oil. A thermometer is your best friend here!
- Don’t Overcrowd the Pot: Frying too many beignets at once can lower the oil temperature, resulting in greasy pastries. Fry in small batches for the best results.
- Let Them Cool: After frying, allow the beignets to cool slightly on a paper towel-lined plate. This helps them maintain their fluffy texture while draining excess oil.
- Serve Fresh: Beignets are best enjoyed fresh and warm. If you have leftovers, reheat them in the oven for a few minutes to bring back their delightful texture.
By keeping these cooking notes in mind, you’ll be well on your way to creating the most scrumptious homemade vanilla beignets. Now, let’s explore some serving suggestions that will elevate your beignet experience even further!
Serving Suggestions for Homemade Vanilla Beignets
Now that your homemade vanilla beignets are golden brown and dusted with powdered sugar, it’s time to think about how to serve them! Presentation can elevate the experience, and I love to get a little creative when it comes to serving these delightful treats. Here are some of my favorite serving suggestions:
- Classic Café Style: Serve your beignets on a beautiful platter, just like they do in New Orleans. Pair them with a steaming cup of café au lait or hot chocolate for a cozy brunch experience.
- Fruit Compote: A side of warm fruit compote, like berry or apple, adds a fresh and tangy contrast to the sweetness of the beignets. It’s like a burst of sunshine on your plate!
- Chocolate Dipping Sauce: Melt some chocolate and serve it in a small bowl for dipping. The rich chocolate pairs perfectly with the fluffy beignets, creating a decadent treat.
- Ice Cream Delight: For a fun twist, serve warm beignets with a scoop of vanilla ice cream on top. The warm and cold combination is simply heavenly!
- Garnish with Fresh Berries: Add a handful of fresh berries on the side for a pop of color and a burst of flavor. Strawberries, raspberries, or blueberries work wonderfully!
These serving suggestions not only enhance the visual appeal but also add layers of flavor to your homemade vanilla beignets. Whether you’re hosting a brunch or enjoying a quiet evening at home, these ideas will surely impress your family and friends. Now, let’s move on to some tips for making the best homemade vanilla beignets!
Tips for Making the Best Homemade Vanilla Beignets
As I’ve spent countless hours perfecting my homemade vanilla beignets, I’ve gathered a treasure trove of tips that can help you achieve the best results. These little nuggets of wisdom will ensure your beignets are not only delicious but also a joy to make. Here’s what I’ve learned:
- Use Room Temperature Ingredients: Let your eggs and milk sit out for a bit before mixing. Room temperature ingredients blend more easily, creating a smoother dough.
- Don’t Rush the Chilling: Chilling the dough is essential for achieving that light and airy texture. If you can, let it chill a bit longer than 30 minutes for even better results.
- Test the Oil: Before frying all your beignets, do a test fry with a small piece of dough. This way, you can adjust the oil temperature if needed and ensure perfect frying.
- Keep an Eye on Frying Time: Beignets can go from golden brown to burnt in a flash. Stay close to the stove and flip them as soon as they puff up and turn golden.
- Experiment with Flavors: Don’t hesitate to add your own twist! Whether it’s a hint of nutmeg or a splash of almond extract, personalizing the flavor can make your beignets truly unique.
With these tips in your back pocket, you’re well on your way to creating the most delightful homemade vanilla beignets. Remember, cooking is all about having fun and enjoying the process, so don’t stress too much. Embrace the adventure, and let your creativity shine! Now, let’s take a look at the breakdown of time for making these scrumptious treats.
Breakdown of Time for Homemade Vanilla Beignets
Now that we’ve covered the ingredients, preparation, and tips for making the best homemade vanilla beignets, let’s talk about the time it takes to create these delightful treats. Knowing the time commitment can help you plan your cooking adventure better. Here’s a quick breakdown:
- Prep Time: 15 minutes – This includes gathering your ingredients, mixing the dough, and getting everything ready for chilling.
- Chilling Time: 30 minutes – This is essential for achieving that light and fluffy texture. Patience is key here!
- Cooking Time: 15 minutes – Frying the beignets in small batches will take about 2-3 minutes per batch, so keep an eye on the clock.
- Total Time: 1 hour – From start to finish, you can have your homemade vanilla beignets ready to enjoy in about an hour!
With this timeline in mind, you can easily fit making these beignets into your day. Whether it’s a weekend brunch or a special occasion, you’ll be able to whip up a batch of these fluffy delights in no time. Now, let’s move on to the nutritional information for those who are curious about what’s in these sweet treats!
Nutritional Information for Homemade Vanilla Beignets
As a passionate home cook, I believe it’s important to enjoy our culinary creations while being mindful of what goes into them. Here’s a quick look at the nutritional information for homemade vanilla beignets, so you can savor each bite with a little knowledge:
- Serving Size: 1 beignet (approximately 50g)
- Calories: 150-200 calories
- Total Fat: 8g (Saturated Fat: 4g)
- Cholesterol: 40mg
- Sodium: 100mg
- Total Carbohydrates: 20g (Dietary Fiber: 0g, Sugars: 5g)
- Protein: 3g
Keep in mind that these values can vary based on the specific ingredients you use and how much powdered sugar you add on top. While homemade vanilla beignets are a delightful treat, moderation is key. Enjoy them as a special indulgence, and don’t forget to share with friends and family for a truly joyful experience!
Frequently Asked Questions about Homemade Vanilla Beignets
As I’ve shared my love for homemade vanilla beignets, I often get questions from fellow food enthusiasts eager to try their hand at this delightful treat. I love answering these questions because it shows just how much excitement there is around making these fluffy pastries! Here are some of the most frequently asked questions I encounter, along with my personal insights:
Can I make the dough ahead of time?
Absolutely! You can prepare the dough a day in advance. Just mix it up, chill it, and then wrap it tightly in plastic wrap. When you’re ready to fry, simply roll it out and cut it into squares. It’s a great way to save time on a busy morning!
What if I don’t have a thermometer?
No worries! If you don’t have a thermometer, you can do a simple test. Drop a small piece of dough into the hot oil. If it sizzles and rises to the surface, the oil is ready for frying. Just keep an eye on it to avoid burning!
Can I bake these beignets instead of frying them?
While frying gives beignets their signature texture, you can bake them for a healthier option. Preheat your oven to 375°F (190°C), place the cut squares on a baking sheet, and bake for about 10-12 minutes or until golden brown. They won’t be quite the same, but they’ll still be delicious!
How do I store leftover beignets?
Leftover beignets can be stored in an airtight container at room temperature for up to two days. If you want to keep them longer, consider freezing them. Just make sure to let them cool completely before placing them in a freezer-safe bag. When you’re ready to enjoy, reheat them in the oven for a few minutes!
Can I use gluten-free flour?
Yes, you can! If you’re looking for a gluten-free option, substitute the all-purpose flour with a gluten-free flour blend. Just make sure it’s a blend that works well for baking. The texture may vary slightly, but they’ll still be tasty!
These questions reflect the curiosity and enthusiasm that comes with making homemade vanilla beignets. I hope my answers help you feel more confident in your culinary adventure. Remember, cooking is all about experimenting and having fun, so don’t hesitate to make these beignets your own! Now, let’s wrap up our delightful journey with a conclusion on these sweet treats.
Conclusion on Homemade Vanilla Beignets
In conclusion, homemade vanilla beignets are more than just a delicious treat; they are a heartfelt experience that brings joy to any occasion. The process of making these fluffy pastries is a delightful journey filled with creativity and love. From mixing the dough to the sweet aroma of frying, each step is an opportunity to create lasting memories with family and friends.
What I adore most about homemade vanilla beignets is their versatility. Whether you enjoy them plain, dusted with powdered sugar, or filled with delightful surprises, there’s a version for everyone. They are perfect for brunch gatherings, cozy family breakfasts, or even as a sweet indulgence on a quiet afternoon.
So, roll up your sleeves, gather your loved ones, and embark on this culinary adventure. With a little patience and a sprinkle of creativity, you’ll be rewarded with warm, fluffy beignets that will surely bring smiles to everyone’s faces. Trust me, once you take that first bite, you’ll understand why these little pastries hold a special place in my heart. Happy cooking!
