

Introduction to Maple Glazed Donut Holes
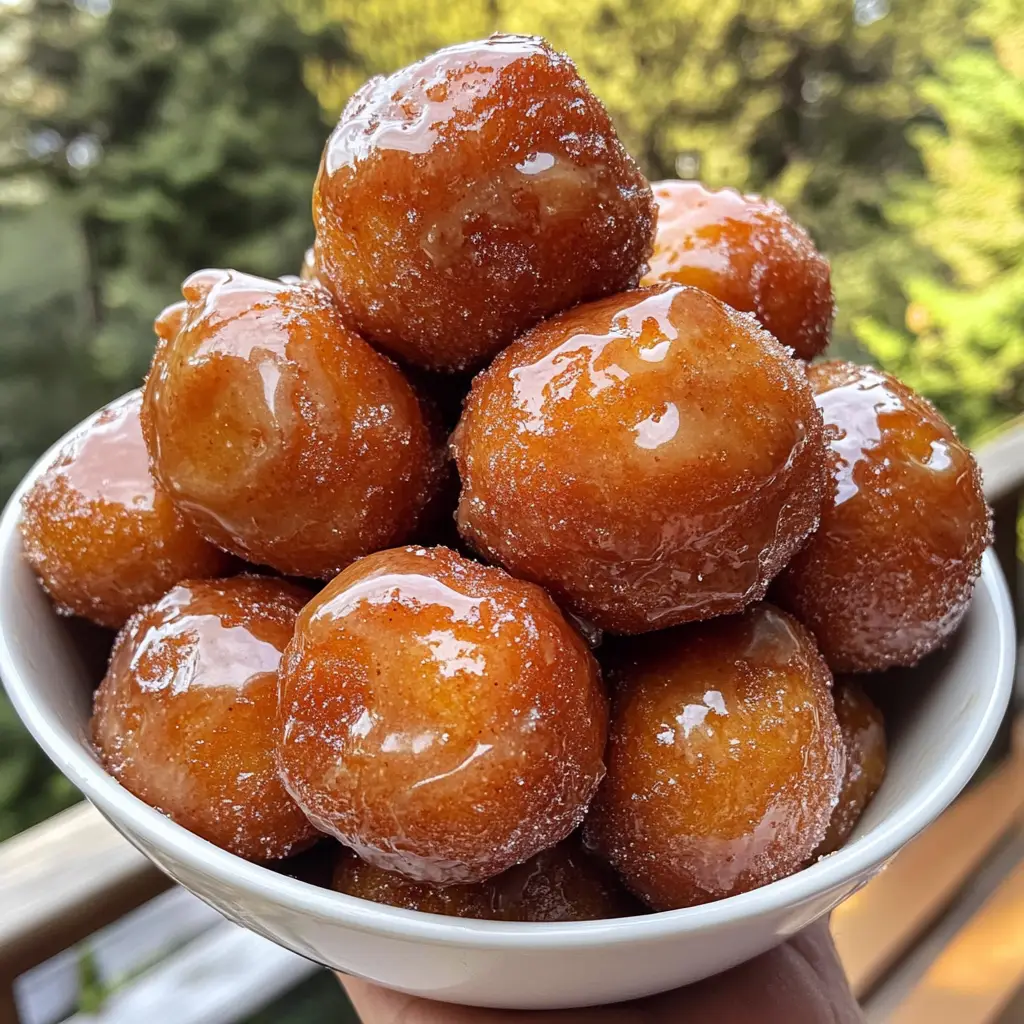
There’s something magical about the aroma of freshly baked Maple Glazed Donut Holes wafting through the kitchen. It instantly brings back memories of cozy mornings and sweet indulgences. As a busy mom, I know how precious those moments can be, and this recipe is a delightful solution for a quick treat that will impress your loved ones. Whether you’re looking to brighten up a hectic day or simply want to enjoy a sweet moment with your family, these donut holes are the perfect answer. Trust me, once you try them, you won’t be able to resist!
Why You’ll Love This Maple Glazed Donut Holes
These Maple Glazed Donut Holes are not just a treat; they’re a lifesaver for busy days! They come together in under 30 minutes, making them perfect for a quick breakfast or an afternoon snack. The soft, fluffy texture paired with the rich maple glaze is simply irresistible. Plus, they’re a hit with kids and adults alike, ensuring smiles all around. Who doesn’t love a sweet moment that’s easy to whip up?
Ingredients for Maple Glazed Donut Holes
Gathering the right ingredients is the first step to creating these delightful Maple Glazed Donut Holes. Here’s what you’ll need:
- All-purpose flour: The backbone of your donut holes, providing structure and fluffiness.
- Granulated sugar: This sweetener adds just the right amount of sweetness to balance the flavors.
- Baking powder: A leavening agent that helps your donut holes rise and become light and airy.
- Salt: A pinch enhances the overall flavor, making the sweetness pop.
- Ground cinnamon: This warm spice adds a cozy touch, perfect for any sweet treat.
- Milk: It brings moisture to the batter, ensuring a tender texture.
- Unsalted butter: Melted butter adds richness and flavor, making each bite melt in your mouth.
- Egg: This binds the ingredients together and contributes to the donut holes’ fluffiness.
- Vanilla extract: A splash of vanilla elevates the flavor profile, adding warmth and depth.
- Powdered sugar: Essential for the glaze, it creates that sweet, smooth finish.
- Maple syrup: The star of the show! It infuses the glaze with a rich, sweet maple flavor.
For those looking to customize, consider adding chopped nuts for crunch or sprinkles for a fun twist. You can find all the exact measurements at the bottom of the article, ready for printing. Happy baking!

How to Make Maple Glazed Donut Holes
Step 1: Preheat and Prepare
First things first, preheat your oven to 350°F (175°C). This step is crucial for achieving that perfect golden-brown color. While the oven warms up, grab your donut hole pan and give it a good greasing. I like to use a non-stick spray, but you can also brush it with melted butter. This ensures that your delightful donut holes pop out easily after baking. Trust me, you don’t want to lose any of that deliciousness!
Step 2: Mix Dry Ingredients
In a large mixing bowl, whisk together the all-purpose flour, granulated sugar, baking powder, salt, and ground cinnamon. This is where the magic begins! The flour provides structure, while the sugar adds sweetness. The baking powder is your secret weapon for fluffiness, and the salt enhances all those lovely flavors. Make sure everything is well combined, as this will set the stage for your Maple Glazed Donut Holes to shine!
Step 3: Combine Wet Ingredients
In another bowl, mix together the milk, melted butter, egg, and vanilla extract. I love the smell of vanilla; it’s like a warm hug for your senses! Whisk these ingredients until they’re well combined. The melted butter adds richness, while the egg binds everything together. This mixture will bring moisture to your donut holes, ensuring they’re soft and fluffy. It’s the perfect complement to the dry ingredients!
Step 4: Combine Mixtures
Now, it’s time to bring the two mixtures together. Pour the wet ingredients into the bowl with the dry ingredients. Gently stir until just combined; be careful not to overmix! A few lumps are perfectly fine. Overmixing can lead to dense donut holes, and we want them light and airy. This is where the excitement builds as you see your batter come together!
Step 5: Fill the Pan
Using a spoon or a small ice cream scoop, fill each donut hole cavity about 2/3 full with the batter. This allows room for them to rise without overflowing. I find that using a scoop makes this step so much easier and less messy! Make sure to spread the batter evenly in each cavity. You want every donut hole to be just as delicious as the last!
Step 6: Bake
Pop the filled pan into your preheated oven and bake for 10-12 minutes. Keep an eye on them; you want them to turn a lovely golden brown. To check for doneness, insert a toothpick into the center of a donut hole. If it comes out clean, they’re ready! The aroma wafting through your kitchen will be absolutely irresistible, and you’ll be counting down the minutes until you can taste them!
Step 7: Cool and Glaze
Once baked, let the donut holes cool in the pan for a few minutes before transferring them to a wire rack. This helps them firm up a bit. While they cool, mix the powdered sugar and maple syrup in a separate bowl to create the glaze. Once the donut holes are cool enough to handle, dunk each one into the glaze. Place them back on the wire rack to set. The glaze will create a sweet, shiny finish that’s simply mouthwatering!
Tips for Success
- Measure your ingredients accurately for the best results.
- Don’t overmix the batter; a few lumps are okay!
- Use a toothpick to check for doneness; it should come out clean.
- Let the donut holes cool slightly before glazing for a better finish.
- Experiment with toppings like nuts or sprinkles for added fun!
Equipment Needed
- Donut hole pan: Essential for shaping your treats; a mini muffin pan can work in a pinch.
- Mixing bowls: Use at least two for wet and dry ingredients; any size will do.
- Whisk: Perfect for blending ingredients; a fork can also get the job done.
- Measuring cups and spoons: Accurate measurements are key; use a kitchen scale for precision.
- Wire rack: Ideal for cooling and glazing; a plate can substitute if needed.
Variations
- Chocolate Chip Maple Glazed Donut Holes: Add mini chocolate chips to the batter for a delightful chocolatey twist.
- Maple Pecan Donut Holes: Stir in chopped pecans for a nutty crunch that pairs beautifully with the maple flavor.
- Gluten-Free Option: Substitute all-purpose flour with a gluten-free blend to make these donut holes suitable for gluten-sensitive friends.
- Vegan Version: Replace the egg with a flax egg and use plant-based milk and butter for a delicious vegan treat.
- Spiced Maple Donut Holes: Add a pinch of nutmeg or ginger to the dry ingredients for an extra layer of warmth and flavor.
Serving Suggestions
- Pair your Maple Glazed Donut Holes with a steaming cup of coffee or tea for a cozy treat.
- Serve them alongside fresh fruit for a balanced breakfast or snack.
- For a fun presentation, arrange them on a decorative platter with colorful sprinkles.
- Drizzle extra maple syrup over the top for an indulgent touch.
FAQs about Maple Glazed Donut Holes
Can I make Maple Glazed Donut Holes ahead of time?
Absolutely! You can prepare the batter in advance and store it in the fridge for up to 24 hours. Just remember to give it a good stir before filling the donut hole pan. Freshly baked donut holes are always best, but this tip can save you time on busy mornings!
How do I store leftover donut holes?
To keep your Maple Glazed Donut Holes fresh, store them in an airtight container at room temperature for up to three days. If you want to keep them longer, consider freezing them. Just thaw and glaze when you’re ready to enjoy!
Can I use a different type of syrup for the glaze?
While maple syrup is the star of this recipe, you can experiment with other syrups like honey or agave for a different flavor profile. Just keep in mind that it will change the taste of your glaze, but it can be a fun twist!
What can I do if my donut holes are too dense?
If your Maple Glazed Donut Holes turn out dense, it might be due to overmixing the batter. Remember, a few lumps are okay! Also, ensure your baking powder is fresh, as expired leavening agents can affect the rise.
Can I make these donut holes without a donut hole pan?
Yes! If you don’t have a donut hole pan, you can use a mini muffin pan instead. Just adjust the baking time slightly, as mini muffins may take a bit longer to bake. The result will still be delicious!
Final Thoughts
Making Maple Glazed Donut Holes is more than just baking; it’s about creating sweet moments with your loved ones. The joy of watching them disappear in seconds is priceless! Each bite is a delightful blend of fluffy texture and rich maple flavor, making them a perfect treat for any occasion. Whether it’s a busy morning or a cozy afternoon snack, these donut holes bring smiles and warmth to the table. So, roll up your sleeves, gather your ingredients, and let the sweet aroma fill your home. Trust me, you’ll be glad you did!
Print
Maple Glazed Donut Holes: A Sweet Treat You Can’t Resist!
- Total Time: 27 minutes
- Yield: 24 donut holes 1x
- Diet: Vegetarian
Description
Maple Glazed Donut Holes are a delightful sweet treat that combines the rich flavor of maple syrup with the soft, fluffy texture of donut holes, making them irresistible.
Ingredients
- 2 cups all-purpose flour
- 1/2 cup granulated sugar
- 1 tablespoon baking powder
- 1/2 teaspoon salt
- 1/2 teaspoon ground cinnamon
- 1/2 cup milk
- 1/4 cup unsalted butter, melted
- 1 large egg
- 1 teaspoon vanilla extract
- 1 cup powdered sugar
- 1/4 cup maple syrup
Instructions
- Preheat the oven to 350°F (175°C) and grease a donut hole pan.
- In a large bowl, whisk together the flour, sugar, baking powder, salt, and cinnamon.
- In another bowl, mix the milk, melted butter, egg, and vanilla extract until well combined.
- Pour the wet ingredients into the dry ingredients and stir until just combined.
- Fill each donut hole cavity about 2/3 full with the batter.
- Bake for 10-12 minutes or until golden brown and a toothpick comes out clean.
- Let the donut holes cool for a few minutes before removing them from the pan.
- In a separate bowl, mix the powdered sugar and maple syrup to create the glaze.
- Dunk each donut hole into the glaze and place on a wire rack to set.
Notes
- For a stronger maple flavor, add more maple syrup to the glaze.
- These donut holes are best enjoyed fresh but can be stored in an airtight container for a few days.
- Feel free to add chopped nuts or sprinkles on top of the glaze for extra texture.
- Prep Time: 15 minutes
- Cook Time: 12 minutes
- Category: Dessert
- Method: Baking
- Cuisine: American
Nutrition
- Serving Size: 1 donut hole
- Calories: 120
- Sugar: 10g
- Sodium: 50mg
- Fat: 4g
- Saturated Fat: 2g
- Unsaturated Fat: 2g
- Trans Fat: 0g
- Carbohydrates: 18g
- Fiber: 0g
- Protein: 1g
- Cholesterol: 20mg
Keywords: Maple Glazed Donut Holes, donut holes, sweet treat, dessert recipe
