

Mini Pistachio Tartlets: Creamy, Crunchy Bliss Awaits!
Sensory-Rich Introduction with Immediate Craving
Imagine a delicate, buttery crust cradling a luscious pistachio filling that melts in your mouth. The moment you take a bite of these Mini Pistachio Tartlets, the satisfying crunch of the crust gives way to a smooth, nutty explosion of flavor that dances on your palate. These delightful treats are not just desserts; they are a celebration of textures and tastes that evoke memories of family gatherings and festive occasions. Whether it’s a holiday feast, a summer picnic, or an elegant brunch, these tartlets are the perfect sweet ending to any meal, leaving your guests craving more.
Why You’ll Love This Mini Pistachio Tartlets
- Texture Contrast: The flaky crust paired with the creamy filling creates a delightful contrast that keeps each bite interesting.
- Flavor Balance: The nutty sweetness of pistachios is perfectly complemented by the richness of cream and a hint of vanilla, making it a harmonious dessert.
- Versatility: These tartlets can be served at various occasions, from casual get-togethers to formal events, adapting to any setting.
- Ease of Preparation: With straightforward steps and minimal ingredients, even novice bakers can create these impressive treats.
- Universal Appeal: The combination of flavors and textures makes these tartlets a hit among both children and adults, ensuring everyone enjoys them.
Essential Tools & Preparation Strategy
- Food Processor: Essential for quickly blending the crust and filling ingredients to achieve a smooth consistency.
- Mini Tartlet Pans: These provide the perfect shape and size for individual servings, making them visually appealing.
- Rolling Pin: Necessary for rolling out the dough evenly, ensuring a consistent crust thickness.
- Baking Sheet: Used to hold the tartlet pans while baking, promoting even heat distribution for a perfectly baked crust.
- Mixing Bowls: Important for combining ingredients and preparing the filling, allowing for organized preparation.
- Whisk: Useful for mixing the filling ingredients thoroughly, ensuring a smooth and creamy texture.
- Cooling Rack: Helps cool the tartlets evenly after baking, preventing sogginess.
Ingredients & Their Roles in This Mini Pistachio Tartlets
For the Crust:
- All-Purpose Flour: Provides structure and stability to the crust.
- Unsalted Butter: Adds richness and flavor, creating a tender texture.
- Powdered Sugar: Sweetens the crust and contributes to its delicate texture.
- Egg Yolk: Acts as a binding agent, enriching the dough.
- Cold Water: Helps bring the dough together without overworking it.
For the Filling:
- Shelled Pistachios: The star ingredient, providing a nutty flavor and creamy texture.
- Granulated Sugar: Sweetens the filling, balancing the nuttiness of the pistachios.
- Heavy Cream: Adds richness and creaminess to the filling.
- Eggs: Provide structure and help set the filling during baking.
- Vanilla Extract: Enhances the overall flavor profile with a warm, aromatic note.
- Salt: Balances sweetness and enhances the flavors.
Substitutions:
- For a gluten-free option, substitute all-purpose flour with a gluten-free flour blend.
- Use almond milk or coconut cream in place of heavy cream for a dairy-free version.
Step-by-Step Guide to Perfect Mini Pistachio Tartlets
- Preheat the Oven: Set your oven to 350°F (175°C) to ensure it’s ready for baking.
- Prepare the Crust: In a food processor, combine flour, butter, and powdered sugar until the mixture resembles coarse crumbs.
- Form the Dough: Add the egg yolk and cold water, pulsing until the dough comes together. Avoid overmixing.
- Chill the Dough: Press the dough into mini tartlet pans and chill for 15 minutes to prevent shrinking during baking.
- Pre-Bake the Crusts: Bake the crusts for 15-20 minutes or until golden brown. Remove and let cool.
- Make the Filling: In the food processor, blend pistachios and sugar until finely ground. Add heavy cream, eggs, vanilla extract, and salt, blending until smooth.
- Fill the Tartlets: Pour the filling into the cooled tartlet shells, filling just below the rim to prevent overflow.
- Bake Again: Bake for an additional 20-25 minutes, or until the filling is set and slightly puffed. Let cool before serving.
Chef’s Notes & Pro Tips for Flawless Results
- Make-Ahead Instructions: These tartlets can be made a day in advance; store in the refrigerator until ready to serve.
- Storage: Keep leftovers in an airtight container in the fridge for up to 3 days.
- Equipment Recommendations: Invest in high-quality mini tartlet pans for even baking and easy removal.
- Customization Options: Experiment with different nuts or flavorings, such as almond or hazelnut, for a unique twist.
Avoid These Common Cooking Mistakes
- Overworking the Dough: This can lead to a tough crust. Solution: Mix until just combined.
- Not Chilling the Crust: Skipping this step can cause the crust to shrink while baking. Solution: Always chill the dough before baking.
- Filling Too Full: This can cause overflow during baking. Solution: Fill just below the rim.
- Not Pre-Baking the Crust: This can result in a soggy bottom. Solution: Always pre-bake until golden.
- Using Stale Pistachios: This can affect the flavor. Solution: Use fresh, high-quality pistachios.
- Not Letting the Tartlets Cool: Serving them warm can make the filling too soft. Solution: Allow to cool completely before serving.
- Skipping the Garnish: This can make the tartlets look less appealing. Solution: Always add a finishing touch like crushed nuts or whipped cream.
Creative Variations & Customizations
- Chocolate Pistachio Tartlets: Add cocoa powder to the filling for a chocolatey twist.
- Fruit-Infused Tartlets: Top with fresh berries or a fruit compote for a seasonal touch.
- Spiced Pistachio Tartlets: Incorporate cardamom or cinnamon into the filling for a warm flavor profile.
- Vegan Version: Substitute eggs with flaxseed meal and use coconut cream for a dairy-free option.
- Savory Pistachio Tartlets: Add herbs like rosemary or thyme to the crust for a savory twist.
Perfect Pairings: What to Serve With Mini Pistachio Tartlets
- Whipped Cream: A dollop adds creaminess and balances the nutty flavor.
- Vanilla Ice Cream: The cold, creamy texture contrasts beautifully with the warm tartlets.
- Fresh Berries: Their tartness complements the sweetness of the tartlets.
- Honey or Maple Syrup: A drizzle enhances the sweetness and adds a touch of elegance.
- Green Tea: The lightness of green tea balances the richness of the dessert.
- Mimosas: Perfect for brunch, adding a festive touch to your gathering.
- Light Dessert Wine: Pair with Moscato to enhance the nutty flavors.
- Chocolate Sauce: For those who love a chocolate-pistachio combination, this is a must-try.
- Edible Flowers: Garnish for an elegant presentation at special occasions.
Storage & Meal Prep Instructions
- Refrigeration: Store tartlets in an airtight container in the fridge for up to 3 days.
- Freezing: For longer storage, freeze the baked tartlets in a single layer, then transfer to a container. Thaw in the fridge before serving.
- Reheating: Warm in a preheated oven at 300°F (150°C) for about 10 minutes to restore crispness.
Nutrition Facts & Health Insights
| Nutrient | Per Mini Tartlet |
|---|---|
| Calories | 220 |
| Sugar | 10 grams |
| Sodium | 50 milligrams |
| Fat | 15 grams |
| Saturated Fat | 7 grams |
| Unsaturated Fat | 6 grams |
| Trans Fat | 0 grams |
| Carbohydrates | 20 grams |
| Fiber | 2 grams |
| Protein | 4 grams |
| Cholesterol | 40 milligrams |
Health Insights: Pistachios are rich in healthy fats, protein, and antioxidants, making these tartlets a more nutritious dessert option.
Frequently Asked Questions
- Can I use salted pistachios?: Yes, but reduce the added salt in the filling.
- How do I know when the filling is set?: It should be slightly puffed and firm to the touch.
- Can I make these tartlets gluten-free?: Absolutely! Use a gluten-free flour blend for the crust.
- What can I substitute for heavy cream?: Use coconut cream or a dairy-free alternative for a lighter option.
- How long do these tartlets last?: They can be stored in the fridge for up to 3 days.
- Can I freeze the tartlets?: Yes, they freeze well; just ensure they are stored in an airtight container.
- What if I don’t have mini tartlet pans?: You can use a muffin tin as an alternative.
- How can I customize the flavor?: Add spices or different nuts to the filling for a unique twist.
- Is it necessary to pre-bake the crust?: Yes, this step prevents a soggy bottom.
- Can I use other nuts?: Yes, feel free to experiment with almonds or hazelnuts for different flavors.
Final Inspiration & Kitchen Confidence
As you embark on your journey to create these Mini Pistachio Tartlets, remember that baking is not just about following a recipe; it’s about expressing your creativity and sharing joy with others. Celebrate your achievements in the kitchen, and don’t hesitate to experiment with flavors and presentations. With each tartlet you make, you’re not just crafting a dessert; you’re creating memories. So gather your ingredients, roll up your sleeves, and let the sweet aroma of pistachios fill your home. Happy baking!
Print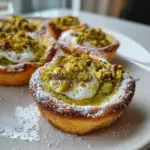
Mini Pistachio Tartlets: Creamy, Crunchy Bliss Awaits!
- Total Time: 1 hour 15 minutes
- Yield: 12 mini tartlets 1x
- Diet: Vegetarian
Description
Mini Pistachio Tartlets are a delightful combination of creamy pistachio filling nestled in a buttery, flaky crust. Each bite offers a satisfying crunch followed by a smooth, nutty flavor that dances on the palate, making them an irresistible treat for any occasion.
Ingredients
- For the crust:
- 1 ½ cups all-purpose flour
- ½ cup unsalted butter, chilled and cubed
- ¼ cup powdered sugar
- 1 large egg yolk
- 2–3 tablespoons cold water
- For the filling:
- 1 cup shelled pistachios
- ½ cup granulated sugar
- ½ cup heavy cream
- 2 large eggs
- 1 teaspoon vanilla extract
- ¼ teaspoon salt
Instructions
- Preheat the oven to 350°F (175°C).
- In a food processor, combine flour, butter, and powdered sugar until the mixture resembles coarse crumbs.
- Add the egg yolk and cold water, pulsing until the dough comes together.
- Press the dough into mini tartlet pans and chill for 15 minutes.
- Bake the crusts for 15-20 minutes or until golden brown. Remove and let cool.
- In the food processor, blend pistachios and sugar until finely ground.
- Add heavy cream, eggs, vanilla extract, and salt, blending until smooth.
- Pour the filling into the cooled tartlet shells and bake for an additional 20-25 minutes, or until the filling is set and slightly puffed.
- Let cool before serving. Garnish with crushed pistachios if desired.
Notes
- These tartlets can be made a day in advance; store in the refrigerator until ready to serve.
- Store leftovers in an airtight container in the fridge for up to 3 days.
- For a gluten-free option, substitute the all-purpose flour with a gluten-free flour blend.
- Prep Time: 30 minutes
- Cook Time: 45 minutes
- Category: desserts
- Method: baking
- Cuisine: American
Nutrition
- Serving Size: 1 mini tartlet
- Calories: 220
- Sugar: 10 grams
- Sodium: 50 milligrams
- Fat: 15 grams
- Saturated Fat: 7 grams
- Unsaturated Fat: 6 grams
- Trans Fat: 0 grams
- Carbohydrates: 20 grams
- Fiber: 2 grams
- Protein: 4 grams
- Cholesterol: 40 milligrams
Keywords: Mini Pistachio Tartlets, pistachio dessert, tartlets, mini desserts, nutty treats, creamy tart, easy dessert recipe, holiday baking, party desserts, vegetarian desserts, bite-sized treats, homemade tartlets, sweet pastry
