
Introduction to No-Bake Dreamsicle Pie Recipe
As a passionate home cook, I often find myself reminiscing about the sweet, sunny days of my childhood. One of my fondest memories is enjoying a refreshing orange creamsicle on a hot summer afternoon. The creamy texture and zesty flavor danced on my tongue, making every bite a delightful experience. Inspired by those nostalgic moments, I decided to create a dessert that captures that same joy: the No-Bake Dreamsicle Pie.
This pie is not just a treat; it’s a celebration of flavors that brings a smile to my face every time I make it. The best part? It requires no baking! That means less time in the kitchen and more time enjoying the company of family and friends. I love how this recipe combines the bright, citrusy notes of orange with the smooth, velvety creaminess of whipped topping and cream cheese. It’s like a summer day in pie form!
Whether you’re hosting a summer barbecue, celebrating a birthday, or simply craving something sweet, this No-Bake Dreamsicle Pie is sure to impress. It’s easy to whip up, and the vibrant colors make it a showstopper on any dessert table. Plus, it’s a fantastic way to involve kids in the kitchen. They can help mix, pour, and, of course, taste along the way!
So, grab your mixing bowl and let’s dive into this delightful recipe that’s bound to become a family favorite. I can’t wait to share my tips and tricks with you, ensuring your No-Bake Dreamsicle Pie turns out just as dreamy as mine!
Ingredients for No-Bake Dreamsicle Pie Recipe
Before we embark on this delicious journey, let’s gather all the ingredients needed for our No-Bake Dreamsicle Pie. I always believe that the quality of ingredients can make a world of difference in the final taste. So, let’s make sure we’re using the best!
Main Ingredients
- 1 ½ cups of graham cracker crumbs
- ½ cup of unsalted butter, melted
- 1 cup of cream cheese, softened
- 1 cup of powdered sugar
- 1 cup of heavy whipping cream
- 1 cup of orange juice (freshly squeezed is best!)
- 1 tablespoon of orange zest
- 1 teaspoon of vanilla extract
When I make this pie, I always opt for fresh orange juice. The vibrant flavor truly shines through, making each bite taste like sunshine. If you can’t find fresh oranges, store-bought juice will work, but try to choose one without added sugars for a more authentic taste.
Optional Add-ons
- 1 cup of mini marshmallows (for added texture)
- 1 cup of whipped topping (for extra fluffiness)
- Chocolate shavings or sprinkles (for decoration)
- Additional fruit slices (like strawberries or blueberries) for garnish
These optional add-ons can elevate your pie to new heights! I love adding mini marshmallows for a fun twist, and a sprinkle of chocolate shavings on top makes it look extra special. Feel free to get creative and customize your pie to suit your taste!
How to Prepare No-Bake Dreamsicle Pie Recipe
Now that we have all our ingredients ready, it’s time to roll up our sleeves and get to the fun part—preparing the No-Bake Dreamsicle Pie! I find that the process is just as enjoyable as the final product. Let’s dive into the steps together!
Step 1: Prepare the Crust
First things first, we need to create a delicious crust that will hold all that creamy goodness. In a mixing bowl, combine the graham cracker crumbs and melted butter. Stir until the crumbs are evenly coated and resemble wet sand.
Tips for Step 1
- For a crunchier crust, consider toasting the graham cracker crumbs in the oven for a few minutes before mixing with butter.
- Press the mixture firmly into the bottom and up the sides of a pie dish. I like to use the bottom of a measuring cup to get an even layer.
Step 2: Make the Filling
Next, let’s whip up the filling! In a large mixing bowl, beat the softened cream cheese until it’s smooth and creamy. Gradually add in the powdered sugar, mixing until well combined. Then, pour in the orange juice, orange zest, and vanilla extract. Mix until everything is blended beautifully.
Tips for Step 2
- Make sure your cream cheese is at room temperature. This helps it blend smoothly without lumps.
- If you want a lighter filling, fold in some whipped topping at this stage for extra fluffiness!
Step 3: Assemble the Pie
Now comes the exciting part—assembling our pie! Pour the creamy filling into the prepared crust, spreading it evenly with a spatula. I love to create a little swirl on top for a fun look!
Tips for Step 3
- For a decorative touch, you can add mini marshmallows or fruit slices on top of the filling before chilling.
- Don’t be afraid to get creative! You can even layer the filling with some whipped topping for a beautiful marbled effect.
Step 4: Chill the Pie
Finally, it’s time to let our pie chill in the refrigerator. Cover it with plastic wrap and let it set for at least 4 hours, or overnight if you can wait that long. This step is crucial for the flavors to meld together and for the pie to firm up.
Tips for Step 4
- If you’re in a hurry, you can place the pie in the freezer for about 1 hour, but keep an eye on it to avoid freezing.
- Once chilled, slice the pie with a warm knife for clean cuts. Just dip the knife in hot water, wipe it dry, and slice!
And there you have it! Each step brings us closer to that dreamy, creamy No-Bake Dreamsicle Pie. I can already taste the sunshine in every bite!
Equipment Needed for No-Bake Dreamsicle Pie Recipe
Before we dive into the kitchen, let’s gather the essential tools that will make our No-Bake Dreamsicle Pie a breeze to prepare. Having the right equipment on hand can save time and make the process more enjoyable. Here’s what you’ll need:
- Mixing Bowls: A couple of medium-sized mixing bowls will work perfectly for combining the crust and filling.
- Measuring Cups and Spoons: Accurate measurements are key to a successful pie, so don’t forget these!
- Electric Mixer: A hand mixer or stand mixer will help you achieve that smooth, creamy filling. If you don’t have one, a whisk and some elbow grease will do the trick!
- Spatula: A rubber spatula is great for scraping down the sides of the bowl and spreading the filling evenly.
- Pie Dish: A 9-inch pie dish is ideal for this recipe. If you don’t have one, a square baking dish works just as well.
- Plastic Wrap: This will cover the pie while it chills in the refrigerator, keeping it fresh and delicious.
With these tools at your side, you’ll be well-equipped to create your No-Bake Dreamsicle Pie. Remember, cooking is all about improvisation, so feel free to use what you have on hand. Let’s get ready to whip up some magic!
Variations of No-Bake Dreamsicle Pie Recipe
As I’ve experimented with my No-Bake Dreamsicle Pie, I’ve discovered that there are so many fun ways to switch things up! Each variation brings a unique twist, making it even more exciting to share with family and friends. Here are a few of my favorite adaptations:
- Berry Dreamsicle Pie: Add a layer of fresh berries, like strawberries or blueberries, between the crust and filling. The burst of fruitiness complements the orange flavor beautifully!
- Chocolate Dreamsicle Pie: For chocolate lovers, mix in some cocoa powder into the filling or drizzle melted chocolate on top before chilling. It’s a delightful combination of chocolate and orange.
- Nutty Dreamsicle Pie: Incorporate crushed nuts, such as almonds or pecans, into the crust for an added crunch. You can also sprinkle some on top for decoration.
- Vegan Dreamsicle Pie: Substitute cream cheese with a vegan alternative and use coconut cream instead of heavy whipping cream. This way, everyone can enjoy a slice!
These variations not only keep the recipe fresh but also allow you to cater to different tastes and dietary preferences. I love how a simple change can create a whole new dessert experience. So, don’t hesitate to get creative and make this No-Bake Dreamsicle Pie your own!
Cooking Notes for No-Bake Dreamsicle Pie Recipe
As I’ve made my No-Bake Dreamsicle Pie over the years, I’ve picked up a few handy cooking notes that can help ensure your pie turns out perfectly every time. These little tips can make a big difference in flavor and texture!
- Room Temperature Ingredients: Always make sure your cream cheese is at room temperature before mixing. This helps create a smooth filling without any lumps. Trust me, it’s worth the extra few minutes!
- Chill Time: Patience is key! Allowing the pie to chill for at least 4 hours (or overnight) helps the flavors meld beautifully. If you can resist the temptation, waiting overnight is the best way to enjoy the full flavor.
- Serving Fresh: This pie is best enjoyed fresh. If you have leftovers, store them in the refrigerator, but try to finish them within a few days for optimal taste and texture.
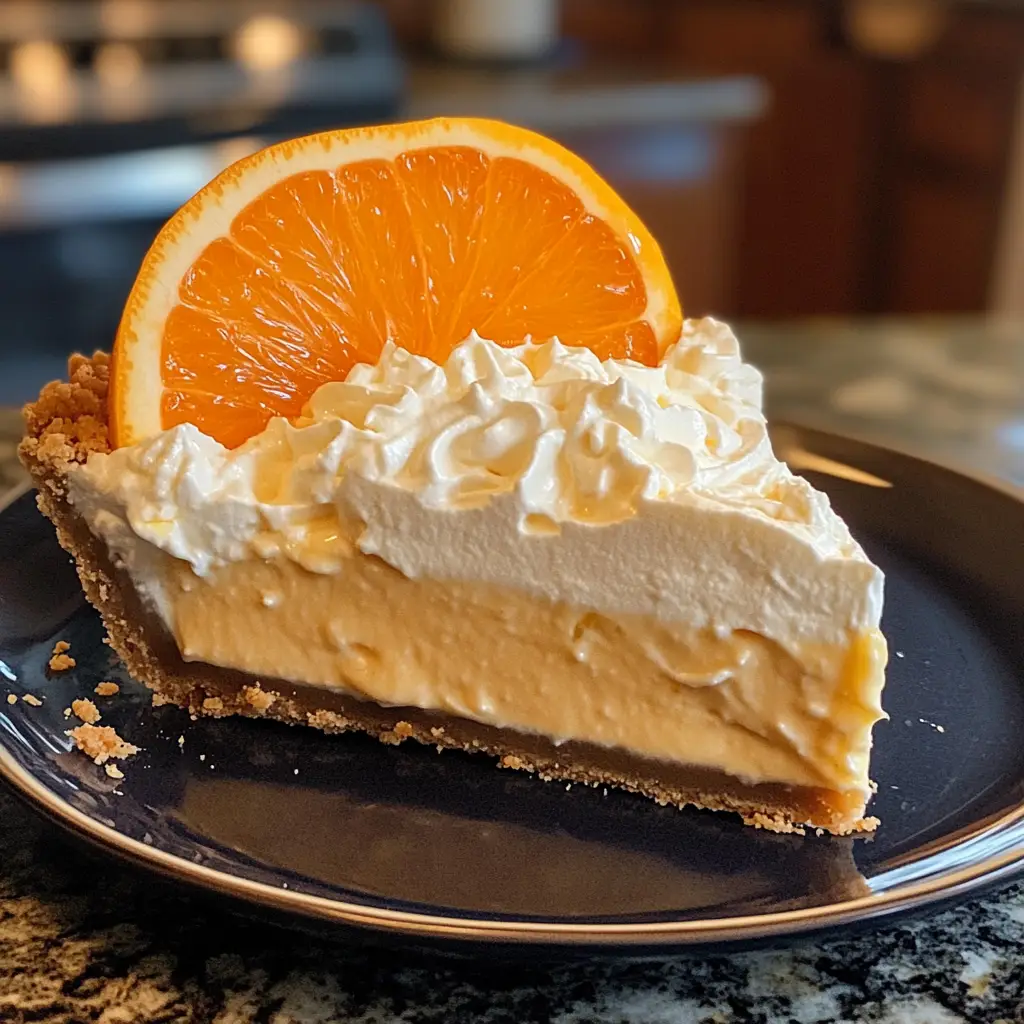
- Garnishing: Don’t skip the garnishing! A sprinkle of orange zest or a few fresh fruit slices on top not only adds a pop of color but also enhances the flavor. It’s like giving your pie a little extra love!
These cooking notes are my secret weapons in the kitchen. They help me create a No-Bake Dreamsicle Pie that’s not just good, but truly unforgettable. I hope they help you too as you embark on your own culinary adventure!
Serving Suggestions for No-Bake Dreamsicle Pie Recipe
Now that our No-Bake Dreamsicle Pie is ready to shine, let’s talk about how to serve it up in style! Presentation can elevate any dessert, and I love to make my pie look as delightful as it tastes. Here are some of my favorite serving suggestions:
- Chilled Slices: Serve each slice straight from the fridge for a refreshing treat. The coolness enhances the flavors, making every bite feel like a summer breeze.
- Garnish with Fresh Fruit: Top each slice with a few fresh orange slices or berries. Not only do they add a burst of color, but they also complement the pie’s flavors beautifully.
- Whipped Cream Delight: A dollop of whipped cream on top adds a creamy touch. You can even sprinkle some orange zest or chocolate shavings for an extra flair!
- Serve with Ice Cream: For an indulgent twist, pair a slice of pie with a scoop of vanilla or orange sherbet ice cream. It’s a match made in dessert heaven!
- Festive Plates: Use colorful or themed plates to serve your pie, especially for special occasions. It adds a fun element and makes the dessert feel even more special.
These serving suggestions not only enhance the visual appeal but also create a delightful experience for everyone at the table. I love watching my family and friends’ faces light up as they take their first bite. So, get creative and enjoy sharing your No-Bake Dreamsicle Pie in a way that brings joy to every gathering!
Tips for Perfecting No-Bake Dreamsicle Pie Recipe
As I’ve whipped up my No-Bake Dreamsicle Pie time and time again, I’ve gathered a treasure trove of tips that can help you achieve pie perfection. These little nuggets of wisdom can make all the difference in your dessert journey!
- Use Fresh Ingredients: Always opt for fresh orange juice and zest. The vibrant flavors will elevate your pie and make it taste like a slice of sunshine!
- Don’t Rush the Chilling: Allowing the pie to chill for the full recommended time is crucial. This helps the filling set properly and allows the flavors to meld beautifully.
- Experiment with Sweetness: Taste your filling before pouring it into the crust. If you prefer a sweeter pie, feel free to adjust the powdered sugar to your liking.
- Layering Flavors: Consider adding a layer of whipped topping on top of the filling before chilling. It adds a lovely texture and makes for a beautiful presentation!
- Slice with Care: For clean slices, use a warm knife. This simple trick makes serving easier and keeps your pie looking gorgeous!
These tips are my secret ingredients for a No-Bake Dreamsicle Pie that’s not just good, but truly unforgettable. I hope they inspire you to create your own delicious masterpiece!
Breakdown of Time for No-Bake Dreamsicle Pie Recipe
As a home cook, I know that time management is key in the kitchen. When it comes to making my No-Bake Dreamsicle Pie, I like to keep things organized. Here’s a simple breakdown of the time you’ll need to whip up this delightful dessert:
- Prep Time: 20 minutes
- Chilling Time: 4 hours (or overnight for best results)
- Total Time: 4 hours and 20 minutes (or overnight)
While the prep time is quick and easy, the chilling time is where the magic happens. It allows the flavors to meld and the pie to set perfectly. I often find myself eagerly waiting, but trust me, the wait is worth it! So, plan ahead and let your No-Bake Dreamsicle Pie chill to perfection. You’ll be rewarded with a refreshing treat that’s sure to impress!
Nutritional Information for No-Bake Dreamsicle Pie Recipe
As a passionate home cook, I always find it helpful to know the nutritional information of the dishes I prepare. It allows me to enjoy my creations while being mindful of what I’m serving to my family and friends. Here’s a general breakdown of the nutritional information for a slice of No-Bake Dreamsicle Pie, based on a standard 1/8 slice from the entire pie:
- Calories: Approximately 250
- Fat: 15g
- Saturated Fat: 9g
- Cholesterol: 40mg
- Sodium: 150mg
- Carbohydrates: 30g
- Fiber: 1g
- Sugar: 18g
- Protein: 3g
Keep in mind that these values can vary based on the specific brands of ingredients you use and any optional add-ons you choose to include. If you’re looking to lighten things up, consider using reduced-fat cream cheese or a sugar substitute. I love how this pie can be enjoyed in moderation, allowing everyone to savor a slice of summer bliss without any guilt!
Frequently Asked Questions about No-Bake Dreamsicle Pie Recipe
As I’ve shared my No-Bake Dreamsicle Pie with friends and family, I’ve received quite a few questions along the way. It’s always fun to see the excitement on their faces as they learn about this delightful dessert! Here are some of the most frequently asked questions I encounter, along with my answers to help you on your culinary journey.
Can I make this pie ahead of time?
Absolutely! In fact, I recommend making it a day in advance. The flavors meld beautifully when it sits overnight in the fridge. Just cover it well with plastic wrap to keep it fresh. You’ll be rewarded with a pie that’s even more delicious!
What can I use instead of cream cheese?
If you’re looking for a dairy-free option, you can substitute cream cheese with a vegan cream cheese alternative. I’ve tried it, and it works wonderfully! You can also use silken tofu blended until smooth for a lighter option.
How long will the pie last in the fridge?
While I doubt it will last long because it’s so tasty, the No-Bake Dreamsicle Pie can be stored in the refrigerator for about 3 to 4 days. Just make sure to keep it covered to maintain its freshness!
Can I freeze the No-Bake Dreamsicle Pie?
Yes, you can freeze it! Just slice it first and wrap each piece tightly in plastic wrap, then place them in an airtight container. When you’re ready to enjoy, let it thaw in the fridge for a few hours. It’s like having a little piece of summer ready to go!
What’s the best way to serve the pie?
I love serving it chilled, topped with fresh fruit or a dollop of whipped cream. You can even sprinkle some orange zest or chocolate shavings for an extra touch. Presentation is key, and it makes the pie look as delightful as it tastes!
These questions are just a glimpse into the wonderful world of No-Bake Dreamsicle Pie. I hope my answers help you feel more confident as you embark on your own pie-making adventure. Remember, cooking is all about having fun and experimenting, so don’t hesitate to make this recipe your own!
Conclusion on No-Bake Dreamsicle Pie Recipe
As I wrap up my journey through the delightful world of the No-Bake Dreamsicle Pie, I can’t help but feel a sense of joy. This recipe is more than just a dessert; it’s a celebration of flavors that brings back cherished memories of summer days filled with laughter and sunshine. The combination of creamy filling and zesty orange is like a warm hug on a plate, making it perfect for any occasion.
What I love most about this pie is its simplicity. With no baking required, it’s an easy way to impress family and friends without spending hours in the kitchen. Plus, the vibrant colors and delightful flavors make it a showstopper at any gathering. Whether you’re hosting a barbecue, celebrating a birthday, or simply treating yourself, this pie is sure to bring smiles all around.
So, gather your ingredients, roll up your sleeves, and dive into this culinary adventure. I hope you enjoy making and sharing the No-Bake Dreamsicle Pie as much as I do. Here’s to sweet memories and delicious moments—one slice at a time!
