
Introduction to No-Bake Key Lime Cheesecake Recipe
As a passionate home cook, I find joy in creating desserts that not only taste amazing but also bring a smile to the faces of my loved ones. One of my all-time favorites is the No-Bake Key Lime Cheesecake. This delightful treat is like a burst of sunshine on a plate, with its zesty lime flavor and creamy texture. It’s perfect for those warm summer days when you want something refreshing yet indulgent.
My love for this cheesecake began during a family vacation in Florida. I remember sitting by the beach, the salty breeze tousling my hair, and savoring a slice of key lime pie. The tangy sweetness danced on my taste buds, and I knew I had to recreate that experience at home. However, I wanted to make it easier and quicker, so I decided to whip up a no-bake version. And let me tell you, it was a game-changer!
This No-Bake Key Lime Cheesecake Recipe is not just simple; it’s also incredibly versatile. You can serve it at summer barbecues, birthday parties, or even as a sweet ending to a cozy family dinner. Plus, it requires minimal effort, which means more time to enjoy the company of friends and family. Trust me, once you try this recipe, it will become a staple in your dessert repertoire.
So, grab your mixing bowl and let’s dive into the world of creamy, dreamy cheesecake that will transport you straight to a tropical paradise. I promise, you won’t regret it!
Ingredients for No-Bake Key Lime Cheesecake Recipe
Before we embark on this delicious journey, let’s gather all the ingredients we need for our No-Bake Key Lime Cheesecake. I always believe that quality ingredients make a world of difference in the final product. So, let’s make sure we have everything ready to create this delightful dessert!
Main Ingredients
- 1 ½ cups graham cracker crumbs
- ½ cup unsalted butter, melted
- 2 (8-ounce) packages cream cheese, softened
- 1 cup powdered sugar
- ½ cup fresh key lime juice (about 4-6 limes)
- 1 tablespoon lime zest (for that extra zing!)
- 1 cup heavy whipping cream
When it comes to the cream cheese, I always opt for full-fat varieties. They give the cheesecake that rich, creamy texture we all crave. And don’t skimp on the fresh key limes! The vibrant flavor they bring is simply unmatched. If you can’t find key limes, regular limes will work just fine, but the taste will be slightly different.
Optional Add-ons
- Fresh fruit for garnish (like strawberries or blueberries)
- Whipped cream for topping
- Chocolate shavings for a decadent twist
- Toasted coconut flakes for a tropical flair
These optional add-ons can elevate your cheesecake to new heights. I love adding fresh fruit on top; it not only looks beautiful but also adds a burst of flavor. And if you’re feeling adventurous, a sprinkle of toasted coconut can transport your taste buds straight to the beach!
Now that we have our ingredients lined up, we’re one step closer to creating this heavenly No-Bake Key Lime Cheesecake. Let’s move on to the fun part—preparing it!
How to Prepare No-Bake Key Lime Cheesecake Recipe
Now that we have all our ingredients ready, it’s time to roll up our sleeves and get to the fun part—preparing our No-Bake Key Lime Cheesecake! I love this part because it’s where the magic happens. Follow these simple steps, and you’ll be on your way to a delicious dessert that will impress everyone.
Step 1: Prepare the Crust
First things first, let’s create that crunchy, buttery crust that will hold all the creamy goodness. In a mixing bowl, combine the graham cracker crumbs and melted butter. Stir until the crumbs are evenly coated and resemble wet sand.
Next, press this mixture firmly into the bottom of a 9-inch springform pan. I like to use the bottom of a measuring cup to really pack it down. This helps the crust hold together when we slice into the cheesecake later.
Tips for Step 1
- For an extra flavor boost, try adding a pinch of salt to the crust mixture.
- If you want a thicker crust, feel free to double the crust ingredients!
Step 2: Make the Filling
Now, let’s whip up the creamy filling! In a large mixing bowl, beat the softened cream cheese with an electric mixer until it’s smooth and fluffy. This usually takes about 2-3 minutes. Then, gradually add in the powdered sugar, lime juice, and lime zest. Mix until everything is well combined and creamy.
In another bowl, whip the heavy cream until stiff peaks form. Gently fold the whipped cream into the cream cheese mixture. This step is crucial because it gives the cheesecake its light and airy texture. Be careful not to deflate the whipped cream!
Tips for Step 2
- Make sure your cream cheese is at room temperature for easier mixing.
- For a more intense lime flavor, you can add a bit more lime juice or zest to taste.
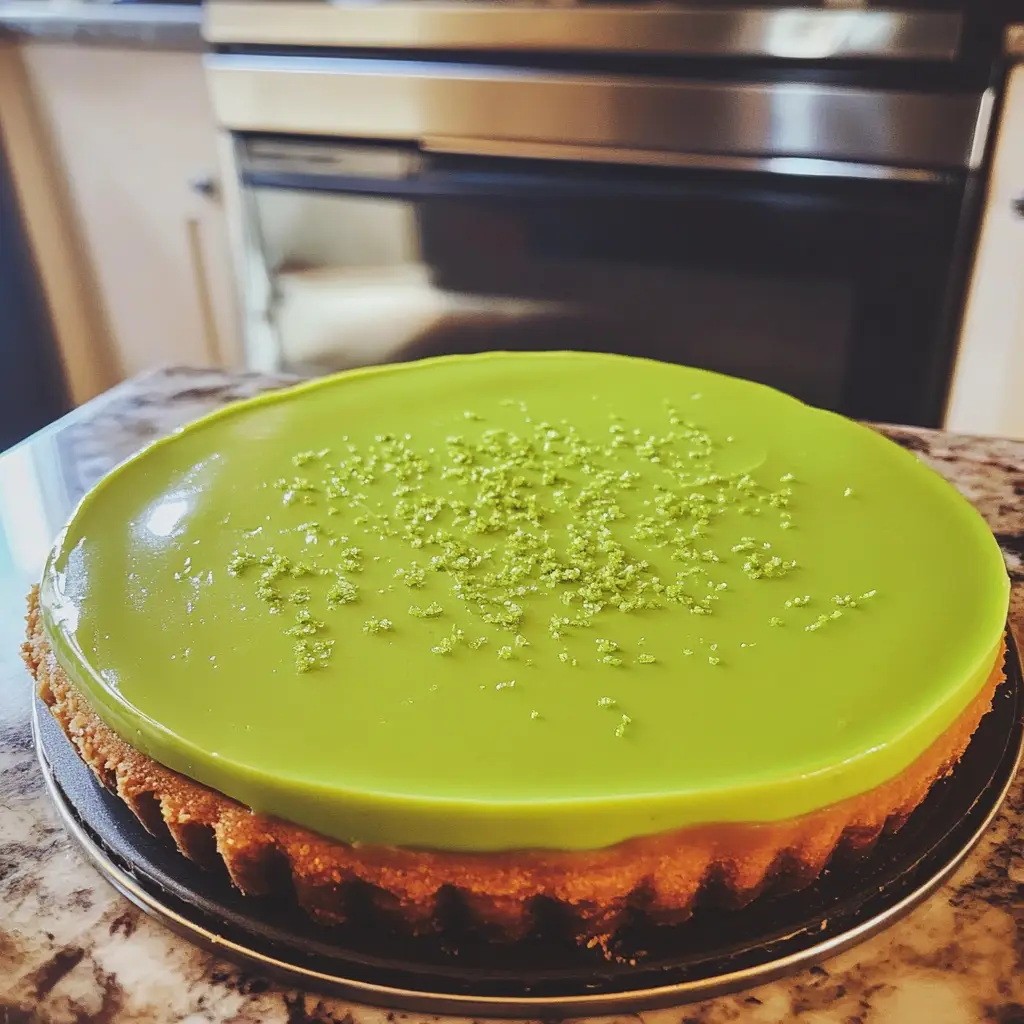
Step 3: Assemble the Cheesecake
With the crust and filling ready, it’s time to assemble! Pour the creamy filling over the prepared crust, spreading it evenly with a spatula. I like to give it a little shake to smooth out the top. You can also use the spatula to create swirls for a decorative touch.
Tips for Step 3
- For a fun twist, try layering the filling with some fruit puree for a marbled effect.
- Don’t worry if the top isn’t perfect; it will be covered with toppings later!
Step 4: Chill the Cheesecake
Now comes the hardest part—waiting! Cover the cheesecake with plastic wrap and place it in the refrigerator. Let it chill for at least 4 hours, or overnight if you can resist the temptation. This allows the flavors to meld and the cheesecake to set properly.
Tips for Step 4
- If you’re short on time, a 4-hour chill will work, but overnight is best for flavor.
- To prevent condensation, make sure the cheesecake is well covered while chilling.
And there you have it! Four simple steps to create a No-Bake Key Lime Cheesecake that’s sure to impress. I can already imagine the smiles on everyone’s faces when they take that first bite. Let’s move on to the next section and gather the equipment we’ll need for this delightful dessert!
Equipment Needed for No-Bake Key Lime Cheesecake Recipe
Before we dive into the kitchen, let’s gather the essential tools for our No-Bake Key Lime Cheesecake. Having the right equipment makes the process smoother and more enjoyable. Here’s what you’ll need:
- 9-inch springform pan: This is perfect for easy removal of the cheesecake once it’s set. If you don’t have one, a regular pie dish will work, but slicing might be a bit trickier.
- Mixing bowls: You’ll need a couple of these—one for the crust and another for the filling. I recommend using a large bowl for the filling to give you plenty of room to mix.
- Electric mixer: This will help you achieve that smooth, fluffy cream cheese filling. If you don’t have one, a whisk will do, but it will take a bit more elbow grease!
- Spatula: A rubber spatula is great for folding in the whipped cream and spreading the filling evenly.
- Measuring cups and spoons: Accurate measurements are key to a successful cheesecake, so don’t skip these!
- Plastic wrap: This will cover the cheesecake while it chills in the fridge, preventing any unwanted odors from seeping in.
With these tools at your side, you’re all set to create a delicious No-Bake Key Lime Cheesecake. Remember, cooking is all about having fun, so don’t stress if you have to improvise a little. Let’s keep the good vibes rolling as we move on to the next section!
Variations of No-Bake Key Lime Cheesecake Recipe
As a home cook, I love experimenting with recipes to create new flavors and textures. The No-Bake Key Lime Cheesecake is no exception! Here are a few delightful variations that can add a twist to this classic dessert:
- Berry Bliss: Swirl in some fresh raspberry or blueberry puree into the filling before chilling. The tartness of the berries complements the lime beautifully, creating a vibrant and colorful cheesecake.
- Coconut Dream: Incorporate shredded coconut into the crust or the filling for a tropical flair. You can also top the cheesecake with toasted coconut flakes for added texture and flavor.
- Chocolate Indulgence: For chocolate lovers, try adding melted dark chocolate to the filling. This rich addition pairs surprisingly well with the zesty lime, creating a decadent dessert experience.
- Minty Fresh: Add a hint of fresh mint to the filling for a refreshing twist. Just a few finely chopped mint leaves can elevate the flavor profile and give it a unique touch.
These variations not only keep things exciting but also allow you to tailor the cheesecake to your taste preferences or the occasion. I often find that trying out new flavors can lead to delightful surprises, and who knows? You might just discover your new favorite version of this No-Bake Key Lime Cheesecake!
Cooking Notes for No-Bake Key Lime Cheesecake Recipe
As I’ve learned through my culinary adventures, a few cooking notes can make all the difference in achieving the perfect No-Bake Key Lime Cheesecake. Here are some tips that I always keep in mind while preparing this delightful dessert:
- Room Temperature Ingredients: Make sure your cream cheese is at room temperature before mixing. This helps create a smooth filling without lumps. I usually take it out of the fridge about an hour before I start.
- Fresh Lime Juice: Always opt for fresh key lime juice if possible. The flavor is so much brighter than bottled juice. Plus, squeezing those limes is a great way to get into the tropical spirit!
- Chilling Time: Patience is key! While it’s tempting to dig in right away, letting the cheesecake chill overnight really enhances the flavors. Trust me, it’s worth the wait!
- Serving Temperature: For the best texture, serve the cheesecake slightly chilled. If it’s too cold, the flavors can be muted. A quick 10-minute sit at room temperature before serving can do wonders.
- Storage: This cheesecake can be stored in the fridge for up to a week. Just make sure to cover it well to keep it fresh and prevent it from absorbing any odors.
These cooking notes are like little nuggets of wisdom I’ve gathered over time. They help ensure that every slice of my No-Bake Key Lime Cheesecake is as delicious as the last. Now, let’s keep the momentum going and explore how to serve this delightful dessert!
Serving Suggestions for No-Bake Key Lime Cheesecake Recipe
When it comes to serving my No-Bake Key Lime Cheesecake, I love to get a little creative! Presentation can elevate the experience, making it even more enjoyable for everyone. Here are some of my favorite serving suggestions that add a special touch:
- Garnish with Fresh Fruit: A few slices of fresh strawberries or a handful of blueberries on top not only look stunning but also add a burst of flavor. The vibrant colors make the cheesecake pop!
- Whipped Cream Delight: A dollop of freshly whipped cream on each slice is a classic choice. It adds a light, airy texture that complements the creamy cheesecake beautifully.
- Chocolate Drizzle: For a touch of decadence, drizzle some melted chocolate over the top. The combination of chocolate and lime is surprisingly delightful and adds a gourmet flair.
- Serve with Lime Slices: Placing a thin slice of lime on each plate not only enhances the presentation but also gives a hint of what’s inside. It’s a simple yet effective way to entice your guests!
- Chill and Serve: I always recommend serving the cheesecake chilled, but not too cold. Letting it sit for about 10 minutes at room temperature before serving allows the flavors to shine through.
These serving suggestions are just a few ways to make your No-Bake Key Lime Cheesecake even more delightful. Each slice becomes a little celebration, perfect for sharing with family and friends. I can already picture the smiles as everyone takes their first bite!
Tips for Perfecting No-Bake Key Lime Cheesecake Recipe
As I’ve whipped up my fair share of No-Bake Key Lime Cheesecakes, I’ve gathered a treasure trove of tips that can help you achieve cheesecake perfection. These little nuggets of wisdom can make a big difference in your final result, so let’s dive in!
- Use Quality Ingredients: Always choose high-quality cream cheese and fresh key limes. The better the ingredients, the better the cheesecake will taste. Trust me, it’s worth the extra effort!
- Don’t Overmix: When combining the whipped cream with the cream cheese mixture, be gentle. Overmixing can deflate the whipped cream, leading to a denser cheesecake. Fold it in carefully for that light, airy texture.
- Adjust Sweetness: Taste your filling before pouring it into the crust. If you prefer a sweeter cheesecake, feel free to add a bit more powdered sugar. It’s all about finding that perfect balance!
- Experiment with Zest: If you love lime, don’t hesitate to add more lime zest to the filling. It enhances the flavor and gives your cheesecake a vibrant, zesty kick.
- Chill Longer for Best Results: While 4 hours is the minimum chill time, letting your cheesecake sit overnight allows the flavors to meld beautifully. Patience truly pays off!
These tips have helped me create countless delicious cheesecakes, and I’m excited for you to try them out! With a little care and attention, your No-Bake Key Lime Cheesecake will be a showstopper at any gathering. Now, let’s keep the momentum going and break down the time needed for this delightful dessert!
Breakdown of Time for No-Bake Key Lime Cheesecake Recipe
As a home cook, I know that time management is key in the kitchen. When it comes to making my No-Bake Key Lime Cheesecake, here’s how the timing breaks down:
- Prep Time: 20 minutes. This includes gathering your ingredients, preparing the crust, and mixing the filling. It’s a quick and enjoyable process!
- Chilling Time: 4 hours (or overnight for best results). This is the hardest part, as you’ll need to resist the temptation to dig in right away. But trust me, it’s worth the wait!
- Total Time: 4 hours and 20 minutes (or overnight if you choose). This total time includes both the prep and chilling time, giving you a delicious dessert with minimal effort.
With this breakdown, you can easily plan your day around making this delightful cheesecake. Whether it’s for a special occasion or just a sweet treat for yourself, knowing the timing helps keep everything on track. Now, let’s move on to the nutritional information so you can enjoy this dessert guilt-free!
Nutritional Information for No-Bake Key Lime Cheesecake Recipe
As a passionate home cook, I believe that enjoying dessert doesn’t have to come with guilt. Understanding the nutritional information of my No-Bake Key Lime Cheesecake helps me appreciate it even more. Here’s a breakdown of the approximate nutritional values per slice (assuming 12 slices total):
- Calories: 250
- Fat: 18g
- Saturated Fat: 10g
- Cholesterol: 60mg
- Sodium: 150mg
- Carbohydrates: 22g
- Fiber: 0g
- Sugar: 12g
- Protein: 3g
These values can vary based on the specific brands and ingredients you use. If you’re looking to lighten things up, consider using reduced-fat cream cheese or a sugar substitute. I often find that making small adjustments can still yield a delicious result without sacrificing flavor. Enjoying a slice of this cheesecake is a delightful treat, and knowing its nutritional content allows me to savor it even more!
Frequently Asked Questions about No-Bake Key Lime Cheesecake Recipe
As I’ve shared my No-Bake Key Lime Cheesecake Recipe with friends and family, I’ve encountered a few common questions. I love answering these queries because it helps others enjoy this delightful dessert just as much as I do! Here are some frequently asked questions that might help you on your cheesecake journey:
Can I use regular limes instead of key limes?
Absolutely! While key limes have a unique flavor that’s slightly sweeter and more aromatic, regular limes can work just fine. Just keep in mind that the taste will be a bit different, but still delicious!
How long can I store the cheesecake?
Your No-Bake Key Lime Cheesecake can be stored in the refrigerator for up to a week. Just make sure to cover it well with plastic wrap to keep it fresh and prevent it from absorbing any odors from the fridge.
Can I freeze the cheesecake?
Yes, you can freeze the cheesecake! Just make sure to wrap it tightly in plastic wrap and then in aluminum foil. It can be frozen for up to 2 months. When you’re ready to enjoy it, let it thaw in the refrigerator overnight before serving.
What can I use instead of cream cheese?
If you’re looking for a lighter option, you can try using Greek yogurt or mascarpone cheese. They will give you a different texture, but they can still create a creamy filling. Just remember to adjust the sweetness to your taste!
Can I make this cheesecake ahead of time?
Definitely! In fact, making it a day ahead is a great idea. The flavors meld beautifully overnight, and it gives you one less thing to worry about on the day of your gathering. Just remember to cover it well while it chills!
These questions are just a few of the common inquiries I’ve encountered while sharing my No-Bake Key Lime Cheesecake Recipe. I hope this helps clear up any doubts you might have and encourages you to dive into making this delightful dessert. Now, let’s wrap things up with a sweet conclusion!
Conclusion on No-Bake Key Lime Cheesecake Recipe
As I reflect on my culinary journey with the No-Bake Key Lime Cheesecake, I can’t help but smile. This recipe is more than just a dessert; it’s a celebration of flavors, memories, and the joy of sharing with loved ones. The zesty lime, creamy filling, and crunchy crust come together in perfect harmony, creating a treat that’s both refreshing and indulgent.
What I love most about this cheesecake is its simplicity. With just a handful of ingredients and minimal effort, you can whip up a dessert that looks and tastes like it came from a fancy bakery. Plus, the no-bake aspect means you can enjoy it without the hassle of turning on the oven, making it perfect for warm days or spontaneous gatherings.
Whether you’re serving it at a summer barbecue, a birthday party, or simply enjoying a slice on a quiet evening, this No-Bake Key Lime Cheesecake is sure to impress. I encourage you to give it a try and make it your own with fun variations and toppings. Trust me, once you take that first bite, you’ll understand why this recipe has a special place in my heart. Happy baking, and may your kitchen be filled with joy and deliciousness!
