
Introduction to No-Bake Key Lime Pie Recipe
As a passionate home cook, I find joy in creating desserts that not only taste amazing but also bring a smile to the faces of my loved ones. One of my all-time favorites is the No-Bake Key Lime Pie. This delightful treat is like a burst of sunshine on a plate, with its zesty lime flavor and creamy texture. It’s the perfect dessert for warm days when you want something refreshing without the fuss of baking.
My love for this pie began during a family vacation in Florida. I remember sitting by the beach, the salty breeze tousling my hair, and savoring a slice of this tangy delight. The combination of sweet and tart was simply irresistible! Ever since that day, I’ve been on a mission to recreate that experience in my own kitchen.
What I adore about this No-Bake Key Lime Pie recipe is its simplicity. With just a handful of ingredients, you can whip up a dessert that feels fancy yet is incredibly easy to make. Plus, there’s no need to turn on the oven, which is a huge bonus during those hot summer months. It’s a recipe that invites creativity, allowing you to add your own twist or keep it classic.
In this article, I’ll guide you through the process of making this delightful pie, sharing tips and tricks I’ve learned along the way. Whether you’re a seasoned baker or a novice in the kitchen, I promise you’ll find joy in making this No-Bake Key Lime Pie. So, let’s dive into the ingredients and get started on this culinary adventure!
Ingredients for No-Bake Key Lime Pie Recipe
Before we embark on our culinary journey, let’s gather the ingredients for this delightful No-Bake Key Lime Pie. I always believe that the quality of ingredients can make or break a dish, so I recommend using fresh, high-quality items whenever possible. Here’s what you’ll need:
Main Ingredients
- 1 ½ cups graham cracker crumbs
- ½ cup unsalted butter, melted
- 1 can (14 ounces) sweetened condensed milk
- ½ cup sour cream
- ¾ cup fresh key lime juice (or regular lime juice if key limes are hard to find)
- 1 tablespoon lime zest (for that extra zing!)
- Whipped cream, for topping
When I make this pie, I love to use fresh key limes if I can find them. They have a unique flavor that really elevates the pie. However, if you can’t find them, don’t fret! Regular limes work just as well. Just make sure to taste the juice before adding it to the filling; some limes can be more tart than others!
Optional Add-ons
- Fresh fruit (like slices of lime or berries) for garnish
- Toasted coconut flakes for a tropical twist
- Chocolate shavings for a decadent touch
- Extra lime zest for a pop of color and flavor
These optional add-ons can take your No-Bake Key Lime Pie to the next level. I often like to sprinkle some toasted coconut on top for a delightful crunch. It reminds me of my beach vacation and adds a lovely texture contrast to the creamy filling. Feel free to get creative and make this pie your own!
How to Prepare No-Bake Key Lime Pie Recipe
Now that we have our ingredients ready, it’s time to roll up our sleeves and dive into the fun part—preparing the No-Bake Key Lime Pie! I love this part because it’s all about mixing, blending, and creating something delicious. Let’s break it down step by step.
Step 1: Prepare the Crust
First things first, we need to create a delicious crust that will hold all that creamy goodness. In a mixing bowl, combine the graham cracker crumbs and melted butter. Stir until the crumbs are evenly coated and resemble wet sand.
Next, press this mixture firmly into the bottom and up the sides of a 9-inch pie dish. I like to use the bottom of a measuring cup to really pack it down. This helps the crust hold its shape when we slice into the pie later.
Tips for Step 1
- For an extra flavor boost, try adding a pinch of salt to the crust mixture. It enhances the sweetness of the pie.
- If you want a bit of crunch, consider mixing in some finely chopped nuts, like pecans or almonds, with the graham cracker crumbs.
Step 2: Make the Filling
Now, let’s whip up that luscious filling! In a large mixing bowl, combine the sweetened condensed milk, sour cream, fresh key lime juice, and lime zest. Using a whisk, mix everything together until it’s smooth and creamy. I love watching the colors blend together—it’s like a little magic show in my kitchen!
Tips for Step 2
- Make sure to taste the filling before pouring it into the crust. If you like it a bit tangier, feel free to add a splash more lime juice.
- For a fluffier filling, you can beat the sour cream and condensed milk mixture with an electric mixer for a minute or two.
Step 3: Assemble the Pie
Once your filling is ready, it’s time to pour it into the prepared crust. Gently spread the filling evenly with a spatula. I like to create a little swirl on top for a fun look. It’s all about presentation, right?
Tips for Step 3
- To avoid air bubbles, pour the filling slowly and use a spatula to smooth it out gently.
- If you’re feeling adventurous, you can layer some fresh fruit between the crust and filling for added flavor and color.
Step 4: Chill the Pie
Now comes the hardest part—waiting! Cover the pie with plastic wrap and place it in the refrigerator. Let it chill for at least 4 hours, or overnight if you can resist the temptation. This step is crucial as it allows the filling to set properly.
Tips for Step 4
- If you’re short on time, a quick chill in the freezer for about 1 hour can help, but be careful not to freeze it!
- For the best flavor, I recommend letting it chill overnight. The flavors meld together beautifully, making each bite even more delightful.
Equipment Needed for No-Bake Key Lime Pie Recipe
Before we dive into making our No-Bake Key Lime Pie, let’s gather the necessary equipment. Having the right tools on hand makes the process smoother and more enjoyable. Here’s what you’ll need:
- 9-inch pie dish: This is where all the magic happens! A glass or ceramic pie dish works best, but if you don’t have one, a round cake pan will do just fine.
- Mixing bowls: You’ll need a couple of these—one for the crust and another for the filling. I prefer using a large bowl for the filling to give me plenty of room to whisk everything together.
- Whisk: A good whisk is essential for mixing the filling until it’s smooth and creamy. If you don’t have one, a fork can work in a pinch, though it may take a bit longer.
- Spatula: This handy tool is perfect for spreading the filling evenly in the crust. A silicone spatula is my go-to because it’s flexible and easy to clean.
- Measuring cups and spoons: Accurate measurements are key to a successful pie, so make sure you have these on hand.
- Plastic wrap: You’ll need this to cover the pie while it chills in the refrigerator. If you’re out of plastic wrap, a clean kitchen towel can work as an alternative.
With these tools ready, you’re all set to create your No-Bake Key Lime Pie! Each piece of equipment plays a role in bringing this delightful dessert to life, making the process not only efficient but also fun. Let’s get cooking!
Variations of No-Bake Key Lime Pie Recipe
While the classic No-Bake Key Lime Pie is a showstopper on its own, I love experimenting with variations that add a unique twist to this beloved dessert. Here are a few fun ideas that I’ve tried and absolutely enjoyed:
- Berry Bliss: Add a layer of fresh berries, like strawberries or blueberries, between the crust and the filling. The burst of fruity flavor complements the tangy lime beautifully!
- Coconut Cream: Swap out half of the sour cream for coconut cream. This gives the pie a tropical flair that transports me right back to those sunny beach days.
- Chocolate Drizzle: For a decadent touch, drizzle melted chocolate over the top before serving. The rich chocolate pairs surprisingly well with the zesty lime.
- Minty Fresh: Incorporate some finely chopped fresh mint into the filling for a refreshing twist. It adds a lovely aroma and a hint of coolness that’s perfect for summer.
These variations not only keep things exciting but also allow you to tailor the pie to your taste preferences. I encourage you to get creative and make this No-Bake Key Lime Pie your own. After all, cooking is all about having fun and expressing yourself in the kitchen!
Cooking Notes for No-Bake Key Lime Pie Recipe
As I’ve learned through my culinary adventures, a few cooking notes can make all the difference when preparing your No-Bake Key Lime Pie. Here are some insights that I’ve gathered over the years, which I hope will help you achieve the perfect pie:
- Fresh Ingredients: Always opt for fresh key limes if you can find them. Their vibrant flavor truly elevates the pie. If you’re using bottled lime juice, make sure it’s 100% pure for the best taste.
- Chill Time: Patience is key! Allowing the pie to chill for a full 4 hours or overnight ensures that the filling sets properly. Trust me, the wait is worth it!
- Texture Matters: If you prefer a creamier filling, consider using full-fat sour cream. It adds richness and a velvety texture that’s simply divine.
- Serving Temperature: Serve the pie chilled, but not too cold. Let it sit at room temperature for about 10 minutes before slicing. This makes it easier to cut and enhances the flavors.
- Storage Tips: If you have leftovers (which is rare in my house!), cover the pie tightly with plastic wrap and store it in the refrigerator. It should stay fresh for up to 3 days.
These cooking notes are little nuggets of wisdom that I’ve picked up along the way. They help ensure that each slice of your No-Bake Key Lime Pie is as delightful as the last. Happy cooking!
Serving Suggestions for No-Bake Key Lime Pie Recipe
When it comes to serving my No-Bake Key Lime Pie, I love to make it a special occasion, even if it’s just a casual family dinner. Presentation can elevate the experience, and there are a few simple ways to do this. Here are my favorite serving suggestions:
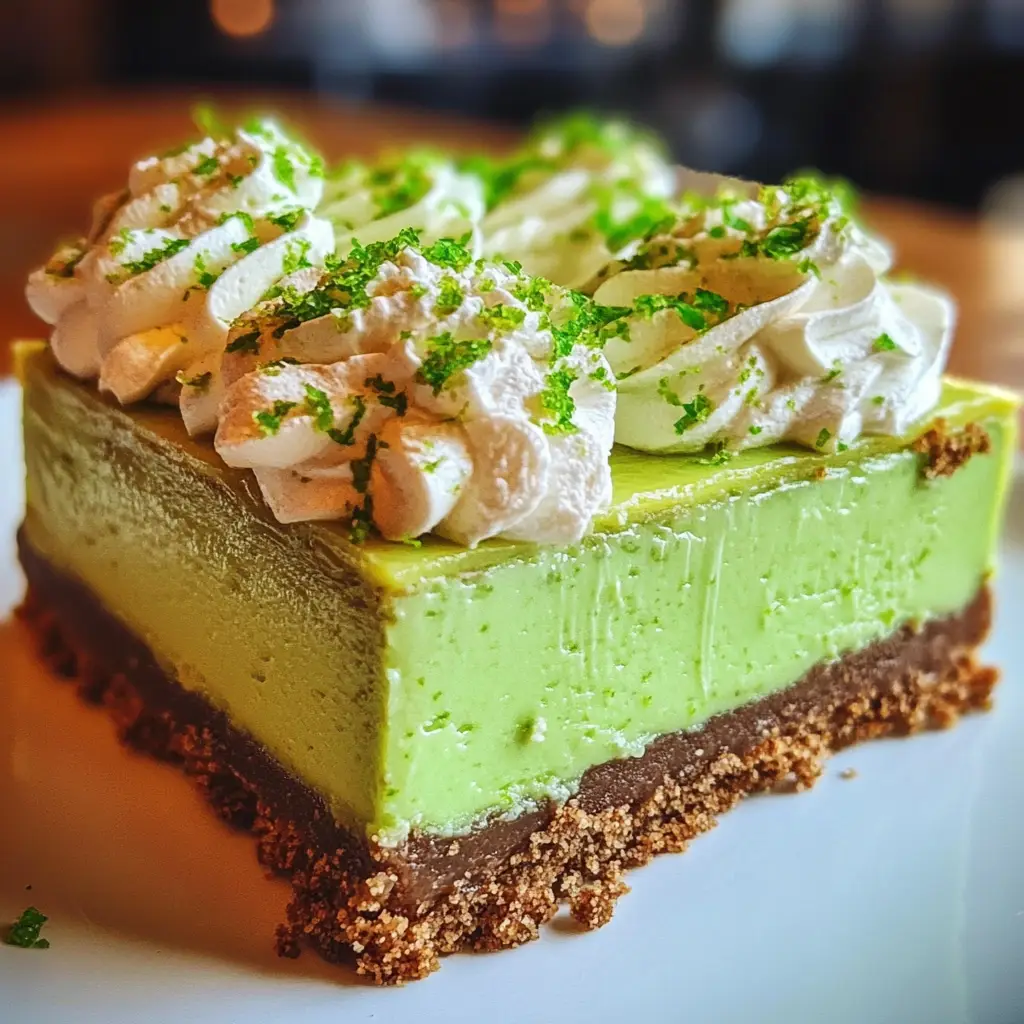
- Garnish with Whipped Cream: A generous dollop of freshly whipped cream on each slice adds a creamy contrast to the tangy filling. I often use a piping bag to create beautiful swirls—it’s like a little cloud on my pie!
- Fresh Fruit: Top each slice with a slice of lime or a handful of fresh berries. The vibrant colors not only look stunning but also add a burst of flavor that complements the pie perfectly.
- Toasted Coconut: For a tropical touch, sprinkle some toasted coconut flakes over the whipped cream. It adds a delightful crunch and reminds me of those sunny beach days.
- Chocolate Drizzle: If you’ve opted for the chocolate variation, a drizzle of melted chocolate over the top can make it look extra indulgent. It’s a sweet surprise that everyone loves!
- Serve with a Side of Lime Sorbet: For an extra refreshing treat, serve a scoop of lime sorbet alongside the pie. The coolness of the sorbet pairs beautifully with the creamy filling.
These serving suggestions not only enhance the visual appeal of your No-Bake Key Lime Pie but also add layers of flavor and texture. Each slice becomes a little celebration, and I can’t wait to share it with friends and family. Enjoy every bite!
Tips for Perfecting No-Bake Key Lime Pie Recipe
As I’ve whipped up my fair share of No-Bake Key Lime Pies, I’ve gathered a treasure trove of tips that can help you achieve pie perfection. These little nuggets of wisdom can make a big difference in your final result. Here’s what I’ve learned:
- Use Room Temperature Ingredients: Before you start mixing, let your sour cream and sweetened condensed milk sit out for about 15 minutes. This helps them blend together more smoothly, creating a creamier filling.
- Don’t Skip the Zest: Adding lime zest is a game-changer! It enhances the flavor and gives your pie that extra zing. Plus, it looks beautiful sprinkled on top!
- Be Mindful of Sweetness: Taste your filling before pouring it into the crust. If it’s too sweet for your liking, a splash more lime juice can balance it out perfectly.
- Chill Thoroughly: Patience is key! Allow the pie to chill for at least 4 hours, but overnight is even better. This ensures the filling sets properly and the flavors meld beautifully.
- Slice with Care: When it’s time to serve, use a sharp knife dipped in warm water to cut clean slices. This helps prevent the filling from sticking to the knife, giving you those picture-perfect pieces.
These tips have helped me create a No-Bake Key Lime Pie that’s not only delicious but also visually stunning. I hope they inspire you to make your own version with confidence. Happy baking (or should I say, mixing)!
Breakdown of Time for No-Bake Key Lime Pie Recipe
As a home cook, I know that time management is key in the kitchen. When it comes to making my No-Bake Key Lime Pie, I like to keep track of the time to ensure everything goes smoothly. Here’s a quick breakdown of the time you’ll need for this delightful dessert:
- Prep Time: 20 minutes – This includes gathering your ingredients, preparing the crust, and mixing the filling. It’s a quick and enjoyable process that gets you one step closer to that delicious pie!
- Chill Time: 4 hours (or overnight) – This is the hardest part! You’ll need to let the pie chill in the refrigerator to set properly. I recommend making it the day before for the best flavor.
- Total Time: 4 hours and 20 minutes (or overnight) – This includes both the prep and chill time. It’s a small investment for a dessert that will impress everyone at the table!
By keeping this time breakdown in mind, you can plan your day accordingly. Whether you’re preparing for a special occasion or just treating yourself, this No-Bake Key Lime Pie is worth every minute spent. Happy cooking!
Nutritional Information for No-Bake Key Lime Pie Recipe
As a passionate home cook, I always find it helpful to know the nutritional information of the dishes I prepare. It allows me to enjoy my culinary creations while being mindful of what I’m eating. Here’s a general breakdown of the nutritional information for a slice of No-Bake Key Lime Pie, based on a standard recipe that serves 8:
- Calories: Approximately 300 calories per slice
- Fat: 18 grams (with about 10 grams of saturated fat)
- Carbohydrates: 35 grams
- Fiber: 1 gram
- Sugar: 20 grams
- Protein: 3 grams
Keep in mind that these values can vary based on the specific ingredients you use, such as the type of crust or the amount of sugar. If you’re looking to lighten things up, consider using reduced-fat sour cream or a sugar substitute. I love how this pie can be enjoyed in moderation, allowing me to savor each delicious bite without guilt. Remember, it’s all about balance in the kitchen!
Frequently Asked Questions about No-Bake Key Lime Pie Recipe
As I’ve shared my No-Bake Key Lime Pie recipe with friends and family, I’ve noticed a few common questions pop up. It’s always great to clarify any doubts, especially when it comes to creating this delightful dessert. Here are some frequently asked questions that I hope will help you on your culinary journey:
Can I use bottled lime juice instead of fresh?
Absolutely! While fresh key lime juice gives the best flavor, bottled lime juice can work in a pinch. Just make sure it’s 100% pure for the best results. I’ve used both, and they each have their charm!
How long can I store the No-Bake Key Lime Pie?
If you have leftovers (which is rare in my house!), you can store the pie in the refrigerator for up to 3 days. Just cover it tightly with plastic wrap to keep it fresh. The flavors actually get better as it sits!
Can I freeze the No-Bake Key Lime Pie?
Yes, you can freeze it! Just make sure to wrap it well in plastic wrap and then in aluminum foil. When you’re ready to enjoy it, let it thaw in the refrigerator for a few hours before serving. It’s a great way to prepare ahead for a special occasion!
What can I use instead of graham cracker crumbs for the crust?
If you’re looking for alternatives, crushed cookies like digestive biscuits or vanilla wafers work wonderfully. You can even use crushed nuts mixed with a bit of melted butter for a gluten-free option. The possibilities are endless!
How do I know when the filling is set?
The filling should be firm to the touch and hold its shape when you slice into the pie. If it jiggles too much, it may need more chilling time. Patience is key here—let it chill for at least 4 hours, or overnight for the best results!
These questions are just a few of the many that can arise when making this No-Bake Key Lime Pie. I hope my answers help you feel more confident in your baking adventure. Remember, cooking is all about experimenting and having fun, so don’t hesitate to make this recipe your own!
Conclusion on No-Bake Key Lime Pie Recipe
As I wrap up this delightful journey through my No-Bake Key Lime Pie recipe, I can’t help but feel a sense of joy. This pie is more than just a dessert; it’s a celebration of flavors, memories, and creativity. The zesty lime, creamy filling, and crunchy crust come together to create a treat that’s both refreshing and indulgent.
What I love most about this recipe is its simplicity. With just a handful of ingredients and no baking required, anyone can whip it up in no time. It’s perfect for warm summer days or any occasion that calls for a sweet touch. Plus, the ability to customize it with various toppings and variations means you can make it uniquely yours.
Whether you’re sharing it with family, friends, or simply treating yourself, this No-Bake Key Lime Pie is sure to bring smiles and satisfaction. So, gather your ingredients, roll up your sleeves, and dive into this culinary adventure. I promise you won’t regret it! Happy cooking!
