
No-Bake Peanut Butter Pie: Indulge in Creamy Bliss!
Sensory-Rich Introduction with Immediate Craving
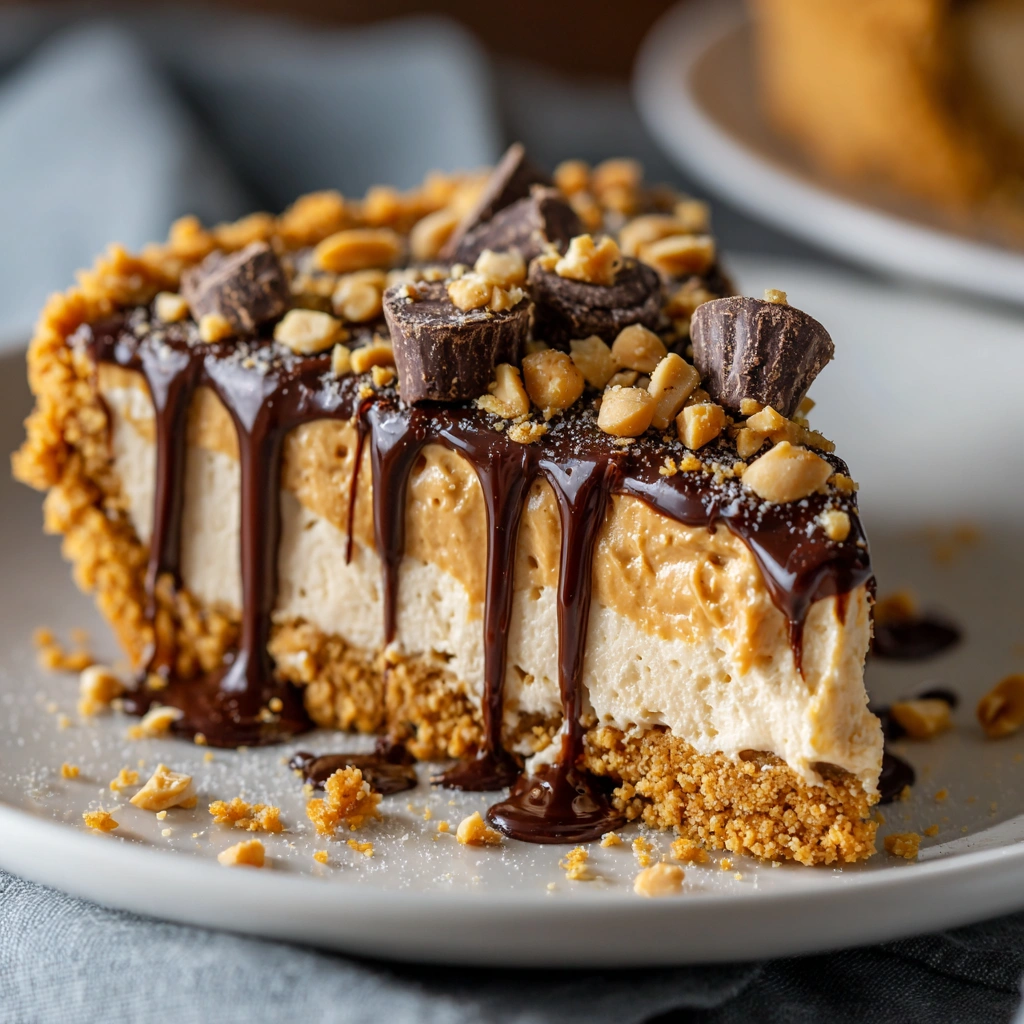
Imagine a dessert that melts in your mouth, where the rich, nutty flavor of creamy peanut butter dances with the sweetness of powdered sugar, all nestled in a crunchy graham cracker crust. This No-Bake Peanut Butter Pie is not just a treat; it’s an experience that evokes childhood memories of licking the spoon after making peanut butter cookies. Perfect for summer gatherings, holiday celebrations, or simply a cozy night in, this pie is a crowd-pleaser that will have everyone coming back for seconds. Whether you’re a peanut butter aficionado or just looking for a delightful dessert, this pie promises to satisfy your cravings and warm your heart.
Why You’ll Love This No-Bake Peanut Butter Pie
- Texture Contrast: The creamy filling contrasts beautifully with the crunchy graham cracker crust, creating a delightful mouthfeel.
- Flavor Balance: The sweetness of the filling is perfectly balanced by the slight saltiness of the peanut butter, making each bite irresistible.
- Versatility: This pie can be customized with various toppings, making it suitable for any occasion or personal preference.
- Ease of Preparation: With no baking required, this recipe is straightforward and quick, perfect for novice bakers and busy schedules alike.
- Universal Appeal: Loved by both kids and adults, this pie is a guaranteed hit at any gathering, ensuring smiles all around.
Essential Tools & Preparation Strategy
- Mixing Bowls: Essential for combining ingredients smoothly; opt for glass or stainless steel for easy cleaning.
- Electric Mixer: Needed for whipping cream and mixing the filling to achieve a light, airy texture.
- Spatula: Useful for gently folding ingredients without deflating the whipped cream, ensuring a fluffy filling.
- Pie Pan: A 9-inch pie pan is crucial for shaping and presenting the pie; consider a glass pan for a beautiful display.
- Measuring Cups and Spoons: Important for accurate ingredient measurements; use dry measuring cups for solids and liquid measuring cups for liquids.
- Chilling Rack: Helps to cool the pie evenly in the refrigerator, ensuring it sets properly.
- Parchment Paper: Optional, but can be used to line the pie pan for easier removal of the pie.
- Whisk: Handy for mixing the filling and whipping cream if you prefer a manual method.
Ingredients & Their Roles in This No-Bake Peanut Butter Pie
Crust
- Graham Cracker Crumbs: Provides a crunchy base with a hint of sweetness.
- Unsalted Butter: Binds the crumbs together and adds richness.
- Granulated Sugar: Enhances the sweetness of the crust.
Filling
- Creamy Peanut Butter: The star ingredient, providing flavor and creaminess.
- Powdered Sugar: Sweetens the filling and helps achieve a smooth texture.
- Cream Cheese: Adds richness and stability to the filling.
- Heavy Whipping Cream: Creates a light, airy texture when whipped.
- Vanilla Extract: Enhances the overall flavor profile.
Topping
- Chocolate Chips: Optional, for a decadent drizzle that complements the peanut butter.
- Chopped Peanuts: For garnish, adding a crunchy texture and visual appeal.
Step-by-Step Guide to Perfect No-Bake Peanut Butter Pie
- Prepare the Crust: In a medium bowl, combine 1 ½ cups of graham cracker crumbs, ½ cup of melted unsalted butter, and ¼ cup of granulated sugar. Mix until well combined.
- Form the Crust: Press the mixture firmly into the bottom and up the sides of a 9-inch pie pan. Chill in the refrigerator for 15 minutes to set.
- Mix the Filling: In a large mixing bowl, beat 8 oz of softened cream cheese until smooth. Add 1 cup of creamy peanut butter and 1 cup of powdered sugar, mixing until fully incorporated.
- Whip the Cream: In a separate bowl, whip 1 cup of heavy cream and 1 tsp of vanilla extract until stiff peaks form.
- Combine Mixtures: Gently fold the whipped cream into the peanut butter mixture until no streaks remain, ensuring a light texture.
- Fill the Crust: Pour the filling into the chilled crust and smooth the top with a spatula.
- Chill the Pie: Refrigerate the pie for at least 4 hours or until set, allowing the flavors to meld.
- Add Toppings: If desired, melt ½ cup of chocolate chips and drizzle over the top before serving. Garnish with chopped peanuts.
Chef’s Notes & Pro Tips for Flawless Results
- Make-Ahead Instructions: This pie can be made up to 2 days in advance and stored in the refrigerator, making it perfect for entertaining.
- Storage: Leftovers can be stored in an airtight container in the fridge for up to 5 days.
- Equipment Recommendations: A stand mixer can make whipping the cream easier, but a hand mixer works just as well.
- Customization Options: For a gluten-free version, use gluten-free graham crackers. You can also experiment with different nut butters for unique flavors.
Avoid These Common Cooking Mistakes
- Not Chilling the Crust Long Enough: This can lead to a soggy bottom. Ensure it chills for at least 15 minutes.
- Overmixing the Whipped Cream: This can cause it to become grainy. Stop mixing as soon as stiff peaks form.
- Using Natural Peanut Butter: This can result in a runny filling. Stick to creamy peanut butter for best results.
- Not Allowing the Pie to Set: Skipping the chilling time can lead to a messy slice. Be patient and chill for at least 4 hours.
- Forgetting to Soften the Cream Cheese: This can create lumps in the filling. Always let it sit at room temperature first.
- Using a Pan That’s Too Small: This can cause overflow. Use a 9-inch pie pan for proper proportions.
- Not Measuring Ingredients Accurately: This can affect the texture and flavor. Use measuring cups and spoons for precision.
- Skipping the Topping: While optional, toppings like chocolate or nuts enhance the pie’s flavor and presentation.
Creative Variations & Customizations
- Chocolate Peanut Butter Pie: Add cocoa powder to the filling for a chocolate twist.
- Nut-Free Version: Substitute sunflower seed butter for a nut-free alternative.
- Vegan Option: Use vegan cream cheese and coconut cream for a dairy-free version.
- Seasonal Flavors: Incorporate pumpkin puree and spices for a fall-inspired pie.
- Fruit Topping: Add fresh banana slices or berries for a fruity contrast.
Perfect Pairings: What to Serve With No-Bake Peanut Butter Pie
- Whipped Cream: A dollop adds extra creaminess and lightens the dessert.
- Fresh Berries: Strawberries or raspberries provide a tart contrast to the sweet pie.
- Vanilla Ice Cream: A scoop enhances the indulgence and adds a creamy texture.
- Chocolate Sauce: Drizzling over the pie elevates the dessert to a new level of decadence.
- Coffee or Espresso: The bitterness of coffee balances the sweetness of the pie.
- Crushed Oreos: Sprinkling on top adds a crunchy texture and chocolate flavor.
- Cold Milk: A classic pairing that complements the richness of the pie.
- Fruit Salad: A refreshing side that lightens the meal and adds color.
Storage & Meal Prep Instructions
- Refrigeration: Store the pie in the fridge for up to 5 days in an airtight container.
- Freezing: For longer storage, freeze the pie for up to 2 months. Thaw in the refrigerator before serving.
- Reheating: This pie is best served chilled, so no reheating is necessary.
Nutrition Facts & Health Insights
| Nutrient | Amount per Serving (1 slice) |
|---|---|
| Calories | 350 |
| Sugar | 20 grams |
| Sodium | 250 milligrams |
| Fat | 25 grams |
| Saturated Fat | 10 grams |
| Unsaturated Fat | 15 grams |
| Trans Fat | 0 grams |
| Carbohydrates | 30 grams |
| Fiber | 2 grams |
| Protein | 6 grams |
| Cholesterol | 30 milligrams |
Health Insights: Peanut butter is a good source of protein and healthy fats, while cream cheese adds calcium. Enjoy this pie in moderation as part of a balanced diet.
Frequently Asked Questions
- Can I use crunchy peanut butter? Yes, but it will change the texture of the filling.
- How long does the pie need to chill? At least 4 hours for the best results.
- Can I make this pie dairy-free? Yes, use vegan cream cheese and coconut cream.
- What can I substitute for graham crackers? Use digestive biscuits or gluten-free alternatives.
- How do I prevent the crust from getting soggy? Ensure it chills properly before adding the filling.
- Can I add chocolate to the filling? Yes, you can mix in melted chocolate for a richer flavor.
- Is it possible to make this pie in advance? Absolutely! It can be made up to 2 days ahead.
- What’s the best way to slice the pie? Use a sharp knife dipped in warm water for clean slices.
Final Inspiration & Kitchen Confidence
As you prepare this No-Bake Peanut Butter Pie, remember that cooking is not just about following a recipe; it’s about creating memories and sharing joy with loved ones. Celebrate your achievements in the kitchen, and don’t hesitate to experiment with flavors and presentations. This pie is a testament to your culinary creativity, and with each slice, you’ll inspire others to indulge in the creamy bliss of peanut butter. So gather your ingredients, roll up your sleeves, and let the magic happen—your perfect pie awaits!
Print
No-Bake Peanut Butter Pie: Indulge in Creamy Bliss!
- Total Time: 4 hours 30 minutes
- Yield: 8 servings 1x
- Diet: Vegetarian
Description
This No-Bake Peanut Butter Pie is a luscious dessert that combines a velvety peanut butter filling with a crunchy graham cracker crust. Each bite offers a delightful contrast of creamy sweetness and nutty richness, making it an irresistible treat for peanut butter lovers.
Ingredients
- Crust:
- 1 ½ cups graham cracker crumbs
- ½ cup unsalted butter, melted
- ¼ cup granulated sugar
- Filling:
- 1 cup creamy peanut butter
- 1 cup powdered sugar
- 8 oz cream cheese, softened
- 1 cup heavy whipping cream
- 1 tsp vanilla extract
- Topping:
- ½ cup chocolate chips (optional)
- Chopped peanuts (for garnish)
Instructions
- In a medium bowl, combine graham cracker crumbs, melted butter, and granulated sugar. Mix until well combined.
- Press the mixture firmly into the bottom and up the sides of a 9-inch pie pan to form the crust. Chill in the refrigerator for 15 minutes.
- In a large mixing bowl, beat the softened cream cheese until smooth. Add the peanut butter and powdered sugar, mixing until fully incorporated.
- In a separate bowl, whip the heavy cream and vanilla extract until stiff peaks form.
- Gently fold the whipped cream into the peanut butter mixture until no streaks remain.
- Pour the filling into the chilled crust and smooth the top with a spatula.
- Chill the pie in the refrigerator for at least 4 hours or until set.
- If desired, melt chocolate chips and drizzle over the top before serving. Garnish with chopped peanuts.
Notes
- This pie can be made up to 2 days in advance and stored in the refrigerator.
- Store leftovers in an airtight container in the fridge for up to 5 days.
- For a gluten-free version, use gluten-free graham crackers.
- Prep Time: 30 minutes
- Cook Time: 0 minutes
- Category: desserts
- Method: no-bake
- Cuisine: American
Nutrition
- Serving Size: 1 slice (1/8 of pie)
- Calories: 350
- Sugar: 20 grams
- Sodium: 250 milligrams
- Fat: 25 grams
- Saturated Fat: 10 grams
- Unsaturated Fat: 15 grams
- Trans Fat: 0 grams
- Carbohydrates: 30 grams
- Fiber: 2 grams
- Protein: 6 grams
- Cholesterol: 30 milligrams
Keywords: No-Bake Peanut Butter Pie, peanut butter dessert, easy pie recipe, no-bake desserts, creamy pie, chocolate drizzle, summer dessert, quick dessert, peanut butter lovers, graham cracker crust, vegetarian dessert, chilled pie, indulgent dessert
