
Sensory-Rich Introduction with Immediate Craving
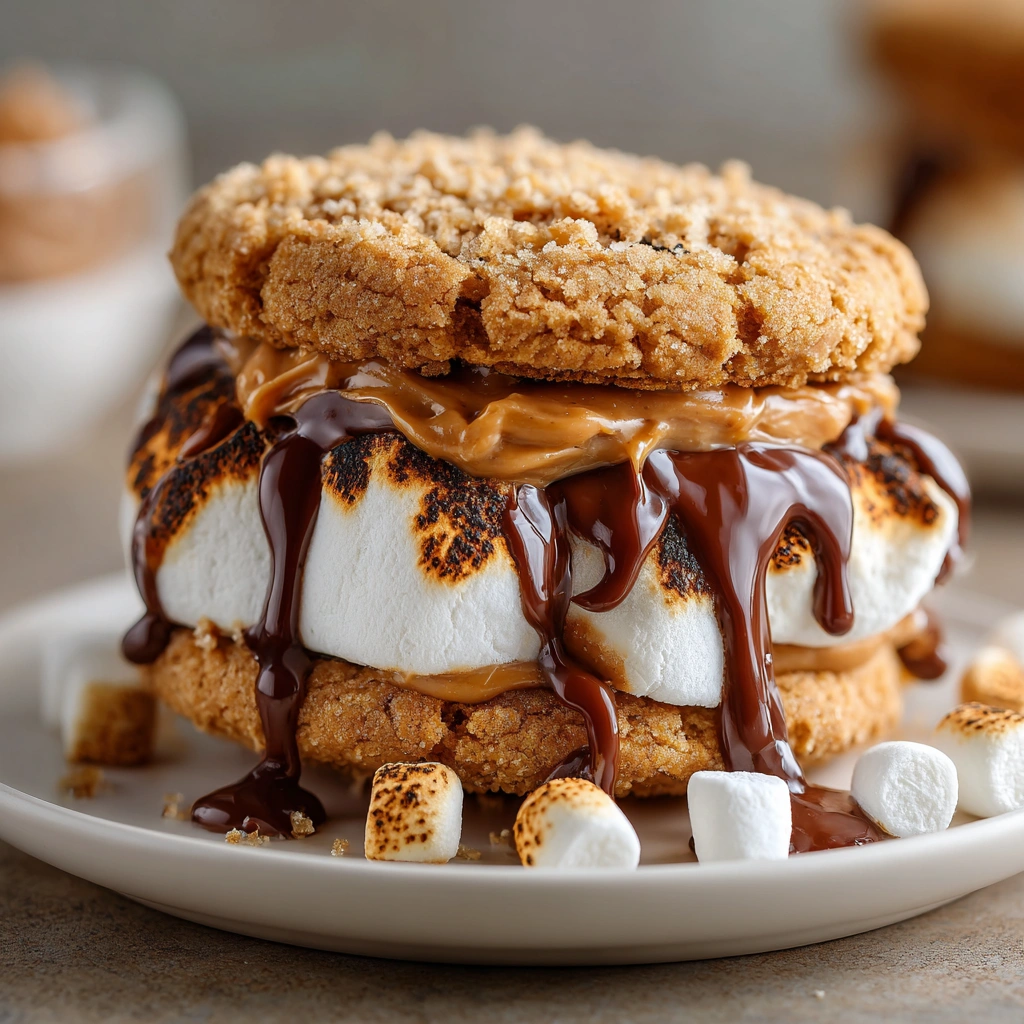
Imagine biting into a warm, freshly baked cookie that’s a delightful medley of textures and flavors. The moment you sink your teeth into these Peanut Butter S’mores Sandwich Cookies, you’re greeted with the crunch of the peanut butter cookie, followed by the gooey embrace of melted marshmallows and rich chocolate. The aroma wafts through your kitchen, a sweet invitation that’s hard to resist, making your mouth water in anticipation.
As a child, I remember the thrill of summer nights spent around a crackling campfire, roasting marshmallows until they were perfectly golden brown. My siblings and I would eagerly assemble our s’mores, the sticky marshmallow oozing out as we took our first bites. This recipe brings that cherished memory indoors, allowing me to recreate that joy in my own kitchen. Each cookie is a nostalgic reminder of those carefree days, wrapped in the warmth of family and laughter.
There’s something truly special about sharing these cookies with loved ones. Whether it’s a cozy gathering with friends or a festive birthday party, these cookies are sure to spark joy and create lasting memories. They’re perfect for summer barbecues, where the sweet flavors complement the warmth of the sun, or for chilly winter nights, paired with a cup of hot cocoa. No matter the occasion, these cookies are a delightful treat that brings everyone together, making every moment a little sweeter.
Why You’ll Love This Peanut Butter S’mores Sandwich Cookies
Let me tell you, these Peanut Butter S’mores Sandwich Cookies are not just any ordinary cookie; they are a delightful experience that will have you coming back for more. Here’s why you’ll fall head over heels for them:
- Texture Contrast: The moment you take a bite, you’ll notice the satisfying crunch of the peanut butter cookie giving way to the gooey, melty marshmallow and rich chocolate filling. It’s a delightful mouthfeel that keeps you reaching for another cookie!
- Flavor Balance: The sweetness of the chocolate and marshmallow perfectly complements the salty richness of the peanut butter. Each bite is a harmonious blend of flavors that dance on your palate, making it hard to resist.
- Versatility: These cookies are incredibly versatile! Whether you’re looking for a sweet dessert, a fun snack for the kids, or a treat to impress your friends, these cookies fit the bill perfectly.
- Ease of Preparation: With simple ingredients and straightforward steps, this recipe is accessible for bakers of all levels. Even if you’re short on time, you can whip these up in no time!
- Universal Appeal: Loved by both kids and adults alike, these cookies are a hit at any gathering. They bring smiles and joy, making them the perfect addition to birthday parties, picnics, or cozy family nights.
So, whether you’re baking for a special occasion or just treating yourself, these cookies are sure to bring happiness to your kitchen and beyond!
Essential Tools & Preparation Strategy
Before diving into the delightful world of Peanut Butter S’mores Sandwich Cookies, let’s gather our essential tools and set the stage for a smooth baking experience. Trust me, having the right equipment makes all the difference!
- Mixing Bowl: A large mixing bowl is essential for combining ingredients smoothly. I always opt for a glass or stainless steel bowl, as they’re easy to clean and won’t retain odors.
- Baking Sheet: A sturdy baking sheet is crucial for even baking. If you’re like me and love to bake in batches, consider using multiple sheets to save time.
- Parchment Paper: This little hero prevents sticking and simplifies cleanup. If you’re feeling fancy, silicone baking mats are a great reusable alternative!
- Measuring Cups and Spoons: Accurate measurements are key to baking success. I recommend using a set of dry measuring cups for solids and liquid measuring cups for liquids to ensure precision.
- Microwave-Safe Bowl: A glass bowl is perfect for melting chocolate without burning it. Remember, patience is key—melt in short intervals!
- Spatula: A flexible silicone spatula is my go-to for spreading chocolate and transferring cookies. It’s gentle on the cookies and makes cleanup a breeze.
- Cooling Rack: This allows cookies to cool evenly, preventing sogginess. If you don’t have one, a plate will do in a pinch!
Ingredients & Their Roles in This Peanut Butter S’mores Sandwich Cookies
Now that we have our tools ready, let’s talk about the star players in our cookie creation. Each ingredient plays a vital role in achieving that perfect balance of flavors and textures.
For the Cookies:
- Creamy Peanut Butter: This is the heart of our cookies, providing richness and flavor. If you’re feeling adventurous, almond butter can be a delightful substitute!
- Granulated Sugar: Sweetens the cookies beautifully. For a deeper flavor, consider using brown sugar instead.
- Egg: Acts as a binder, holding everything together. If you’re vegan, a flax egg works wonders!
- Vanilla Extract: Enhances the overall flavor profile. If you’re in a pinch, you can skip it, but I wouldn’t recommend it!
- Baking Soda: This little leavening agent helps our cookies rise. If you’re out, baking powder can be a suitable alternative.
- Salt: Balances the sweetness. Feel free to adjust based on your taste preferences.
For the Filling:
- Mini Marshmallows: These add that gooey, s’mores-like texture. If you can’t find mini ones, just cut larger marshmallows into smaller pieces.
- Chocolate Chips: The rich chocolate flavor is essential. Dark chocolate or even white chocolate can be fun variations!
Step-by-Step Guide to Perfect Peanut Butter S’mores Sandwich Cookies
Now that we have our ingredients and tools ready, it’s time to bring these Peanut Butter S’mores Sandwich Cookies to life! Follow this step-by-step guide, and you’ll be rewarded with cookies that are not only delicious but also a joy to make.
- Preheat Your Oven: Start by preheating your oven to 350°F (175°C). This ensures that your cookies bake evenly and achieve that perfect golden color.
- Mix the Ingredients: In a mixing bowl, combine 1 cup of creamy peanut butter, 1 cup of granulated sugar, 1 large egg, 1 teaspoon of vanilla extract, 1/2 teaspoon of baking soda, and 1/4 teaspoon of salt. Mix until the batter is smooth and creamy, with no lumps. The aroma of peanut butter will fill your kitchen, making it hard to resist tasting the dough!
- Scoop the Dough: Using a tablespoon, scoop the dough onto a baking sheet lined with parchment paper, spacing them about 2 inches apart. This spacing is crucial to allow the cookies to spread without merging into one another.
- Bake the Cookies: Place the baking sheet in the preheated oven and bake for 10-12 minutes, or until the edges are lightly golden. Keep an eye on them; you want them to be soft in the center but firm enough to hold their shape.
- Cool the Cookies: Once baked, remove the cookies from the oven and let them cool on the baking sheet for 5 minutes. This cooling time allows them to firm up a bit before transferring them to a cooling rack.
- Melt the Chocolate: While the cookies are cooling, melt 1/2 cup of chocolate chips in a microwave-safe bowl. Heat in 30-second intervals, stirring in between until smooth. Be careful not to overheat, as burnt chocolate can ruin the flavor!
- Assemble the Sandwiches: Once the cookies are cool, take one cookie and spread a layer of melted chocolate on the bottom. Top it with a generous handful of mini marshmallows, then place another cookie on top to create a sandwich. The gooey marshmallows will start to melt slightly from the warm chocolate, creating a deliciously messy treat!
- Let Them Set: Allow the assembled cookies to set for 10 minutes before serving. This waiting period helps the chocolate harden a bit, making them easier to handle and eat.
And there you have it! A step-by-step guide to creating your very own Peanut Butter S’mores Sandwich Cookies. The anticipation of that first bite is almost as sweet as the cookies themselves!
Chef’s Notes & Pro Tips for Flawless Results
As you embark on your baking adventure with these Peanut Butter S’mores Sandwich Cookies, here are some invaluable tips and tricks I’ve gathered over the years to ensure your cookies turn out perfectly every time. Trust me, these little nuggets of wisdom can make all the difference!
- Make-ahead Instructions: If you’re short on time, you can prepare the cookie dough ahead of time. Simply refrigerate it for up to 3 days before baking. This not only saves time but also allows the flavors to meld beautifully!
- Storage: To keep your cookies fresh and delicious, store them in an airtight container at room temperature for up to 5 days. If you’re like me and can’t resist snacking, they might not last that long!
- Equipment Recommendations: Investing in quality baking sheets and silicone spatulas can elevate your baking game. A sturdy baking sheet ensures even baking, while a flexible silicone spatula makes transferring cookies a breeze without breaking them.
- Customization Options: Don’t be afraid to get creative! Experiment with different nut butters like almond or cashew for a unique twist. You can also add crushed graham crackers to the cookie dough for that classic s’mores crunch, or even sprinkle in some mini chocolate chips for an extra chocolatey experience!
With these tips in your back pocket, you’ll be well on your way to baking the most delightful Peanut Butter S’mores Sandwich Cookies that will impress family and friends alike. Happy baking!
Avoid These Common Cooking Mistakes
Baking is as much an art as it is a science, and even the most seasoned bakers can run into a few hiccups along the way. To ensure your Peanut Butter S’mores Sandwich Cookies turn out perfectly every time, here are some common mistakes to avoid:
- Overbaking: This is a classic pitfall that can lead to dry, crumbly cookies. Keep a close eye on your cookies and bake them until they are just golden around the edges. Remember, they will continue to cook slightly after being removed from the oven!
- Not Cooling Cookies: If you try to assemble your cookies while they’re still warm, the filling may ooze out, creating a gooey mess. Allow your cookies to cool properly on the baking sheet for at least 5 minutes before transferring them to a cooling rack.
- Using Chunky Peanut Butter: While it may be tempting to use chunky peanut butter for added texture, it can alter the consistency of your cookies. Stick to creamy peanut butter for the best results, ensuring a smooth and cohesive dough.
- Skipping the Parchment Paper: This is a rookie mistake! Not lining your baking sheet can lead to cookies that stick and break apart. Always use parchment paper or silicone baking mats to ensure easy removal and cleanup.
- Not Measuring Ingredients: Baking is all about precision. Not measuring your ingredients accurately can affect the outcome of your cookies. Use proper measuring tools to ensure you get the right quantities for a perfect bake.
- Melting Chocolate Too Quickly: Chocolate can be finicky! Melting it too quickly can lead to burnt chocolate, which is a disaster for your filling. Use short intervals in the microwave, stirring in between, to achieve that smooth, velvety texture.
- Not Letting the Filling Set: After assembling your cookies, it’s crucial to let them set for at least 10 minutes. This allows the chocolate to harden, preventing the cookies from falling apart when you take a bite.
By steering clear of these common mistakes, you’ll be well on your way to creating deliciously gooey and crunchy Peanut Butter S’mores Sandwich Cookies that will impress everyone around you. Happy baking!
Creative Variations & Customizations
One of the best things about baking is the opportunity to get creative and make a recipe your own. These Peanut Butter S’mores Sandwich Cookies are no exception! Here are some fun variations and customizations to consider, ensuring that every batch is uniquely delicious:
- Nut-Free Version: If you or someone you know has nut allergies, simply substitute the peanut butter with sun butter. This sunflower seed butter provides a similar creamy texture and flavor without the nuts, making it a safe and tasty alternative.
- Vegan Option: For a vegan-friendly treat, swap out the egg for a flax egg (1 tablespoon of ground flaxseed mixed with 2.5 tablespoons of water, let it sit for 5 minutes to thicken) and use dairy-free chocolate chips. This way, everyone can enjoy these delightful cookies!
- Seasonal Twist: Embrace the flavors of fall by adding pumpkin spice to the cookie dough. Just a teaspoon or two will infuse your cookies with warm, cozy flavors that are perfect for autumn gatherings.
- Chocolate Lovers: If you can’t get enough chocolate, take it up a notch by adding cocoa powder to the cookie dough. About 1/4 cup will transform your cookies into double chocolate delights, perfect for satisfying any chocolate craving!
- Fruit Infusion: For a fruity touch, consider incorporating dried fruits like cranberries or cherries into the filling. This adds a burst of flavor and a chewy texture that beautifully complements the rich chocolate and gooey marshmallows.
With these creative variations, you can tailor your Peanut Butter S’mores Sandwich Cookies to suit any occasion or personal preference. So, roll up your sleeves and let your imagination run wild in the kitchen!
Perfect Pairings: What to Serve With Peanut Butter S’mores Sandwich Cookies
When it comes to enjoying your Peanut Butter S’mores Sandwich Cookies, the right accompaniments can elevate the experience to new heights. Here are some delightful pairings that will complement the rich, gooey goodness of these cookies:
- Cold Milk: There’s nothing quite like a glass of cold milk to wash down the sweetness of these cookies. The creamy texture and coolness perfectly balance the rich flavors, making it a classic pairing that never goes out of style.
- Vanilla Ice Cream: For an indulgent treat, serve your cookies with a scoop of vanilla ice cream. The creaminess of the ice cream beautifully contrasts with the crunchy cookies, creating a delightful combination that’s hard to resist.
- Hot Cocoa: Embrace the cozy vibes by pairing your cookies with a warm cup of hot cocoa. The chocolatey richness of the cocoa enhances the s’mores experience, making it a perfect treat for chilly evenings.
- Fresh Fruit: Add a refreshing touch to your dessert spread with some fresh fruit. Berries, in particular, work wonderfully, providing a tart contrast that balances the sweetness of the cookies.
- Coffee: For a delightful afternoon pick-me-up, enjoy your cookies with a cup of coffee. The bitterness of the coffee pairs beautifully with the sweetness of the cookies, creating a harmonious flavor experience.
- Whipped Cream: Take your cookies to the next level by adding a dollop of whipped cream. This extra layer of sweetness and creaminess makes each bite even more decadent and satisfying.
- Fruit Compote: For a unique twist, serve your cookies with a side of fruit compote. The tartness of the compote offers a refreshing contrast that balances the rich flavors of the cookies, making for a delightful combination.
- Chocolate Milkshake: If you’re in the mood for something truly decadent, pair your cookies with a chocolate milkshake. This indulgent treat will satisfy any sweet tooth and create a memorable dessert experience.
With these perfect pairings, your Peanut Butter S’mores Sandwich Cookies will shine even brighter, making every bite a celebration of flavor and texture. So gather your loved ones, whip up some of these delightful accompaniments, and enjoy a sweet moment together!
Storage & Meal Prep Instructions
Now that you’ve baked a batch of these irresistible Peanut Butter S’mores Sandwich Cookies, it’s important to know how to store them properly to maintain their deliciousness. Here are some handy tips for storage and meal prep that will keep your cookies fresh and ready to enjoy!
- Fridge Storage: To keep your cookies at their best, store them in an airtight container in the refrigerator. They will stay fresh for up to 5 days. This is a great option if you want to extend their shelf life while keeping them soft and chewy.
- Freezer Storage: If you want to save some cookies for later, freezing is a fantastic option! Place the cookies in a single layer on a baking sheet and freeze until solid. Once frozen, transfer them to a freezer bag or airtight container. They can be stored in the freezer for up to 3 months. Just remember to label the bag with the date so you know when they were made!
- Reheating Methods: When you’re ready to enjoy a cookie (or two!), simply warm them in the microwave for 10-15 seconds. This will give you that fresh-out-of-the-oven taste, with the chocolate slightly melty and the marshmallow gooey again. It’s like a little hug from your kitchen!
With these storage and meal prep instructions, you can savor your Peanut Butter S’mores Sandwich Cookies for days to come. Whether you’re enjoying them fresh or reheated, each bite will remind you of the joy of baking and the sweet memories created in your kitchen!
Nutrition Facts & Health Insights
As we indulge in these delightful Peanut Butter S’mores Sandwich Cookies, it’s essential to be mindful of their nutritional content. Here’s a quick look at the nutrition facts per serving, which is one sandwich cookie:
| Nutrient | Amount per Serving |
|---|---|
| Calories | 250 |
| Sugar | 18 grams |
| Sodium | 150 milligrams |
| Fat | 12 grams |
| Saturated Fat | 3 grams |
| Unsaturated Fat | 8 grams |
| Trans Fat | 0 grams |
| Carbohydrates | 30 grams |
| Fiber | 1 gram |
| Protein | 5 grams |
| Cholesterol | 20 milligrams |
These cookies not only satisfy your sweet tooth but also offer some nutritional benefits. The creamy peanut butter is a fantastic source of protein, providing about 5 grams per cookie. This protein content helps keep you feeling full and satisfied, making these cookies a great option for a quick snack or dessert.
Additionally, the sugar in these cookies gives you a quick energy boost, perfect for those busy days when you need a little pick-me-up. However, it’s important to enjoy these cookies in moderation, as they are still a treat. Balancing them with healthier options throughout your day will ensure you can indulge without guilt!
So, go ahead and enjoy your Peanut Butter S’mores Sandwich Cookies—they’re not just delicious, but they also pack a little nutritional punch!
Frequently Asked Questions
As you embark on your baking journey with these Peanut Butter S’mores Sandwich Cookies, you might have a few questions along the way. Here are some common queries and their answers to help you achieve cookie perfection!
- Can I use natural peanut butter?
Yes, you can use natural peanut butter, but keep in mind that it may alter the texture slightly. Natural peanut butter tends to be more runny, so you might need to adjust the amount of sugar or add a bit more flour to achieve the right consistency. - How do I store leftover cookies?
To keep your cookies fresh, store them in an airtight container at room temperature for up to 5 days. If you want to extend their shelf life, consider refrigerating them. - What can I substitute for eggs?
If you’re looking for an egg substitute, a flax egg works wonderfully! Simply mix 1 tablespoon of ground flaxseed with 2.5 tablespoons of water and let it sit for about 5 minutes until it thickens. This will help bind your ingredients just like an egg would. - Can I make these cookies gluten-free?
Absolutely! To make these cookies gluten-free, simply substitute the granulated sugar with a gluten-free flour blend. Just ensure that the blend you choose is suitable for baking, and you’ll have delicious gluten-free cookies! - How long do these cookies last?
When stored properly in an airtight container, these cookies can last for up to 5 days at room temperature. If you freeze them, they can last for up to 3 months. - Can I freeze the cookie dough?
Yes, you can freeze the cookie dough! Just scoop the dough into balls and place them on a baking sheet to freeze until solid. Once frozen, transfer them to a freezer bag. When you’re ready to bake, simply add a couple of extra minutes to the baking time. - What if my cookies spread too much?
If your cookies spread too much, it could be due to the dough being too warm or not enough flour. Make sure to chill the dough for about 30 minutes before baking, and ensure you’re measuring your ingredients accurately. - How can I make these cookies more chocolatey?
To amp up the chocolate flavor, you can add cocoa powder to the cookie dough (about 1/4 cup) or use dark chocolate chips instead of semi-sweet. You can also drizzle melted chocolate on top of the assembled cookies for an extra chocolatey touch! - Can I add nuts to the filling?
Yes, feel free to add chopped nuts to the filling for an extra crunch! Pecans or walnuts would complement the flavors beautifully. Just be sure to chop them finely so they mix well with the marshmallows and chocolate. - What’s the best way to melt chocolate?
The best way to melt chocolate is to use a microwave-safe bowl and heat it in 30-second intervals, stirring in between. This method helps prevent the chocolate from burning and ensures a smooth, creamy consistency.
With these FAQs answered, you’re well-equipped to tackle any challenges that may arise while baking your Peanut Butter S’mores Sandwich Cookies. Happy baking!
Final Inspiration & Kitchen Confidence
Baking is more than just a process; it’s a journey filled with learning, joy, and a sprinkle of magic. Each time you step into the kitchen, you’re not just creating delicious treats; you’re crafting memories that will last a lifetime. Remember, it’s perfectly okay to make mistakes along the way—every great baker has a few “oops” moments! Embrace them, learn from them, and let them guide you to even greater successes.
As you take your first bite of those warm, gooey Peanut Butter S’mores Sandwich Cookies, take a moment to celebrate your achievement. You’ve poured your heart into this recipe, and now it’s time to share the fruits of your labor with friends and family. Whether it’s a cozy gathering or a festive celebration, these cookies are sure to bring smiles and spark joy. Don’t forget to snap a few photos of your creations—trust me, your loved ones will want to see your baking triumphs!
So, I invite you to dive into this recipe and let your creativity shine. Try it out, make it your own, and don’t hesitate to share your experiences with our community of baking enthusiasts. Your stories and tips can inspire others to embark on their own baking adventures. Together, let’s spread the love of baking and create a world filled with sweet moments and delicious memories. Happy baking!
Print
Peanut Butter S’mores Sandwich Cookies: Gooey, Crunchy Bliss!
- Total Time: 27 minutes
- Yield: 12 sandwich cookies 1x
- Diet: Vegetarian
Description
These Peanut Butter S’mores Sandwich Cookies are a delightful combination of gooey marshmallow, rich chocolate, and crunchy peanut butter cookies. Each bite offers a satisfying texture, with the creaminess of the peanut butter perfectly complementing the sweet, melty filling.
Ingredients
- For the Cookies:
- 1 cup creamy peanut butter
- 1 cup granulated sugar
- 1 large egg
- 1 teaspoon vanilla extract
- 1/2 teaspoon baking soda
- 1/4 teaspoon salt
- For the Filling:
- 1 cup mini marshmallows
- 1/2 cup chocolate chips
Instructions
- Preheat your oven to 350°F (175°C).
- In a mixing bowl, combine the peanut butter, sugar, egg, vanilla extract, baking soda, and salt until smooth.
- Using a tablespoon, scoop the dough onto a baking sheet lined with parchment paper, spacing them 2 inches apart.
- Bake for 10-12 minutes, or until the edges are lightly golden.
- Remove from the oven and let cool for 5 minutes on the baking sheet.
- While the cookies are cooling, melt the chocolate chips in a microwave-safe bowl in 30-second intervals, stirring until smooth.
- Once the cookies are cool, spread a layer of melted chocolate on the bottom of one cookie, top with mini marshmallows, and then sandwich with another cookie.
- Allow the cookies to set for 10 minutes before serving.
Notes
- Make-ahead: The cookie dough can be prepared and refrigerated for up to 3 days before baking.
- Storage: Store cookies in an airtight container at room temperature for up to 5 days.
- Substitutions: Use almond butter instead of peanut butter for a nut-free option.
- Prep Time: 15 minutes
- Cook Time: 12 minutes
- Category: desserts
- Method: baking
- Cuisine: American
Nutrition
- Serving Size: 1 sandwich cookie
- Calories: 250
- Sugar: 18 grams
- Sodium: 150 milligrams
- Fat: 12 grams
- Saturated Fat: 3 grams
- Unsaturated Fat: 8 grams
- Trans Fat: 0 grams
- Carbohydrates: 30 grams
- Fiber: 1 gram
- Protein: 5 grams
- Cholesterol: 20 milligrams
Keywords: Peanut Butter S'mores Sandwich Cookies, dessert, cookies, s'mores, peanut butter, chocolate, marshmallow, baking, sweet treats, easy recipes, American desserts, kid-friendly snacks
