

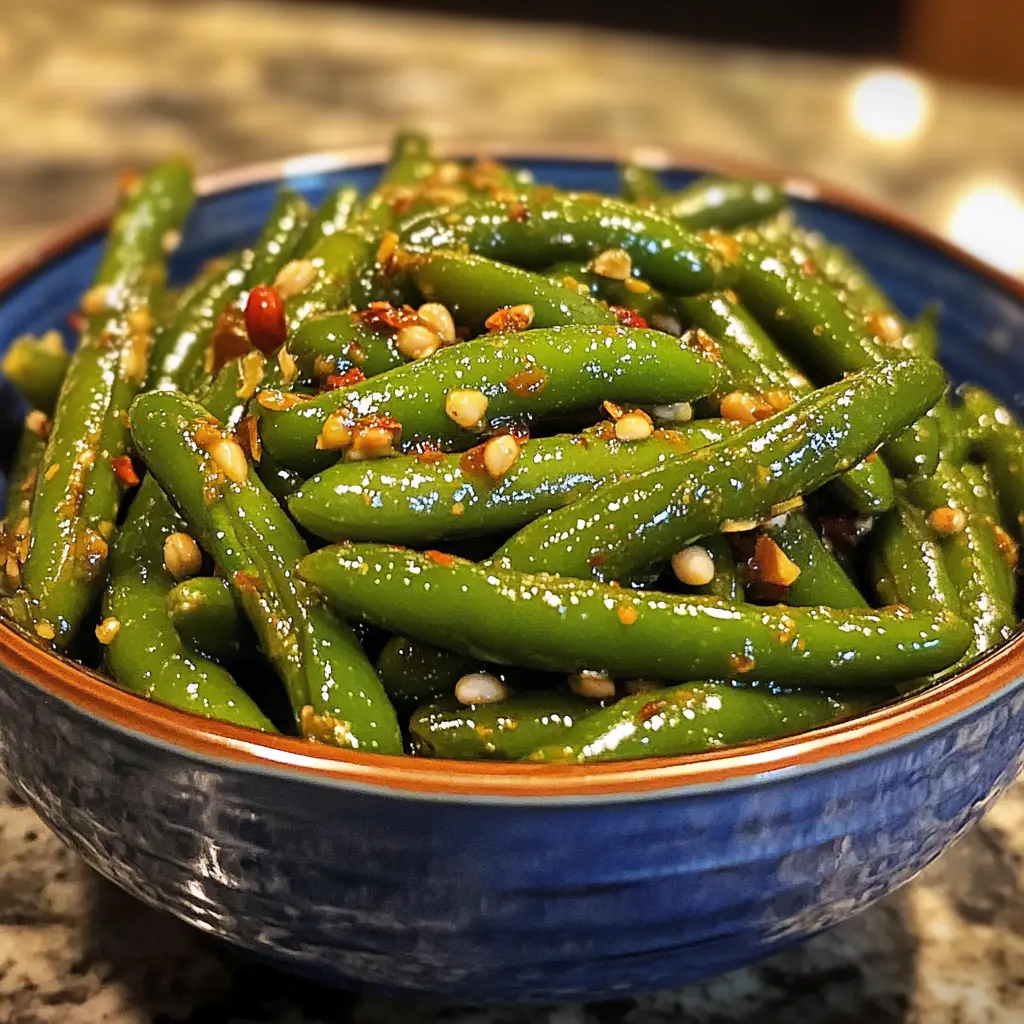
Introduction to Pickled Dilly Beans
As a busy mom, I know how precious time can be, especially when it comes to meal prep. That’s why I’m excited to share my recipe for pickled dilly beans! These vibrant, tangy treats are not just a quick solution for a busy day; they also add a burst of flavor to any meal. Imagine crunching into a perfectly pickled bean, the taste dancing on your tongue. Whether you’re looking to impress your loved ones or simply want a delightful snack, pickled dilly beans are the answer. Trust me, once you try them, you’ll be hooked!
Why You’ll Love This Pickled Dilly Beans
These pickled dilly beans are a game-changer for busy lives. They’re quick to make, taking just 25 minutes from start to finish. Plus, they’re incredibly versatile! You can enjoy them as a snack, a side dish, or even a zesty addition to salads. The tangy flavor and satisfying crunch will have your family asking for more. Trust me, once you taste them, you’ll wonder how you ever lived without them!
Ingredients for Pickled Dilly Beans
Gathering the right ingredients is key to making delicious pickled dilly beans. Here’s what you’ll need:
- Fresh green beans: Look for crisp, vibrant beans. They should snap easily when bent. This is the star of the show!
- Water: Simple, but essential for creating the brine. Use filtered water for the best flavor.
- White vinegar: This adds the tangy kick. You can substitute with apple cider vinegar for a different flavor profile.
- Salt: Regular table salt works, but kosher salt is a great option for a cleaner taste.
- Garlic: Fresh cloves add depth. You can use garlic powder in a pinch, but fresh is best!
- Dill seeds: These give that classic dilly flavor. If you can’t find them, fresh dill can be used instead.
- Red pepper flakes (optional): For those who like a little heat, these are perfect. Adjust the amount to your spice preference.
For exact measurements, check the bottom of the article where you can find everything listed for easy printing. Happy pickling!
How to Make Pickled Dilly Beans
Step 1: Prepare the Green Beans
Start by washing your fresh green beans under cool running water. This removes any dirt or residue. Next, trim the ends of the beans so they fit snugly into your jars. I like to snap them to the right length, which adds a bit of fun to the process! Make sure they’re all about the same size for even pickling. This step is crucial for ensuring every bite is perfectly crunchy and delicious.
Step 2: Make the Brine
In a medium saucepan, combine the water, white vinegar, and salt. Stir it gently to dissolve the salt completely. Then, bring this mixture to a rolling boil over medium-high heat. The aroma of the vinegar will fill your kitchen, and trust me, it’s a good sign! This brine is what gives your pickled dilly beans that tangy flavor. Once boiling, remove it from the heat and let it sit for a moment.
Step 3: Pack the Jars
Now it’s time to pack those jars! Take your sterilized jars and start layering in the green beans. Add a couple of peeled garlic cloves and sprinkle in the dill seeds. If you’re feeling adventurous, toss in some red pepper flakes for a spicy kick. Pack the beans tightly, but don’t squish them. You want them to stay crisp and vibrant. This is where the magic begins!
Step 4: Pour the Brine
Carefully pour the hot brine over the packed beans, ensuring they’re fully submerged. Leave about half an inch of headspace at the top of each jar. This space is important for the beans to expand during processing. As you pour, watch the steam rise and feel the excitement build! The brine will seep into every nook and cranny, infusing those beans with flavor.
Step 5: Seal and Process
Once the jars are filled, it’s time to seal them up! Place the lids on each jar and screw on the bands until they’re fingertip-tight. Next, process the jars in a boiling water bath for 5 to 10 minutes. This step ensures a proper seal and helps preserve your pickled dilly beans. As the jars bob in the water, you’ll feel like a true canning pro!
Step 6: Cool and Store
After processing, carefully remove the jars from the water bath and let them cool on a clean towel or cooling rack. You’ll hear the satisfying “pop” of the lids sealing as they cool. Once they’re completely cool, store the jars in a cool, dark place. Patience is key here! Let them sit for at least two weeks before diving in. The wait will be worth it!
Tips for Success
- Always use fresh, crisp green beans for the best texture.
- Make sure your jars are properly sterilized to prevent spoilage.
- Adjust the amount of red pepper flakes based on your spice tolerance.
- Label your jars with the date to keep track of freshness.
- Experiment with adding other spices like mustard seeds for a unique twist!
Equipment Needed
- Medium saucepan: A regular pot works, but a non-stick one makes cleanup easier.
- Sterilized jars: Mason jars are ideal; you can also use any glass jars with tight-fitting lids.
- Boiling water bath canner: A large pot can substitute if you don’t have a canner.
- Jar lifter: Tongs can work in a pinch, but a jar lifter is safer.
Variations
- Spicy Dilly Beans: Increase the amount of red pepper flakes or add sliced jalapeños for an extra kick.
- Herbed Dilly Beans: Experiment with fresh herbs like thyme or oregano for a unique flavor twist.
- Sweet and Spicy: Add a tablespoon of sugar to the brine for a sweet contrast to the tanginess.
- Garlic Lovers: Increase the number of garlic cloves for a more robust garlic flavor.
- Vegan Option: This recipe is naturally vegan, but you can add a splash of soy sauce for an umami boost.
Serving Suggestions
- Serve pickled dilly beans as a crunchy side with grilled meats or fish.
- Pair them with a refreshing summer salad for a zesty twist.
- Enjoy them as a snack with your favorite cheese and crackers.
- Use them as a garnish in cocktails like Bloody Marys.
- Present them in a colorful jar for a delightful table centerpiece.
FAQs about Pickled Dilly Beans
How long do pickled dilly beans last?
When stored properly in a cool, dark place, pickled dilly beans can last up to a year. Just make sure to check for any signs of spoilage before enjoying them!
Can I use other types of beans?
Absolutely! While green beans are traditional, you can experiment with other varieties like yellow wax beans or even snap peas for a fun twist on pickling.
What can I do if my pickled dilly beans are too salty?
If you find your pickled dilly beans too salty, try rinsing them under cold water before serving. This can help reduce the saltiness while still keeping that delicious tang!
Can I adjust the spice level?
Yes! Feel free to add more or less red pepper flakes based on your spice preference. You can even omit them entirely for a milder flavor.
Are pickled dilly beans safe for canning?
Yes, as long as you follow proper canning procedures, pickled dilly beans are safe to can. Just ensure your jars are sterilized and sealed correctly to prevent spoilage.
Final Thoughts
Making pickled dilly beans is more than just a recipe; it’s a delightful experience that brings joy to your kitchen. The vibrant colors and tangy flavors can brighten any meal, making them a perfect addition to your family’s table. Plus, the satisfaction of creating something delicious from scratch is truly rewarding. Whether you’re snacking on them straight from the jar or serving them alongside dinner, these pickled beans are sure to become a family favorite. So, roll up your sleeves, embrace the process, and enjoy the burst of flavor that pickled dilly beans bring to your life!
Print
Pickled Dilly Beans: Discover the Ultimate Recipe Now!
- Total Time: 25 minutes
- Yield: 4 pint jars 1x
- Diet: Vegetarian
Description
A delicious and tangy recipe for pickled dilly beans that adds a burst of flavor to your meals.
Ingredients
- 1 pound fresh green beans
- 2 cups water
- 1 cup white vinegar
- 1 tablespoon salt
- 2 cloves garlic, peeled
- 1 tablespoon dill seeds
- 1 teaspoon red pepper flakes (optional)
Instructions
- Wash and trim the green beans to fit into jars.
- In a saucepan, combine water, vinegar, and salt. Bring to a boil.
- Pack the green beans into sterilized jars with garlic, dill seeds, and red pepper flakes.
- Pour the hot brine over the beans, leaving about 1/2 inch of headspace.
- Seal the jars with lids and process in a boiling water bath for 5-10 minutes.
- Let the jars cool and store them in a cool, dark place for at least 2 weeks before consuming.
Notes
- For a spicier version, add more red pepper flakes.
- These pickled beans can last up to a year if stored properly.
- Great as a snack or as a side dish with meals.
- Prep Time: 15 minutes
- Cook Time: 10 minutes
- Category: Preserving
- Method: Canning
- Cuisine: American
Nutrition
- Serving Size: 1 jar
- Calories: 50
- Sugar: 1g
- Sodium: 500mg
- Fat: 0g
- Saturated Fat: 0g
- Unsaturated Fat: 0g
- Trans Fat: 0g
- Carbohydrates: 10g
- Fiber: 3g
- Protein: 2g
- Cholesterol: 0mg
Keywords: Pickled Dilly Beans, Pickling, Canning, Green Beans, Preserving
