
Introduction to Pumpkin Patch Dirt Cups
As the leaves turn and the air gets crisp, I find myself craving cozy, festive treats. That’s where these delightful Pumpkin Patch Dirt Cups come in! They’re not just a dessert; they’re a fun way to celebrate the season with your loved ones. Perfect for busy moms like us, this no-bake recipe is quick and easy, making it a fantastic solution for those hectic days. Plus, who can resist the charm of chocolate pudding layered with crushed cookies and pumpkin-flavored candies? Trust me, these cups will bring smiles to your family’s faces!
Why You’ll Love This Pumpkin Patch Dirt Cups
These Pumpkin Patch Dirt Cups are a delightful treat that combines ease and fun. With just a few simple ingredients, you can whip up a dessert that looks as good as it tastes. They’re perfect for busy days when you need something quick yet impressive. Plus, the chocolate and pumpkin flavors create a deliciously festive experience that your family will adore. It’s a win-win for everyone!
Ingredients for Pumpkin Patch Dirt Cups
Gathering the right ingredients is half the fun! Here’s what you’ll need to create these delightful Pumpkin Patch Dirt Cups:
- Chocolate pudding mix: This is the star of the show, providing a rich and creamy base. You can use regular or dark chocolate for a deeper flavor.
- Milk: Essential for preparing the pudding. Whole milk gives a creamier texture, but you can use any milk you prefer.
- Crushed chocolate sandwich cookies: These add a crunchy layer that mimics dirt. Feel free to use gluten-free cookies if needed!
- Whipped cream: This lightens up the pudding, making it fluffy and delightful. You can use store-bought or homemade whipped cream.
- Pumpkin-flavored candies or gummies: These festive treats add a pop of color and flavor, making your cups look like a true pumpkin patch.
- Green gummy worms: A fun decoration that adds a whimsical touch, resembling worms in the dirt. You can swap these for other Halloween-themed candies if you like.
For exact quantities, check the bottom of the article where you can find everything listed for easy printing. Now, let’s get cooking!
How to Make Pumpkin Patch Dirt Cups
Now that we have our ingredients ready, let’s dive into making these delightful Pumpkin Patch Dirt Cups! Follow these simple steps, and you’ll have a festive dessert that’s sure to impress.
Step 1: Prepare the Chocolate Pudding
Start by mixing the chocolate pudding according to the package instructions. Typically, you’ll whisk the pudding mix with milk until it thickens. I like to use whole milk for a creamier texture, but any milk will do. Make sure to whisk vigorously to avoid lumps. Once it’s smooth, set it aside to firm up a bit.
Step 2: Fold in the Whipped Cream
Once your pudding is set, it’s time to add the whipped cream. Gently fold in the whipped cream using a spatula. This step is crucial for achieving that light and fluffy texture. Be careful not to overmix; you want to keep that airy feel. The combination of chocolate pudding and whipped cream is simply heavenly!
Step 3: Layer the Ingredients
Now comes the fun part—layering! Grab your serving cups and start with a layer of the chocolate pudding mixture. Then, sprinkle a generous amount of crushed chocolate sandwich cookies on top. Repeat this process until your cups are filled, finishing with a layer of cookies. This creates a beautiful visual effect that resembles a real pumpkin patch!
Step 4: Add Pumpkin Treats
Next, it’s time to add those festive pumpkin-flavored candies or gummies. Scatter them on top of your layered cups. This not only adds a pop of color but also enhances the pumpkin flavor. Your dessert is starting to look like a charming little pumpkin patch!
Step 5: Decorate with Gummy Worms
To give your cups that final touch, it’s time to decorate with green gummy worms. Arrange them on top, letting them drape over the sides. This whimsical detail makes it look like the worms are crawling through the dirt. It’s a playful touch that kids and adults alike will love!
Step 6: Chill Before Serving
Finally, don’t forget to chill your Pumpkin Patch Dirt Cups in the refrigerator for at least 30 minutes. This step is essential for the flavors to meld together and for the pudding to set perfectly. Trust me, the wait will be worth it when you take that first delicious bite!
Tips for Success
- Use cold milk for a creamier pudding texture.
- Don’t rush the chilling time; it enhances the flavors.
- For a fun twist, try adding crushed candy corn between layers.
- Make these cups a day ahead for easy entertaining.
- Experiment with different cookie types for unique flavors.
Equipment Needed
- Mixing bowl: A medium-sized bowl works best, but any bowl will do.
- Whisk: Use a whisk for mixing the pudding; a fork can work in a pinch.
- Spatula: A rubber spatula is perfect for folding in whipped cream.
- Serving cups: Clear cups showcase the layers beautifully; mason jars are a fun alternative.
- Refrigerator: Essential for chilling your cups before serving.
Variations
- Gluten-Free: Use gluten-free chocolate sandwich cookies to make this dessert suitable for those with gluten sensitivities.
- Vegan Option: Substitute the chocolate pudding mix with a vegan version and use almond or coconut milk. Replace whipped cream with coconut whipped cream for a dairy-free delight.
- Flavor Twist: Add a layer of caramel sauce between the pudding and cookie layers for a sweet surprise.
- Fruit Addition: Incorporate chopped bananas or strawberries between layers for a fruity twist that complements the chocolate.
- Nutty Crunch: Sprinkle chopped nuts or granola on top for an added crunch and texture contrast.
Serving Suggestions
- Pair these Pumpkin Patch Dirt Cups with a warm apple cider for a cozy fall treat.
- Serve alongside mini pumpkin muffins for a delightful dessert spread.
- For a festive touch, garnish with fresh mint leaves or edible flowers.
- Consider using themed plates or napkins to enhance the Halloween vibe.
- Present in mason jars for a rustic, charming look at gatherings.
FAQs about Pumpkin Patch Dirt Cups
As you embark on your journey to create these delightful Pumpkin Patch Dirt Cups, you might have a few questions. Here are some common queries I’ve encountered, along with helpful answers to guide you along the way!
Can I make Pumpkin Patch Dirt Cups in advance?
Absolutely! These cups can be made a day ahead. Just keep them covered in the refrigerator until you’re ready to serve. This not only saves time but also allows the flavors to meld beautifully.
What can I use instead of chocolate pudding mix?
If you’re looking for a twist, try using vanilla pudding mix instead. You can add cocoa powder to it for a chocolatey flavor. It’s a fun way to mix things up while still keeping the dessert delicious!
How can I make these cups healthier?
To lighten up your Pumpkin Patch Dirt Cups, consider using low-fat milk and sugar-free pudding mix. You can also reduce the amount of whipped cream or use a lighter version. It’s all about balance!
What if I can’t find pumpkin-flavored candies?
No worries! You can substitute with any Halloween-themed candies or even chocolate chips. The key is to keep that festive spirit alive, no matter what treats you choose!
Can I use fresh pumpkin in this recipe?
While fresh pumpkin can be delicious, it won’t work in this recipe as a direct substitute for the candies. However, you can incorporate pumpkin puree into the pudding mix for a richer pumpkin flavor if you’d like!
Final Thoughts
Creating these Pumpkin Patch Dirt Cups is more than just making a dessert; it’s about bringing joy and laughter to your family. The smiles on their faces as they dig into these whimsical treats are priceless. I love how this recipe combines simplicity with festive flair, making it perfect for busy days or special occasions. Plus, it’s a wonderful way to get the kids involved in the kitchen! So, gather your ingredients, unleash your creativity, and enjoy the delightful experience of making and sharing these charming cups. Happy cooking!
Print
Pumpkin Patch Dirt Cups: A Fun Dessert You’ll Love!
- Total Time: 45 minutes (including chilling time)
- Yield: 4 servings 1x
- Diet: Vegetarian
Description
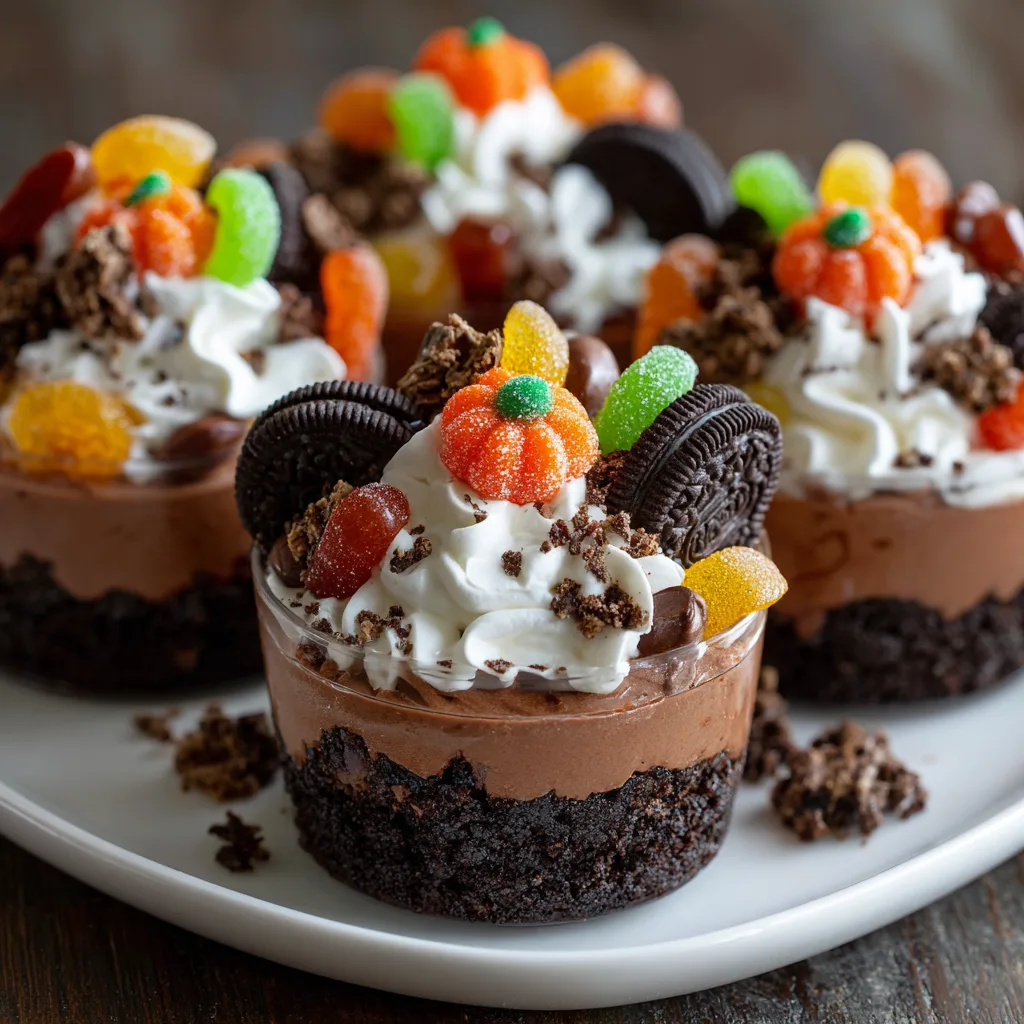
Pumpkin Patch Dirt Cups are a fun and festive dessert that combines chocolate pudding, crushed cookies, and pumpkin-flavored treats to create a delightful Halloween-themed treat.
Ingredients
- 1 package of chocolate pudding mix
- 2 cups of milk
- 1 package of crushed chocolate sandwich cookies
- 1 cup of whipped cream
- 1 cup of pumpkin-flavored candies or gummies
- Green gummy worms (for decoration)
Instructions
- In a mixing bowl, prepare the chocolate pudding according to the package instructions using the milk.
- Once the pudding is set, fold in the whipped cream until well combined.
- In serving cups, layer the chocolate pudding mixture and crushed cookies alternately.
- Top each cup with pumpkin-flavored candies or gummies.
- Decorate with green gummy worms to resemble a pumpkin patch.
- Chill in the refrigerator for at least 30 minutes before serving.
Notes
- For a more intense chocolate flavor, use dark chocolate pudding mix.
- Feel free to add additional Halloween-themed candies for decoration.
- These cups can be made a day in advance for convenience.
- Prep Time: 15 minutes
- Cook Time: 0 minutes
- Category: Dessert
- Method: No-bake
- Cuisine: American
Nutrition
- Serving Size: 1 cup
- Calories: 250
- Sugar: 20g
- Sodium: 150mg
- Fat: 10g
- Saturated Fat: 5g
- Unsaturated Fat: 3g
- Trans Fat: 0g
- Carbohydrates: 35g
- Fiber: 2g
- Protein: 3g
- Cholesterol: 15mg
Keywords: Pumpkin Patch Dirt Cups, Halloween dessert, chocolate pudding, fun dessert
