Description
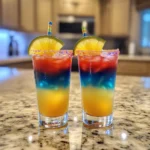
Make stunning Rainbow Rocket Shots with layered colorful liqueurs and juices. Perfect for parties, easy to prepare, and deliciously fun!
Ingredients
For a 6-layer Rainbow Rocket Shot (makes ~6 shots):
Layer 1 – Red
-
1 oz grenadine (heavy syrup)
Layer 2 – Orange
-
1 oz peach schnapps
-
1 oz orange juice
Layer 3 – Yellow
-
1 oz pineapple juice
Layer 4 – Green
-
1 oz melon liqueur (like Midori)
Layer 5 – Blue
-
1 oz blue curaçao
Layer 6 – Purple
-
1 oz black raspberry liqueur (like Chambord or crème de cassis)
Optional Garnish:
-
Whipped cream
-
Rainbow sprinkles
-
Edible glitter
Equipment:
-
Bar spoon
-
Shot glasses (preferably tall and narrow)
-
Pouring tool or syringe for layering
-
Steady hands!
Instructions
Step 1: Start with the red layer
Pour a small amount of grenadine into the bottom of each shot glass. Since it’s the densest, it will naturally settle at the bottom. Let it sit for a minute.
Step 2: Layer orange carefully
In a shaker, mix peach schnapps and orange juice. Slowly pour it over the back of a bar spoon, held just above the grenadine layer. This ensures the layers stay separate.
Step 3: Add the yellow pineapple juice
Again, using the spoon, slowly layer in the pineapple juice. Because it’s lighter than the orange layer, it should float above nicely. Patience is key.
Step 4: Pour in green melon liqueur
Slowly and gently layer in Midori (or another green liqueur) over the pineapple juice. You’ll start to see the rainbow forming!
Step 5: Float blue curaçao
Use the same spoon layering method to add the vivid blue curaçao layer. The colors should now be creating a stunning gradient.
Step 6: Finish with purple liqueur
Complete your shot with a slow pour of Chambord or crème de cassis to get that final, royal purple stripe on top.
Pro Tip: Chill each ingredient beforehand and pour slowly for the best layering results.
Notes
This drink is about density and timing. Always layer from heaviest (more sugar content) to lightest. Syrups and juices go at the bottom, and alcohols like liqueurs float on top. Avoid mixing liquids with carbonation or fizz, as they break the separation and ruin the visual effect.
Let each layer settle for at least 30 seconds before adding the next. Room temperature ingredients can mess up layering—chill all liquids before assembling.
- Prep Time: 10 minutes
- Cook Time: None
- Category: Drinks
- Cuisine: American
Nutrition
- Calories: 110
- Sodium: 5mg
- Fat: 0g
- Protein: 0g