
Sensory-Rich Introduction with Immediate Craving
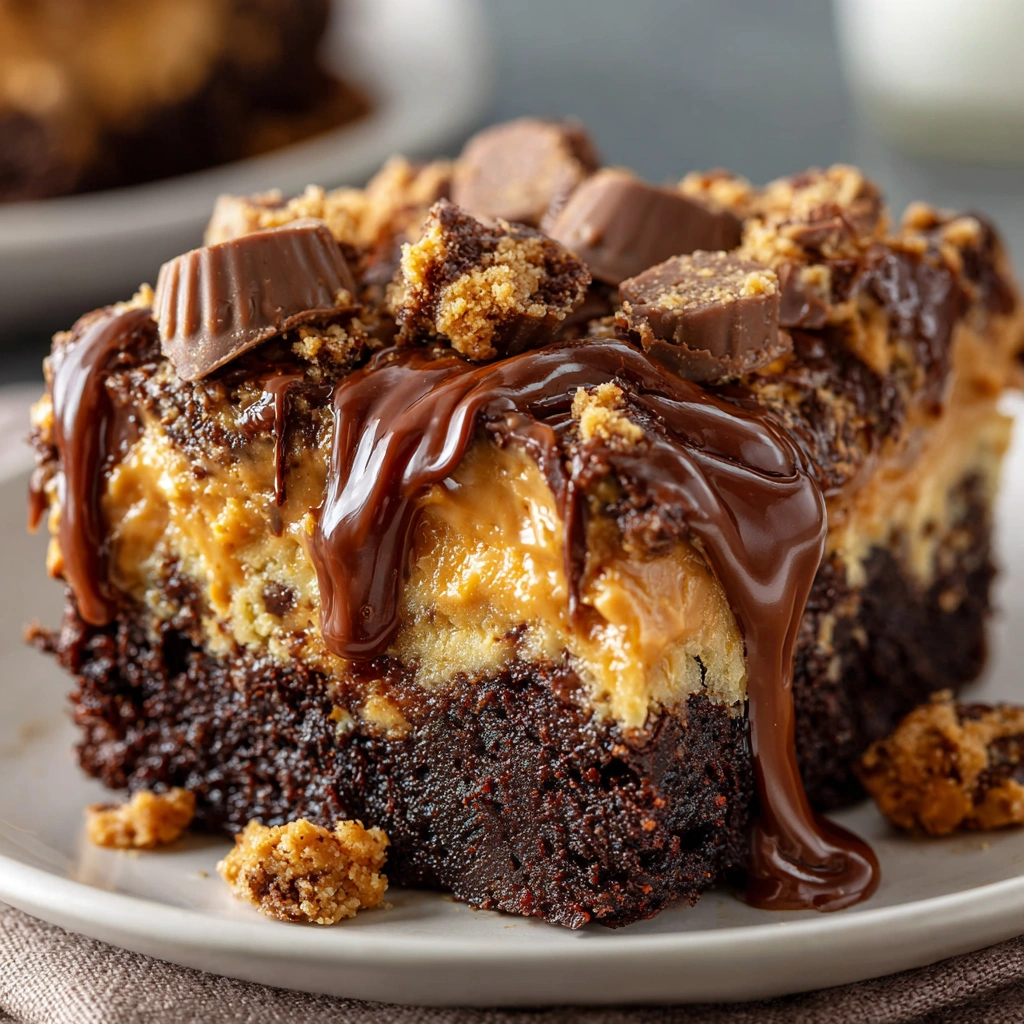
Imagine a cake that captures the essence of indulgence in every bite. The Reese’s Peanut Butter Earthquake Cake is a visual feast, with rich, dark chocolate layers that beckon you closer. As you slice into it, creamy peanut butter swirls reveal themselves, intermingling with the chocolate like a delicious secret waiting to be discovered. Topped with a generous sprinkle of chopped Reese’s Peanut Butter Cups and glistening chocolate chips, this cake is not just a dessert; it’s a celebration of flavors and textures that dance on your palate.
One of my fondest memories associated with this cake was at my sister’s birthday party a few years back. As the cake was unveiled, the room filled with gasps of delight. It was the centerpiece of our dessert table, and I can still hear the laughter and chatter as everyone eagerly anticipated their first slice. The moment someone took a bite, the room erupted in cheers, and I felt a warm glow of pride. This cake had a magical way of bringing everyone together, igniting conversations and creating memories that linger long after the last crumb is gone.
What I love most about this cake is its ability to transform any gathering into a joyous occasion. Whether it’s a birthday bash, a cozy family dinner, or a potluck with friends, the Reese’s Peanut Butter Earthquake Cake is the perfect dessert to share. It’s a reminder that food is not just about sustenance; it’s about connection, love, and the sweet moments we create together. So, whether you’re celebrating a milestone or simply enjoying a quiet evening at home, this cake is sure to elevate the experience and leave everyone craving more.
Perfect for birthdays, holiday parties, or even just a casual get-together, this cake shines in any setting. It’s the kind of dessert that invites you to gather around the table, share stories, and indulge in the simple pleasure of good food and great company.
Why You’ll Love This Reese’s Peanut Butter Earthquake Cake
Let me tell you, this Reese’s Peanut Butter Earthquake Cake is not just a dessert; it’s an experience that tantalizes your taste buds and warms your heart. Here’s why you’ll fall head over heels for it:
- Texture Contrast: The moment you take a bite, you’ll be greeted by the moist, tender chocolate cake that melts in your mouth. This is perfectly complemented by the creamy peanut butter filling that adds a luscious richness. And let’s not forget the crunchy toppings—each bite is a delightful symphony of textures that keeps you coming back for more!
- Flavor Balance: The sweetness of the chocolate harmonizes beautifully with the savory notes of peanut butter. It’s a match made in dessert heaven! This cake appeals to a wide range of palates, making it a crowd-pleaser at any gathering.
- Versatility: Whether you’re hosting a casual family dinner, celebrating a birthday, or bringing a dish to a potluck, this cake fits right in. It’s the kind of dessert that can elevate any occasion, making it a go-to recipe in my kitchen.
- Ease of Preparation: With simple ingredients and straightforward steps, this cake is accessible for bakers of all skill levels. Even if you’re short on time, you can whip this up without breaking a sweat. Trust me, your kitchen will smell divine, and your friends will think you’re a baking wizard!
- Universal Appeal: Combining the beloved flavors of chocolate and peanut butter, this cake is sure to be a hit with both kids and adults alike. It’s a nostalgic treat that brings back memories of childhood, making it perfect for family gatherings or just a cozy night in.
So, whether you’re looking to impress guests or simply indulge in a slice of heaven, this Reese’s Peanut Butter Earthquake Cake is the answer. Get ready to create sweet memories that will linger long after the last bite!
Essential Tools & Preparation Strategy
Before you embark on your baking adventure with the Reese’s Peanut Butter Earthquake Cake, it’s essential to gather the right tools. Having the right equipment not only makes the process smoother but also enhances your overall baking experience. Here’s what you’ll need:
- Mixing Bowls: Necessary for combining ingredients smoothly; I recommend opting for glass or stainless steel for durability. They’re easy to clean and won’t retain odors.
- Electric Mixer: Ideal for achieving a creamy texture in the peanut butter filling. If you don’t have one, a hand mixer can be a good alternative, but be prepared for a bit of arm workout!
- Measuring Cups and Spoons: Ensures accurate ingredient quantities, which is crucial for baking success. For even more precision, consider using a kitchen scale to weigh your ingredients.
- 9×13 Inch Baking Dish: This is the perfect size for even baking. A glass dish is particularly helpful as it allows you to monitor the browning of your cake.
- Spatula: Useful for spreading batter and filling evenly. I recommend a silicone spatula for easy scraping and to ensure you get every last bit of that delicious batter!
- Toothpick: Essential for checking the doneness of the cake. A cake tester can also be used, but a toothpick is a handy tool that most of us have on hand.
- Parchment Paper: While optional, it’s highly recommended for easy removal of the cake from the baking dish. It prevents sticking and makes cleanup a breeze.
With these tools at your disposal, you’ll be well-equipped to create a stunning Reese’s Peanut Butter Earthquake Cake that will impress everyone at your table. Remember, preparation is key, so take a moment to gather everything before you start mixing!
Ingredients & Their Roles in This Reese’s Peanut Butter Earthquake Cake
Understanding the ingredients in your Reese’s Peanut Butter Earthquake Cake is key to mastering this delightful dessert. Each component plays a vital role in creating the rich flavors and textures that make this cake so irresistible. Let’s break it down:
Cake Ingredients
- Chocolate cake mix: This serves as the base flavor and structure of the cake. It provides that rich, chocolatey goodness that pairs perfectly with peanut butter.
- Water: Hydrates the mix, ensuring a moist cake that melts in your mouth. It’s the secret to avoiding a dry texture!
- Vegetable oil: Adds richness and moisture, making the cake tender and soft. It’s a simple ingredient that makes a big difference.
- Eggs: These bind the ingredients together and provide structure. They also contribute to the cake’s overall richness and flavor.
Filling Ingredients
- Creamy peanut butter: The star of the show! This ingredient adds the main flavor component and a luscious creaminess that elevates the cake to new heights.
- Powdered sugar: Sweetens and thickens the filling, giving it that perfect balance of sweetness without being overly sugary.
- Cream cheese: Adds a delightful tanginess and creaminess to the filling, creating a smooth texture that complements the peanut butter beautifully.
Topping Ingredients
- Reese’s Peanut Butter Cups: These little gems add crunch and bursts of flavor, making every bite a delightful surprise.
- Chocolate chips: Enhances the chocolate flavor, creating a rich, gooey topping that’s hard to resist.
- Chopped pecans (optional): Adds texture and a nutty flavor that pairs wonderfully with the chocolate and peanut butter.
Substitutions
If you have dietary restrictions or simply want to experiment, here are some substitutions you can consider:
- Use a gluten-free cake mix to make this cake suitable for those with gluten sensitivities.
- Try alternative nut butters, like almond or cashew butter, for a different flavor profile while still keeping that creamy texture.
With these ingredients and their roles in mind, you’re well on your way to creating a Reese’s Peanut Butter Earthquake Cake that will impress everyone at your table. Each component is carefully chosen to ensure a delightful balance of flavors and textures, making this cake a true showstopper!
Step-by-Step Guide to Perfect Reese’s Peanut Butter Earthquake Cake
Now that you’re ready to dive into the deliciousness of this Reese’s Peanut Butter Earthquake Cake, let’s break down the process step-by-step. Trust me, the aroma of chocolate and peanut butter wafting through your kitchen will be worth every minute spent!
- Preheat your oven to 350°F (175°C) to ensure even baking. This is a crucial step; a properly preheated oven helps the cake rise beautifully.
- In a large mixing bowl, combine the chocolate cake mix, 1 cup of water, 1/2 cup of vegetable oil, and 3 large eggs. Mix until smooth, ensuring no lumps remain. The batter should be glossy and thick, almost like a silky chocolate river.
- In a separate bowl, beat together 1 cup of creamy peanut butter, 1 cup of powdered sugar, and 1/2 cup of softened cream cheese until creamy and well combined. This filling is the heart of the cake, and it should be smooth and luscious, reminiscent of a peanut butter cloud.
- Pour half of the chocolate cake batter into a greased 9×13 inch baking dish, spreading it evenly. This layer will serve as the foundation for your cake.
- Drop spoonfuls of the peanut butter mixture over the chocolate batter, creating a marbled effect. Don’t worry about making it perfect; the beauty of this cake lies in its rustic charm!
- Pour the remaining chocolate batter on top, covering the peanut butter mixture completely. This will create a delightful surprise when you cut into the cake.
- Sprinkle the chopped Reese’s Peanut Butter Cups, 1/2 cup of chocolate chips, and optional 1/2 cup of chopped pecans over the top for added texture and flavor. The toppings will melt slightly during baking, creating a gooey, decadent layer.
- Bake in the preheated oven for 30-35 minutes, or until a toothpick inserted in the center comes out clean. Keep an eye on it; the smell will be intoxicating, and you might be tempted to peek!
- Let the cake cool for at least 15 minutes before serving. This cooling time is essential; it allows the cake to set and makes it easier to slice.
As you follow these steps, remember that baking is as much about the journey as it is about the destination. Each layer you create is a step towards a delicious masterpiece that will surely impress your family and friends!
Chef’s Notes & Pro Tips for Flawless Results
As you embark on your baking journey with the Reese’s Peanut Butter Earthquake Cake, I want to share some invaluable tips that I’ve gathered over the years. These insights will help you achieve a cake that not only looks stunning but tastes divine!
- Make-ahead Instructions: This cake can be prepared a day in advance, which is perfect for busy schedules. Just store it covered at room temperature to keep it fresh and moist. Trust me, the flavors meld beautifully overnight!
- Storage: If you happen to have leftovers (which is rare, but it happens!), store them in an airtight container in the refrigerator for up to 5 days. Just be sure to let it come to room temperature before serving for the best flavor and texture.
- Equipment Recommendations: For ease and efficiency, I highly recommend using a stand mixer, especially when making the peanut butter filling. It saves time and ensures a creamy consistency without the arm workout!
- Customization Options: Don’t be afraid to get creative! Experiment with different toppings like a drizzle of caramel sauce, a sprinkle of sea salt, or even a mix of nuts to suit your taste. Each variation can bring a new twist to this classic cake!
With these pro tips in your back pocket, you’ll be well on your way to creating a Reese’s Peanut Butter Earthquake Cake that will leave everyone raving. Remember, baking is all about having fun and making it your own, so let your creativity shine!
Avoid These Common Cooking Mistakes
As you embark on your baking adventure with the Reese’s Peanut Butter Earthquake Cake, it’s essential to be aware of some common pitfalls that can turn your delicious creation into a baking blunder. Trust me, I’ve learned these lessons the hard way, and I want to save you from the same fate!
- Overmixing the batter: This can lead to a dense cake. Mix just until combined; a few lumps are perfectly fine! Remember, we want a light and fluffy texture, not a brick.
- Not greasing the baking dish properly: This can cause sticking, which is a nightmare when you’re trying to serve your masterpiece. Always grease or line with parchment paper to ensure a smooth release.
- Baking at the wrong temperature: This can result in uneven cooking. Always preheat your oven to 350°F (175°C) before popping your cake in. A well-preheated oven is your best friend!
- Using cold ingredients: Cold eggs and cream cheese can affect the texture of your cake. Make sure to bring them to room temperature before mixing; it makes a world of difference!
- Not checking for doneness: This can lead to an undercooked cake. Use a toothpick to test the center; if it comes out clean, you’re good to go. If it’s still wet, give it a few more minutes.
- Skipping the cooling time: Allowing the cake to cool before serving is crucial. If you cut into it too soon, it may fall apart, and we want those beautiful layers to shine!
- Using too much peanut butter filling: While it’s tempting to add more of that creamy goodness, sticking to the recommended amounts will prevent the cake from becoming overly rich. Balance is key!
By keeping these common mistakes in mind, you’ll be well on your way to creating a stunning Reese’s Peanut Butter Earthquake Cake that will impress everyone at your table. Happy baking!
Creative Variations & Customizations
One of the best things about the Reese’s Peanut Butter Earthquake Cake is its versatility. You can easily adapt this recipe to suit various dietary needs or simply to mix things up a bit. Here are some creative variations and customizations that I’ve tried and loved:
- Gluten-Free Version: For those with dietary restrictions, simply use a gluten-free chocolate cake mix. This way, everyone can enjoy the deliciousness without worry!
- Nut-Free Option: If you’re catering to nut allergies, omit the pecans and use nut-free chocolate chips. This keeps the cake safe for everyone while still delivering that delightful chocolatey goodness.
- Vegan Adaptation: Want to make this cake vegan? Substitute the eggs with flax eggs (1 tablespoon of ground flaxseed mixed with 2.5 tablespoons of water per egg) and use plant-based cream cheese and milk. You won’t miss the dairy one bit!
- Seasonal Twist: Get festive by adding pumpkin spice for a fall-inspired version or a splash of peppermint extract for a holiday treat. These small changes can bring a whole new flavor profile to your cake!
- Mini Cakes: For a fun twist, bake the batter in muffin tins for individual servings. Just be sure to adjust the baking time accordingly—start checking for doneness around 20 minutes.
These variations not only cater to different dietary preferences but also allow you to get creative in the kitchen. Each adaptation brings its own unique flair to the Reese’s Peanut Butter Earthquake Cake, ensuring that you can enjoy this delightful dessert in a way that suits your taste and occasion!
Perfect Pairings: What to Serve With Reese’s Peanut Butter Earthquake Cake
When it comes to enjoying your Reese’s Peanut Butter Earthquake Cake, the right accompaniments can elevate the experience to new heights. Here are some delightful pairings that will complement the rich flavors of this decadent dessert:
- Vanilla Ice Cream: The creaminess of vanilla ice cream perfectly balances the rich, chocolatey cake. As it melts slightly over the warm cake, it creates a heavenly combination that’s hard to resist!
- Chocolate Syrup: For those who crave an extra layer of indulgence, a drizzle of chocolate syrup adds a luscious touch. It enhances the chocolate flavor and makes each bite even more decadent.
- Whipped Cream: Light and airy, whipped cream lightens the dessert and adds a fluffy texture that contrasts beautifully with the dense cake. It’s a classic topping that never goes out of style!
- Cold Milk: A glass of cold milk is a timeless pairing that complements the sweetness of the cake. It’s the perfect way to wash down the rich flavors and makes for a nostalgic experience.
- Fresh Berries: Adding fresh berries, like strawberries or raspberries, provides a refreshing contrast to the rich flavors of the cake. Their tartness cuts through the sweetness, creating a balanced bite.
- Coffee: For a perfect afternoon pick-me-up, serve your cake with a cup of coffee. The bitterness of the coffee enhances the chocolate flavor, making it an ideal pairing for dessert lovers.
- Caramel Sauce: A drizzle of caramel sauce adds a sweet, buttery flavor that pairs beautifully with chocolate. It brings a delightful richness that complements the peanut butter filling.
- Dessert Buffet: If you’re hosting a gathering, consider serving the Reese’s Peanut Butter Earthquake Cake alongside a variety of other desserts for a sweet spread. This way, guests can mix and match flavors, creating their own perfect dessert experience!
With these pairings, you’ll create a dessert experience that’s not only delicious but also memorable. Whether you’re enjoying a slice at home or sharing it with friends, these accompaniments will enhance the joy of indulging in your Reese’s Peanut Butter Earthquake Cake.
Storage & Meal Prep Instructions
Once you’ve indulged in the deliciousness of your Reese’s Peanut Butter Earthquake Cake, you might find yourself with some leftovers (if you’re lucky!). Here’s how to store and prepare this cake for future enjoyment:
- Fridge Storage: Store any leftovers in an airtight container in the refrigerator for up to 5 days. This will keep the cake fresh and moist, ready for you to enjoy a slice whenever the craving strikes!
- Freezer Storage: If you want to save some for later, wrap slices in plastic wrap and store them in a freezer-safe container for up to 3 months. This is a great way to have a sweet treat on hand for unexpected guests or a late-night snack.
- Reheating Methods: When you’re ready to enjoy your frozen cake, simply thaw it in the refrigerator overnight. For a warm, gooey experience, reheat in the microwave for a few seconds before serving. Just be careful not to overheat it, as you want to maintain that delightful texture!
With these storage and meal prep instructions, you can savor the rich flavors of your Reese’s Peanut Butter Earthquake Cake long after it’s been baked. It’s the perfect way to keep the joy of baking alive in your kitchen!
Nutrition Facts & Health Insights
Understanding the nutritional profile of your Reese’s Peanut Butter Earthquake Cake can help you enjoy it mindfully. Here’s a detailed breakdown of the nutrition per serving, so you can indulge with confidence:
| Nutrient | Amount per Serving (1 slice, 1/12 of cake) |
|---|---|
| Calories | 450 |
| Sugar | 35 grams |
| Sodium | 300 milligrams |
| Fat | 22 grams |
| Saturated Fat | 8 grams |
| Unsaturated Fat | 10 grams |
| Trans Fat | 0 grams |
| Carbohydrates | 55 grams |
| Fiber | 2 grams |
| Protein | 6 grams |
| Cholesterol | 50 milligrams |
Now, let’s talk about some of the health benefits of key ingredients in this delightful cake:
- Peanut Butter: Packed with protein and healthy fats, peanut butter not only adds creaminess but also provides a good source of energy. It’s rich in vitamins and minerals, including vitamin E, magnesium, and potassium, which are essential for overall health.
- Chocolate: Dark chocolate, especially when used in moderation, is known for its antioxidant properties. It contains flavonoids that can help improve heart health and lower blood pressure. Plus, it’s a mood booster—who doesn’t feel happier with a little chocolate?
- Pecans (if used): These nuts are a great source of healthy fats, fiber, and protein. They also contain antioxidants and can help lower cholesterol levels, making them a heart-healthy addition to your cake.
While the Reese’s Peanut Butter Earthquake Cake is undeniably a treat, it also offers some nutritional benefits that can make your indulgence feel a little less guilty. Enjoy it as part of a balanced diet, and remember that moderation is key!
Frequently Asked Questions
As you embark on your baking journey with the Reese’s Peanut Butter Earthquake Cake, you might have a few questions along the way. Don’t worry; I’ve got you covered! Here are some common queries and their answers to help you navigate this delicious recipe:
- Can I use a different cake mix?
Absolutely! While this recipe calls for chocolate cake mix, you can experiment with other flavors like vanilla or red velvet. Just keep in mind that the flavor profile will change, but it can lead to some delightful surprises! - How do I make this cake gluten-free?
To make a gluten-free version of the Reese’s Peanut Butter Earthquake Cake, simply substitute the chocolate cake mix with a gluten-free chocolate cake mix. Be sure to check the other ingredients for gluten content, especially the chocolate chips and any toppings. - What can I substitute for cream cheese?
If you’re looking for a substitute for cream cheese, you can use Greek yogurt for a tangy flavor or silken tofu for a dairy-free option. Both alternatives will provide a creamy texture, though the flavor may vary slightly. - How long can I store leftovers?
Leftovers can be stored in an airtight container in the refrigerator for up to 5 days. Just make sure to let it come to room temperature before serving for the best taste and texture! - Can I freeze this cake?
Yes, you can freeze the Reese’s Peanut Butter Earthquake Cake! Wrap slices in plastic wrap and store them in a freezer-safe container for up to 3 months. When you’re ready to enjoy, thaw in the refrigerator overnight and reheat in the microwave for a few seconds. - What if I don’t have an electric mixer?
No problem! A hand mixer or even a good old-fashioned whisk will work just fine. It may take a bit more elbow grease, but you’ll still achieve that creamy peanut butter filling. Just be sure to mix until smooth! - How do I know when the cake is done?
To check for doneness, insert a toothpick into the center of the cake. If it comes out clean or with a few moist crumbs, your cake is ready! If it’s still wet, give it a few more minutes in the oven. - Can I add other mix-ins to the batter?
Absolutely! Feel free to get creative with your mix-ins. You can add chocolate chips, nuts, or even a swirl of caramel for an extra layer of flavor. Just be mindful not to overload the batter, as it can affect the cake’s texture.
With these FAQs in mind, you’re well-equipped to tackle the Reese’s Peanut Butter Earthquake Cake with confidence. Happy baking!
Final Inspiration & Kitchen Confidence
As you wrap up your baking adventure with the Reese’s Peanut Butter Earthquake Cake, I want to take a moment to remind you that baking is truly a journey. Each time you step into the kitchen, you’re not just following a recipe; you’re creating memories, experimenting with flavors, and honing your skills. Every attempt, whether it turns out perfectly or not, is a valuable step towards mastery. So, embrace the process and enjoy the sweet chaos that comes with it!
When you finally pull that cake out of the oven, take a moment to celebrate your achievement. There’s something incredibly rewarding about creating a dessert that brings joy to others. Share your delicious creation with friends and family, and watch as their faces light up with delight. Food has a magical way of connecting us, and your Reese’s Peanut Butter Earthquake Cake is sure to spark joy and laughter around the table.
Now, I invite you to dive into this recipe and make it your own. Don’t hesitate to experiment with flavors, toppings, and presentation. And once you’ve baked your masterpiece, I’d love to hear about your experience! Share your photos, tips, and stories with our community of baking enthusiasts. Together, we can inspire each other and spread the love of baking far and wide. So, roll up your sleeves, preheat that oven, and let’s create something delicious!
Print
Reese’s Peanut Butter Earthquake Cake: Creamy Bliss Awaits!
- Total Time: 55 minutes
- Yield: 12 servings 1x
- Diet: Vegetarian
Description
Indulge in the rich, velvety texture of Reese’s Peanut Butter Earthquake Cake, where the creamy peanut butter swirls through a moist chocolate cake, creating a delightful contrast. Each bite offers a burst of chocolatey sweetness, complemented by the crunch of peanut butter cups, making it a decadent treat for any dessert lover.
Ingredients
- Cake:
- 1 box chocolate cake mix
- 1 cup water
- 1/2 cup vegetable oil
- 3 large eggs
- Filling:
- 1 cup creamy peanut butter
- 1 cup powdered sugar
- 1/2 cup cream cheese, softened
- Topping:
- 1 cup Reese’s Peanut Butter Cups, chopped
- 1/2 cup chocolate chips
- 1/2 cup chopped pecans (optional)
Instructions
- Preheat your oven to 350°F (175°C).
- In a large mixing bowl, combine the chocolate cake mix, water, vegetable oil, and eggs. Mix until smooth.
- In a separate bowl, beat together the peanut butter, powdered sugar, and cream cheese until creamy.
- Pour half of the chocolate cake batter into a greased 9×13 inch baking dish.
- Drop spoonfuls of the peanut butter mixture over the chocolate batter, then pour the remaining chocolate batter on top.
- Sprinkle the chopped Reese’s Peanut Butter Cups, chocolate chips, and pecans over the top.
- Bake in the preheated oven for 30-35 minutes, or until a toothpick inserted in the center comes out clean.
- Let the cake cool for at least 15 minutes before serving.
Notes
- This cake can be made a day in advance; store it covered at room temperature.
- Leftovers can be stored in an airtight container in the refrigerator for up to 5 days.
- For a gluten-free version, use a gluten-free chocolate cake mix.
- Prep Time: 20 minutes
- Cook Time: 35 minutes
- Category: desserts
- Method: baking
- Cuisine: American
Nutrition
- Serving Size: 1 slice (1/12 of cake)
- Calories: 450
- Sugar: 35 grams
- Sodium: 300 milligrams
- Fat: 22 grams
- Saturated Fat: 8 grams
- Unsaturated Fat: 10 grams
- Trans Fat: 0 grams
- Carbohydrates: 55 grams
- Fiber: 2 grams
- Protein: 6 grams
- Cholesterol: 50 milligrams
Keywords: Reese’s Peanut Butter Earthquake Cake, chocolate cake, peanut butter dessert, easy cake recipe, decadent dessert, party cake, creamy filling, chocolate peanut butter, baking, American desserts, sweet treats, indulgent cake, homemade cake
