Introduction to Spooky Spiderweb Brownies
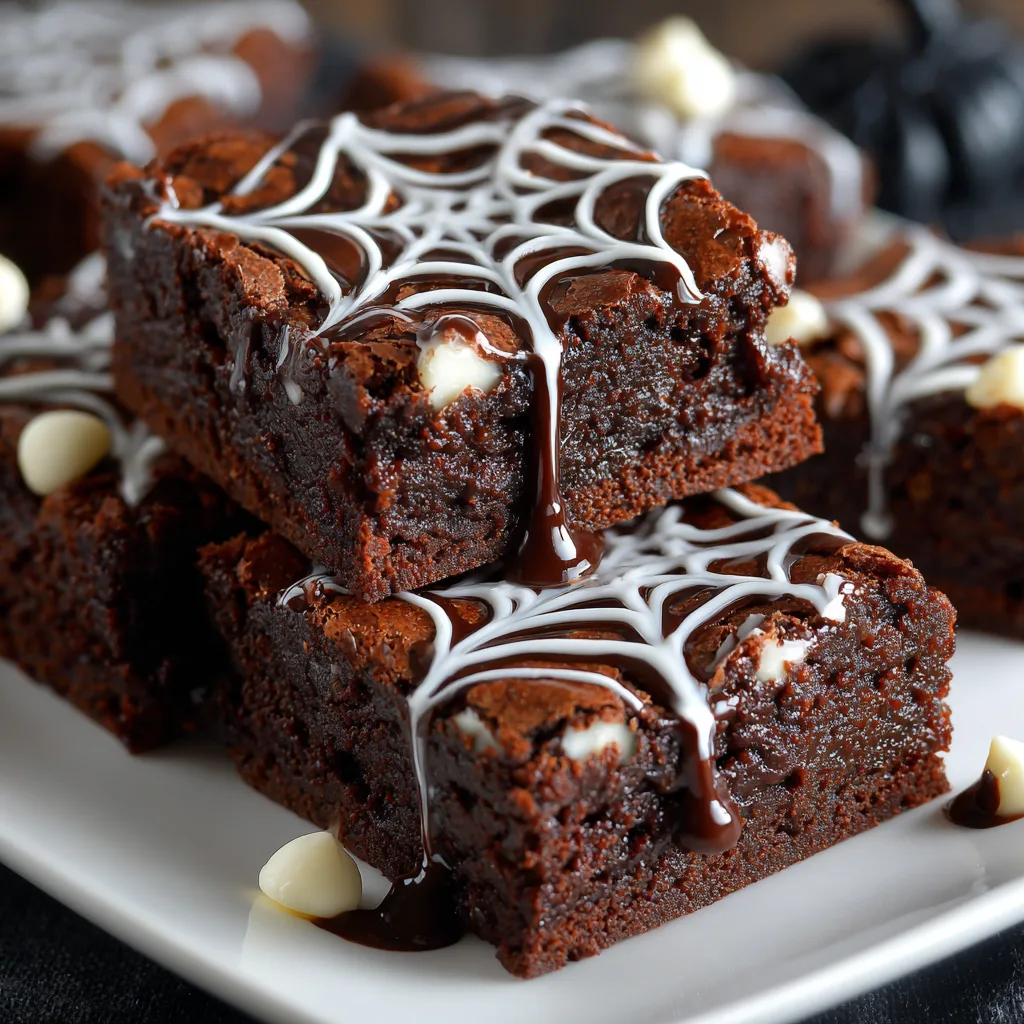
As the leaves turn and the air gets crisp, I can’t help but get excited about Halloween. One of my favorite ways to celebrate is by whipping up a batch of Spooky Spiderweb Brownies. These delightful treats are not just delicious; they’re a fun way to bring a little festive spirit into your home. Perfect for busy moms like us, this recipe is quick and easy, making it a fantastic solution for last-minute gatherings or school parties. Plus, who can resist the charm of a spooky spiderweb design? Let’s dive into this delicious adventure!
Why You’ll Love This Spooky Spiderweb Brownies
These Spooky Spiderweb Brownies are a dream come true for busy moms and professionals. They come together in just about 50 minutes, making them a quick and satisfying treat. The rich chocolate flavor paired with the sweet white chocolate chips creates a taste that’s simply irresistible. Plus, the fun spiderweb design adds a playful touch that will delight kids and adults alike. It’s a treat that brings joy without the fuss!
Ingredients for Spooky Spiderweb Brownies
Gathering the right ingredients is the first step to creating these delightful Spooky Spiderweb Brownies. Here’s what you’ll need:
- Unsalted butter: This adds richness and moisture to the brownies. You can substitute with coconut oil for a dairy-free option.
- Granulated sugar: Sweetness is key! Brown sugar can be used for a deeper flavor.
- Large eggs: They help bind the ingredients together and create a fudgy texture. If you need an egg substitute, try applesauce or flaxseed meal.
- Vanilla extract: A splash of vanilla enhances the overall flavor. Pure vanilla is best, but imitation works too.
- All-purpose flour: This provides structure to the brownies. For a gluten-free version, use almond flour or a gluten-free blend.
- Cocoa powder: The star of the show! It gives the brownies their rich chocolate flavor. Dark cocoa powder can intensify the taste.
- Salt: Just a pinch balances the sweetness and enhances the chocolate flavor.
- Baking powder: This leavening agent helps the brownies rise slightly, giving them a nice texture.
- White chocolate chips: These add a sweet contrast to the dark chocolate. You can swap them for milk chocolate or even dark chocolate chips if you prefer.
- Black icing: Essential for creating the spooky spiderweb design. You can make your own or buy it pre-made for convenience.
For exact measurements, check the bottom of the article where you can find a printable version of the recipe. Happy baking!
How to Make Spooky Spiderweb Brownies
Now that we have our ingredients ready, let’s get to the fun part—making these Spooky Spiderweb Brownies! Follow these simple steps, and you’ll have a delicious treat that’s sure to impress.
Step 1: Preheat and Prepare
First things first, preheat your oven to 350°F (175°C). This ensures your brownies bake evenly. While the oven warms up, grease a 9×13 inch baking pan. You can use butter or cooking spray. This step is crucial to prevent sticking!
Step 2: Mix the Wet Ingredients
In a large bowl, melt the unsalted butter. I usually do this in the microwave for about 30 seconds. Once melted, mix in the granulated sugar until it’s well combined. Then, add the eggs one at a time, mixing well after each addition. Don’t forget to stir in the vanilla extract for that lovely aroma!
Step 3: Combine the Dry Ingredients
In another bowl, whisk together the all-purpose flour, cocoa powder, salt, and baking powder. This step helps to evenly distribute the dry ingredients. It’s like giving your brownies a little pep talk before they hit the oven!
Step 4: Combine Wet and Dry Mixtures
Now, gradually add the dry ingredients to the wet mixture. Mix until just combined. Be careful not to overmix; we want those brownies to stay fudgy and delicious. A few lumps are perfectly fine!
Step 5: Add White Chocolate Chips
Next, fold in the white chocolate chips. This is where the magic happens! The sweet chips will melt slightly during baking, creating pockets of creamy goodness. Yum!
Step 6: Bake the Brownies
Pour the batter into your prepared baking pan and spread it evenly. Bake for 25-30 minutes. To check if they’re done, insert a toothpick in the center. If it comes out clean, they’re ready to cool!
Step 7: Cool and Decorate
Once baked, allow the brownies to cool completely in the pan. This is the hardest part, but trust me, it’s worth the wait! After they’ve cooled, use black icing to create a spooky spiderweb design on top. Get creative—this is where the fun really begins!
Tips for Success
- Make sure your butter is fully melted for a smooth batter.
- Don’t overmix the batter; it should be just combined for fudgy brownies.
- Let the brownies cool completely before decorating to avoid melting the icing.
- Use a sharp knife to cut clean edges for a professional look.
- Experiment with different toppings like Halloween sprinkles for extra flair!
Equipment Needed
- 9×13 inch baking pan: A standard size for brownies. You can use a glass or metal pan.
- Mixing bowls: A large bowl for wet ingredients and a medium bowl for dry. Any size will do!
- Whisk and spatula: Essential for mixing. A wooden spoon works too!
- Toothpick: For testing doneness. A fork can work in a pinch.
- Microwave-safe bowl: For melting butter. A small saucepan on the stove is a great alternative.
Variations
- Nutty Brownies: Add chopped walnuts or pecans for a delightful crunch.
- Mint Chocolate: Incorporate mint extract into the batter for a refreshing twist.
- Gluten-Free: Substitute all-purpose flour with a gluten-free blend or almond flour.
- Vegan Option: Use flax eggs and coconut oil instead of eggs and butter for a plant-based treat.
- Spicy Kick: Add a pinch of cayenne pepper or cinnamon for a surprising flavor boost.
Serving Suggestions for Spooky Spiderweb Brownies
- Pair with a scoop of vanilla ice cream for a delightful contrast.
- Serve alongside a warm cup of spiced apple cider for a cozy treat.
- Present on a festive Halloween platter with themed decorations.
- Drizzle with caramel sauce for an extra indulgent touch.
- Top with whipped cream and a sprinkle of Halloween sprinkles for fun!
FAQs about Spooky Spiderweb Brownies
Can I make these Spooky Spiderweb Brownies ahead of time?
Absolutely! You can bake the brownies a day in advance. Just store them in an airtight container at room temperature. Decorate them with the spiderweb design on the day you plan to serve them for the best presentation.
What can I use instead of black icing for the spiderweb design?
If you don’t have black icing, you can melt dark chocolate and use a piping bag to create the spiderweb. Alternatively, white icing tinted with black food coloring works well too!
How do I store leftover Spooky Spiderweb Brownies?
Store any leftovers in an airtight container at room temperature for up to three days. If you want to keep them longer, you can freeze them for up to a month. Just thaw before serving!
Can I use a different type of chocolate in this recipe?
Definitely! While white chocolate chips add a sweet contrast, you can swap them for milk or dark chocolate chips. Each variation will give your brownies a unique flavor profile!
Are these brownies suitable for a gluten-free diet?
Yes! Simply replace the all-purpose flour with a gluten-free flour blend or almond flour. This way, everyone can enjoy these delicious Spooky Spiderweb Brownies!
Final Thoughts
Making Spooky Spiderweb Brownies is more than just baking; it’s about creating memories with your loved ones. The joy of watching your kids’ faces light up as they see the spooky design is priceless. These brownies are a delightful blend of rich chocolate and sweet white chocolate chips, making them a hit at any Halloween gathering. Plus, they’re easy enough to whip up on a busy day! So, gather your ingredients, unleash your creativity, and enjoy the laughter and fun that comes with this festive treat. Happy Halloween baking!
Print
Spooky Spiderweb Brownies: A Halloween Treat Delight!
- Total Time: 50 minutes
- Yield: 24 brownies 1x
- Diet: Vegetarian
Description
Delicious brownies decorated with a spooky spiderweb design, perfect for Halloween celebrations.
Ingredients
- 1 cup unsalted butter
- 2 cups granulated sugar
- 4 large eggs
- 1 teaspoon vanilla extract
- 1 cup all-purpose flour
- 1 cup cocoa powder
- 1/2 teaspoon salt
- 1/2 teaspoon baking powder
- 1 cup white chocolate chips
- Black icing for decoration
Instructions
- Preheat the oven to 350°F (175°C) and grease a 9×13 inch baking pan.
- In a large bowl, melt the butter and mix in the sugar until well combined.
- Add the eggs one at a time, mixing well after each addition, then stir in the vanilla extract.
- In another bowl, whisk together the flour, cocoa powder, salt, and baking powder.
- Gradually add the dry ingredients to the wet ingredients, mixing until just combined.
- Fold in the white chocolate chips.
- Pour the batter into the prepared baking pan and spread evenly.
- Bake for 25-30 minutes or until a toothpick inserted in the center comes out clean.
- Allow the brownies to cool completely before decorating.
- Using black icing, create a spiderweb design on top of the brownies.
Notes
- For a more intense chocolate flavor, use dark cocoa powder.
- Store leftovers in an airtight container for up to 3 days.
- Feel free to add Halloween-themed sprinkles for extra decoration.
- Prep Time: 20 minutes
- Cook Time: 30 minutes
- Category: Dessert
- Method: Baking
- Cuisine: American
Nutrition
- Serving Size: 1 brownie
- Calories: 250
- Sugar: 20g
- Sodium: 150mg
- Fat: 12g
- Saturated Fat: 7g
- Unsaturated Fat: 3g
- Trans Fat: 0g
- Carbohydrates: 35g
- Fiber: 2g
- Protein: 3g
- Cholesterol: 50mg
Keywords: Spooky Spiderweb Brownies, Halloween Treats, Brownie Recipe


