
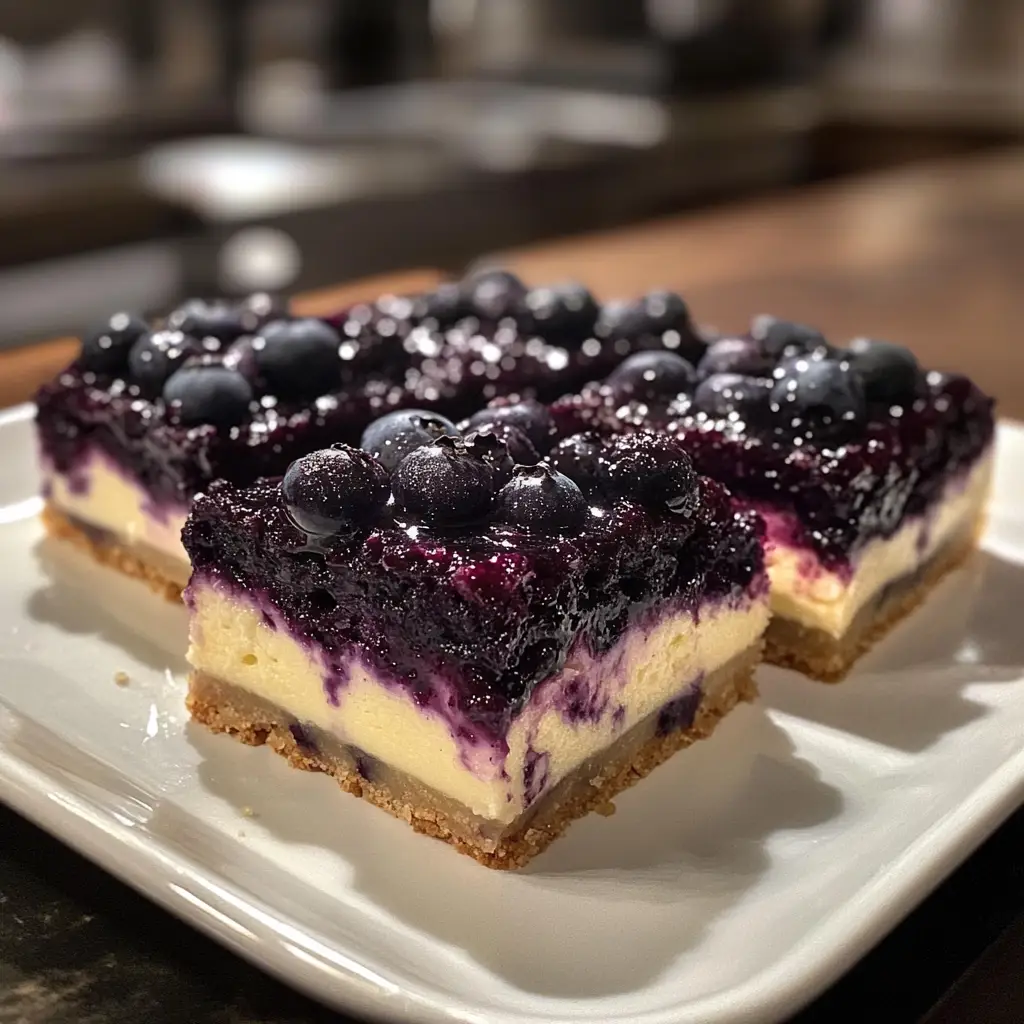
Introduction to Blueberry Cheesecake Bars Recipe
As a passionate home cook, I find joy in creating desserts that not only taste divine but also bring a smile to the faces of my loved ones. One of my all-time favorites is the Blueberry Cheesecake Bars Recipe. These delightful treats are a perfect blend of creamy cheesecake and sweet, tangy blueberries, all nestled in a buttery crust. Just thinking about them makes my mouth water!
Let me take you back to a sunny afternoon when I first stumbled upon this recipe. I was rummaging through my grandmother’s old recipe box, filled with handwritten notes and faded clippings. Among the treasures, I found a simple note that read, “Blueberry Cheesecake Bars.” Intrigued, I decided to give it a whirl. The moment I took my first bite, I was transported to a world of creamy bliss, where the tartness of the blueberries danced harmoniously with the rich cheesecake filling.
What I love most about these bars is their versatility. They are perfect for any occasion, whether it’s a summer picnic, a cozy family gathering, or just a sweet treat to enjoy while binge-watching my favorite shows. Plus, they are easy to make, which means I can whip them up even on the busiest of days. Trust me, once you try this recipe, you’ll want to share it with everyone you know!
So, grab your apron and let’s dive into the world of blueberry cheesecake bars. I promise you, this recipe will become a cherished favorite in your kitchen, just like it is in mine!
Ingredients for Blueberry Cheesecake Bars Recipe
Before we embark on this delicious journey, let’s gather all the ingredients we need for the Blueberry Cheesecake Bars Recipe. I always believe that quality ingredients make a world of difference in the final outcome. So, let’s make sure we have everything ready to go!
Main Ingredients
- 1 ½ cups graham cracker crumbs
- ½ cup unsalted butter, melted
- 2 cups cream cheese, softened
- 1 cup granulated sugar
- 2 large eggs
- 1 teaspoon vanilla extract
- 2 cups fresh blueberries (or frozen, if fresh isn’t available)
- 1 tablespoon lemon juice
When it comes to the cream cheese, I always opt for full-fat varieties. They provide that rich, creamy texture that makes the cheesecake filling so luscious. If you’re feeling adventurous, you can even try using flavored cream cheese for a twist!
Optional Add-ons
- 1 teaspoon lemon zest for added brightness
- ¼ cup powdered sugar for a sweeter topping
- Fresh mint leaves for garnish
- Chocolate drizzle for a decadent touch
These optional add-ons can elevate your blueberry cheesecake bars to a whole new level. I love adding lemon zest; it gives a refreshing zing that complements the blueberries beautifully. And if you have a sweet tooth, a sprinkle of powdered sugar on top can be the cherry on the cake—well, in this case, the bar!
Now that we have our ingredients lined up, we’re one step closer to creating these delightful treats. Let’s move on to the next part of our culinary adventure!
How to Prepare Blueberry Cheesecake Bars Recipe
Now that we have all our ingredients ready, it’s time to roll up our sleeves and get cooking! Making Blueberry Cheesecake Bars is a delightful process that fills your kitchen with sweet aromas. I always find it therapeutic to create something delicious from scratch. Let’s break it down step by step!
Step 1: Prepare the Crust
First things first, we need to create that buttery graham cracker crust that serves as the foundation for our cheesecake bars. In a mixing bowl, combine the graham cracker crumbs and melted butter. Mix until the crumbs are evenly coated and resemble wet sand.
Tips for Step 1
- For an extra flavor boost, consider adding a pinch of cinnamon to the crumb mixture.
- Press the mixture firmly into the bottom of your baking pan. This helps create a sturdy crust that won’t crumble when you cut the bars.
Step 2: Make the Cheesecake Filling
Next, let’s whip up the creamy cheesecake filling! In a large bowl, beat the softened cream cheese until it’s smooth and fluffy. Gradually add the granulated sugar, mixing until well combined. Then, add the eggs one at a time, followed by the vanilla extract. Mix until everything is perfectly blended.
Tips for Step 2
- Make sure your cream cheese is at room temperature. This helps achieve a smooth texture without lumps.
- Don’t overmix the batter once you add the eggs. Just mix until combined to keep the filling light and airy.
Step 3: Prepare the Blueberry Topping
Now, let’s prepare the blueberry topping! In a small saucepan, combine the fresh blueberries and lemon juice. Cook over medium heat until the blueberries start to burst and release their juices. This should take about 5-7 minutes. Once done, remove from heat and let it cool slightly.
Tips for Step 3
- If you prefer a smoother topping, you can mash the blueberries with a fork or blend them slightly.
- Feel free to add a tablespoon of sugar if you like your topping a bit sweeter!
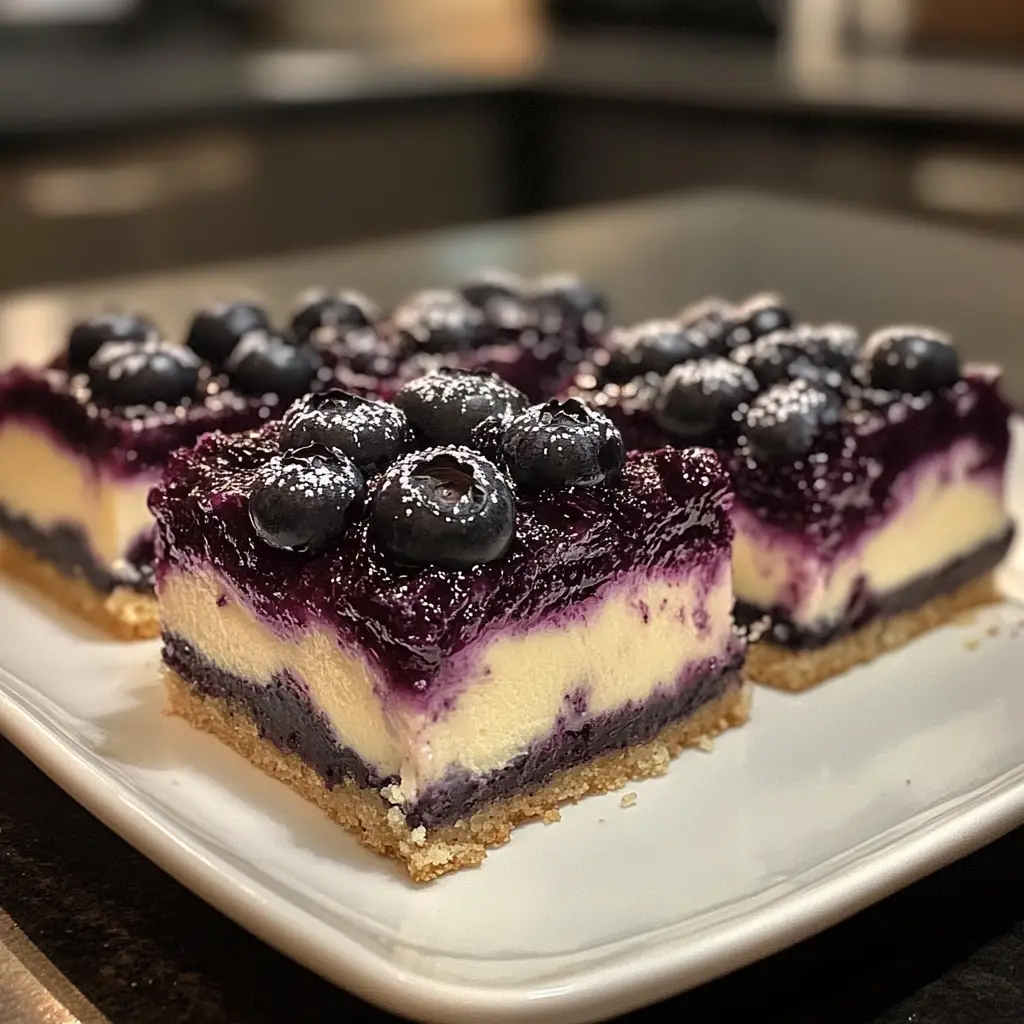
Step 4: Assemble and Bake
It’s time to bring everything together! Pour the cheesecake filling over the prepared crust, spreading it evenly. Then, spoon the blueberry topping over the cheesecake layer. Use a knife to swirl the blueberries into the filling for a beautiful marbled effect.
Tips for Step 4
- Preheat your oven to 325°F (160°C) before you start assembling. This ensures the bars bake evenly.
- Line your baking pan with parchment paper for easy removal once the bars are baked and cooled.
Once everything is assembled, pop the pan into the oven and let it bake for about 40-45 minutes. You’ll know it’s done when the edges are set, but the center still has a slight jiggle. Let it cool completely before slicing into bars.
And there you have it! Your very own homemade Blueberry Cheesecake Bars are ready to be enjoyed. I can’t wait for you to taste them!
How to Prepare Blueberry Cheesecake Bars Recipe
Now that we have all our ingredients ready, it’s time to roll up our sleeves and get cooking! Making Blueberry Cheesecake Bars is a delightful process that fills your kitchen with sweet aromas. I always find it therapeutic to create something delicious from scratch. Let’s break it down step by step!
Step 1: Prepare the Crust
First things first, we need to create that buttery graham cracker crust that serves as the foundation for our cheesecake bars. In a mixing bowl, combine the graham cracker crumbs and melted butter. Mix until the crumbs are evenly coated and resemble wet sand.
Tips for Step 1
- For an extra flavor boost, consider adding a pinch of cinnamon to the crumb mixture. It adds a warm, cozy touch!
- Press the mixture firmly into the bottom of your baking pan. This helps create a sturdy crust that won’t crumble when you cut the bars.
Step 2: Make the Cheesecake Filling
Next, let’s whip up the creamy cheesecake filling! In a large bowl, beat the softened cream cheese until it’s smooth and fluffy. Gradually add the granulated sugar, mixing until well combined. Then, add the eggs one at a time, followed by the vanilla extract. Mix until everything is perfectly blended.
Tips for Step 2
- Make sure your cream cheese is at room temperature. This helps achieve a smooth texture without lumps. Trust me, it makes a world of difference!
- Don’t overmix the batter once you add the eggs. Just mix until combined to keep the filling light and airy. We want it to be fluffy, not dense!
Step 3: Prepare the Blueberry Topping
Now, let’s prepare the blueberry topping! In a small saucepan, combine the fresh blueberries and lemon juice. Cook over medium heat until the blueberries start to burst and release their juices. This should take about 5-7 minutes. Once done, remove from heat and let it cool slightly.
Tips for Step 3
- If you prefer a smoother topping, you can mash the blueberries with a fork or blend them slightly. It’s all about your personal preference!
- Feel free to add a tablespoon of sugar if you like your topping a bit sweeter! A little sweetness can go a long way in enhancing those blueberries.
Step 4: Assemble and Bake
It’s time to bring everything together! Pour the cheesecake filling over the prepared crust, spreading it evenly. Then, spoon the blueberry topping over the cheesecake layer. Use a knife to swirl the blueberries into the filling for a beautiful marbled effect.
Tips for Step 4
- Preheat your oven to 325°F (160°C) before you start assembling. This ensures the bars bake evenly and come out just right.
- Line your baking pan with parchment paper for easy removal once the bars are baked and cooled. It makes serving a breeze!
Once everything is assembled, pop the pan into the oven and let it bake for about 40-45 minutes. You’ll know it’s done when the edges are set, but the center still has a slight jiggle. Let it cool completely before slicing into bars.
And there you have it! Your very own homemade Blueberry Cheesecake Bars are ready to be enjoyed. I can’t wait for you to taste them!
Equipment Needed for Blueberry Cheesecake Bars Recipe
Before we dive into baking, let’s make sure we have the right tools at our disposal. Having the right equipment can make the process smoother and more enjoyable. Here’s what you’ll need to whip up those delicious Blueberry Cheesecake Bars:
- 9×9-inch baking pan: This is the perfect size for our cheesecake bars. If you don’t have one, a similar-sized dish will work just fine.
- Mixing bowls: A couple of medium-sized bowls will help you mix the crust and filling separately.
- Electric mixer: While a whisk can do the job, an electric mixer makes it easier to achieve that smooth, fluffy cheesecake filling.
- Rubber spatula: This handy tool is great for scraping down the sides of the bowl and ensuring every bit of goodness is mixed in.
- Parchment paper: Lining your baking pan with parchment paper makes it a breeze to lift out the bars once they’re baked.
- Small saucepan: You’ll need this for cooking the blueberry topping. A non-stick pan works wonders!
- Knife or offset spatula: For swirling the blueberry topping into the cheesecake filling and for cutting the bars once they’re cooled.
With these tools in hand, you’re all set to create your scrumptious Blueberry Cheesecake Bars. Remember, cooking is all about having fun, so don’t stress if you need to improvise with what you have. Let’s get baking!
Variations of Blueberry Cheesecake Bars Recipe
As a home cook, I love experimenting with recipes to create new flavors and textures. The Blueberry Cheesecake Bars are no exception! Here are a few delightful variations that you can try to put your own spin on this classic treat:
- Mixed Berry Cheesecake Bars: Swap out the blueberries for a mix of your favorite berries, like raspberries, strawberries, or blackberries. The combination adds a burst of color and flavor!
- Chocolate Chip Blueberry Cheesecake Bars: Add a handful of chocolate chips to the cheesecake filling for a rich, decadent twist. The chocolate pairs beautifully with the tartness of the blueberries.
- Vegan Blueberry Cheesecake Bars: Substitute the cream cheese with a plant-based alternative and use flax eggs instead of regular eggs. You can still enjoy the creamy texture without the dairy!
- Almond Blueberry Cheesecake Bars: Incorporate almond extract into the cheesecake filling for a nutty flavor that complements the blueberries perfectly. Just a teaspoon can make a big difference!
These variations not only keep things exciting but also allow you to cater to different tastes and dietary preferences. I encourage you to get creative and make these bars your own. Who knows? You might just discover a new favorite version!
Cooking Notes for Blueberry Cheesecake Bars Recipe
As I’ve learned through my culinary adventures, a few cooking notes can make all the difference when preparing Blueberry Cheesecake Bars. Here are some tips that I always keep in mind to ensure my bars turn out perfectly every time:
- Chill Time: After baking, let your cheesecake bars cool at room temperature before refrigerating. This helps them set properly. I usually let them chill for at least 4 hours, or even overnight, for the best texture.
- Storage: These bars can be stored in an airtight container in the fridge for up to a week. They also freeze well! Just wrap them tightly in plastic wrap and foil, and they’ll last for up to three months.
- Serving Temperature: I love serving these bars chilled, as it enhances the creamy texture. However, if you prefer them at room temperature, just let them sit out for about 30 minutes before serving.
- Cutting Tips: For clean cuts, use a sharp knife and wipe it with a damp cloth between slices. This keeps the edges neat and makes for a beautiful presentation!
By keeping these cooking notes in mind, you’ll be well on your way to creating the most delicious Blueberry Cheesecake Bars that will impress everyone who gets a taste. Happy baking!
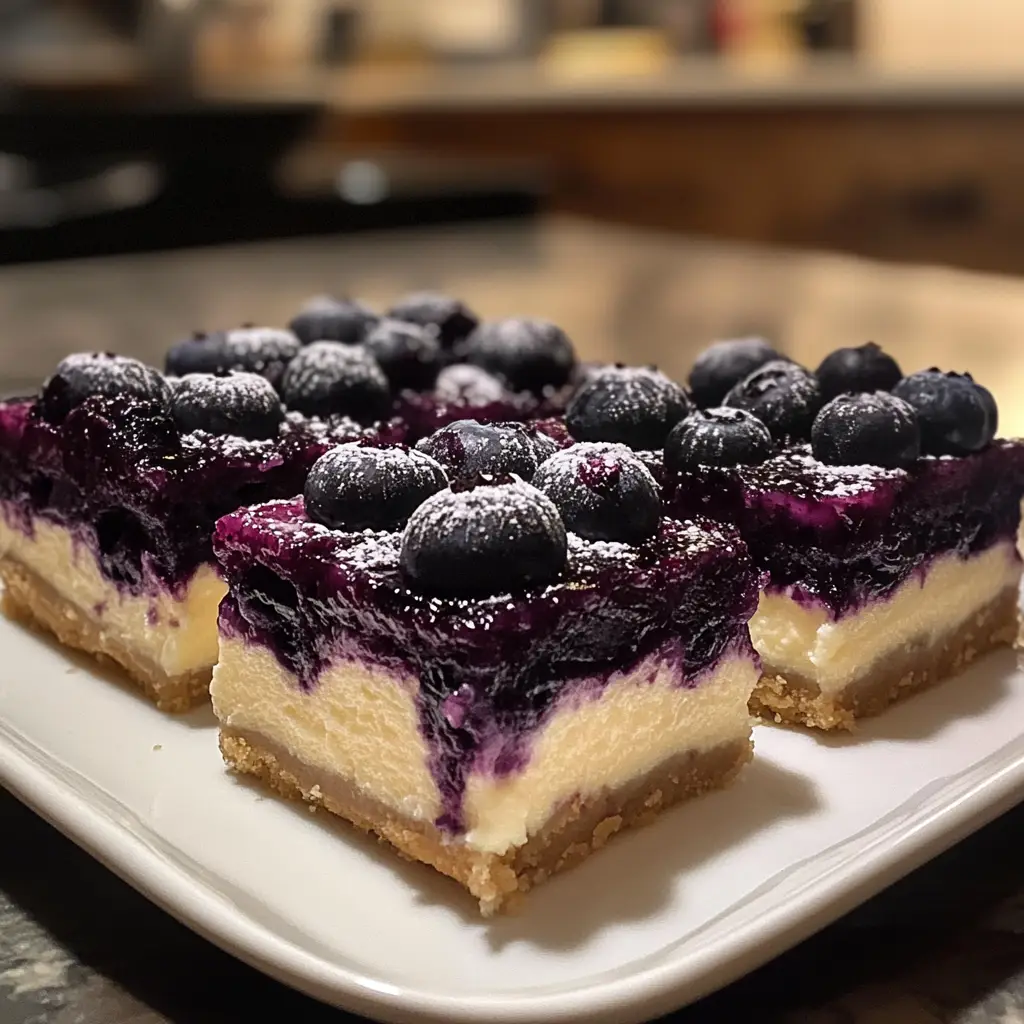
Serving Suggestions for Blueberry Cheesecake Bars Recipe
When it comes to serving my Blueberry Cheesecake Bars, I love to get a little creative! These bars are not only delicious but also visually appealing, making them perfect for any occasion. Here are some of my favorite serving suggestions that elevate the experience:
- Fresh Whipped Cream: A dollop of freshly whipped cream on top adds a light and airy touch. It complements the creamy cheesecake beautifully!
- Berry Compote: Drizzle some extra blueberry compote or a mix of berries over the bars for an added burst of flavor and color. It’s like a berry explosion on your plate!
- Ice Cream: Serve these bars with a scoop of vanilla or lemon ice cream. The cold creaminess pairs perfectly with the rich cheesecake.
- Mint Garnish: A sprig of fresh mint on top not only looks stunning but also adds a refreshing aroma that enhances the overall taste.
- Chocolate Sauce: For those who love a little decadence, a drizzle of chocolate sauce can take these bars to a whole new level of indulgence!
These serving suggestions not only make the Blueberry Cheesecake Bars more delightful but also allow you to customize them to suit your guests’ preferences. Whether it’s a casual family dinner or a fancy gathering, these bars are sure to impress!
Tips for Perfecting Blueberry Cheesecake Bars Recipe
As I’ve baked my fair share of Blueberry Cheesecake Bars, I’ve gathered a few tips that can help you achieve perfection every time. These little nuggets of wisdom can make a big difference in your baking journey!
- Room Temperature Ingredients: Always use room temperature cream cheese and eggs. This ensures a smooth, lump-free filling that bakes evenly. I usually take them out of the fridge an hour before I start.
- Don’t Overbake: Keep an eye on your bars while they bake. They should be set around the edges but still slightly jiggly in the center. Overbaking can lead to a dry texture, and nobody wants that!
- Cool Gradually: After baking, let your bars cool in the pan for about 30 minutes before transferring them to the fridge. This gradual cooling helps prevent cracks on the surface.
- Use Fresh Blueberries: If possible, opt for fresh blueberries. They burst with flavor and add a beautiful pop of color. If you use frozen, make sure to thaw and drain them well to avoid excess moisture.
- Experiment with Flavors: Don’t hesitate to play around with flavors! Adding a splash of almond extract or a hint of cinnamon can elevate your bars to new heights.
With these tips in your back pocket, you’ll be well on your way to creating the most delightful Blueberry Cheesecake Bars that will have everyone asking for seconds. Happy baking!
Breakdown of Time for Blueberry Cheesecake Bars Recipe
When it comes to baking, timing is everything! I always like to plan ahead, so here’s a quick breakdown of the time you’ll need to whip up these delicious Blueberry Cheesecake Bars. Knowing the prep and cooking times helps me stay organized and ensures I can enjoy the process without feeling rushed.
- Prep Time: 20 minutes – This includes gathering your ingredients, preparing the crust, and mixing the cheesecake filling.
- Cooking Time: 40-45 minutes – This is the time it takes for the bars to bake to perfection in the oven.
- Total Time: Approximately 1 hour – This includes both prep and cooking time, but remember to factor in additional cooling time before serving!
With this time breakdown, you can easily fit these Blueberry Cheesecake Bars into your day. Just remember to allow for some extra chilling time after baking, as they taste best when fully set. Happy baking!
Nutritional Information for Blueberry Cheesecake Bars Recipe
As a home cook, I always find it helpful to know the nutritional information of the dishes I prepare. It allows me to enjoy my creations while being mindful of what I’m eating. Here’s a general breakdown of the nutritional content for one serving of Blueberry Cheesecake Bars (assuming the recipe yields 12 bars):
- Calories: Approximately 220
- Protein: 4g
- Carbohydrates: 28g
- Fat: 10g
- Saturated Fat: 6g
- Cholesterol: 50mg
- Sodium: 150mg
- Fiber: 1g
- Sugar: 12g
Keep in mind that these values can vary based on the specific ingredients you use and any optional add-ons you choose to include. If you’re looking to lighten things up, consider using low-fat cream cheese or reducing the sugar slightly. Regardless, these Blueberry Cheesecake Bars are a delightful treat that can fit into a balanced diet. Enjoy every bite!
Frequently Asked Questions about Blueberry Cheesecake Bars Recipe
As I’ve shared my Blueberry Cheesecake Bars recipe with friends and family, I’ve noticed a few common questions pop up. I love answering these queries because it helps everyone feel more confident in their baking journey. Here are some of the most frequently asked questions about this delightful dessert:
Can I use frozen blueberries instead of fresh?
Absolutely! Frozen blueberries work just fine in this recipe. Just make sure to thaw and drain them well to avoid excess moisture. They may not hold their shape as well as fresh ones, but they’ll still taste delicious!
How do I store leftover cheesecake bars?
To keep your Blueberry Cheesecake Bars fresh, store them in an airtight container in the refrigerator. They can last up to a week. If you want to keep them longer, you can freeze them for up to three months. Just wrap them tightly in plastic wrap and foil before freezing.
Can I make these bars ahead of time?
Yes! In fact, I often make them a day in advance. They taste even better after chilling in the fridge for a few hours or overnight. This allows the flavors to meld beautifully, making them a perfect make-ahead dessert!
What can I substitute for cream cheese?
If you’re looking for a dairy-free option, you can use a plant-based cream cheese alternative. For a lighter version, consider using Greek yogurt or ricotta cheese. Just keep in mind that the texture and flavor may vary slightly.
How do I know when the cheesecake bars are done baking?
The edges should be set, while the center will still have a slight jiggle. This indicates that the bars are perfectly baked. If you overbake them, they can become dry, so keep a close eye on them during the last few minutes of baking!
These questions are just a few of the many that can arise when making Blueberry Cheesecake Bars. I hope my answers help you feel more prepared and excited to create this delicious dessert. Happy baking!
Conclusion on Blueberry Cheesecake Bars Recipe
As I wrap up this delightful journey into the world of Blueberry Cheesecake Bars, I can’t help but feel a sense of joy and satisfaction. These bars are not just a dessert; they are a celebration of flavors and memories. The creamy cheesecake, the burst of sweet blueberries, and the buttery crust come together to create a treat that is simply irresistible.
What I love most about this recipe is its versatility. Whether you’re hosting a summer barbecue, celebrating a birthday, or just indulging in a sweet moment at home, these bars fit perfectly into any occasion. Plus, they are easy to make, allowing even novice bakers to shine in the kitchen.
So, if you’re looking for a dessert that will impress your family and friends, look no further! I encourage you to try making these Blueberry Cheesecake Bars and share them with your loved ones. I promise they will become a cherished favorite, just like they are in my home. Happy baking, and may your kitchen always be filled with love and delicious aromas!
