
Introduction to Internet-Famous Cheesy Potato Side
Ah, the Internet! A magical place where recipes go viral, and food trends take off like a rocket. One dish that has captured the hearts—and stomachs—of many is the Internet-famous cheesy potato side. I remember the first time I stumbled upon this delightful creation. It was a chilly evening, and I was scrolling through my social media feed, looking for something to warm my soul. Suddenly, there it was: a bubbling, cheesy potato dish that looked like a warm hug on a plate. I knew I had to try it!
This cheesy potato side is not just a recipe; it’s a celebration of comfort food. It combines creamy cheese, tender potatoes, and a sprinkle of love, making it the perfect addition to any meal. Whether you’re hosting a dinner party or just enjoying a cozy night in, this dish is sure to impress. Plus, it’s incredibly easy to make, which is a huge bonus for someone like me who loves to cook but also enjoys a little simplicity in the kitchen.
As I began experimenting with the recipe, I found myself adding my own twists and turns, making it even more special. From crispy toppings to a hint of spice, the possibilities are endless! I can’t wait to share this recipe with you, along with some personal tips and tricks that I’ve picked up along the way. So, grab your apron, and let’s dive into the world of cheesy potato goodness!
Ingredients for Internet-Famous Cheesy Potato Side
Before we get our hands dirty in the kitchen, let’s gather all the ingredients for this cheesy potato side. I always believe that the quality of your ingredients can make or break a dish. So, let’s make sure we’re using the best of the best!
Main Ingredients
- 2 pounds of russet potatoes, peeled and diced
- 1 cup of shredded sharp cheddar cheese
- 1 cup of sour cream
- 1/2 cup of milk
- 1/4 cup of unsalted butter
- 1 teaspoon of garlic powder
- 1 teaspoon of onion powder
- Salt and pepper to taste
When choosing potatoes, I always go for russets. They’re starchy and fluffy, making them perfect for this dish. And don’t skimp on the cheese! A good sharp cheddar adds a wonderful depth of flavor that will have everyone coming back for seconds.
Optional Add-ons
- 1/2 cup of cooked bacon bits for a smoky flavor
- 1/4 cup of chopped green onions for a fresh crunch
- 1/2 cup of cream cheese for extra creaminess
- 1/2 teaspoon of paprika for a hint of spice
These optional add-ons can elevate your cheesy potato side to new heights! I love adding bacon bits for that savory crunch, and a sprinkle of green onions adds a pop of color and freshness. Feel free to mix and match based on your taste preferences!
How to Prepare Internet-Famous Cheesy Potato Side
Now that we have all our ingredients ready, it’s time to roll up our sleeves and get cooking! I find that the process of making this cheesy potato side is just as enjoyable as eating it. Each step brings a new layer of flavor and excitement. Let’s dive into the preparation!
Step 1: Prepping the Potatoes
First things first, we need to prep our potatoes. Start by peeling and dicing the russet potatoes into bite-sized pieces. This helps them cook evenly and makes for a delightful texture in the final dish.
Tips for Choosing the Right Potatoes
When selecting potatoes, I always go for russets. They’re starchy and fluffy, which makes them perfect for this cheesy dish. Look for potatoes that are firm and free of blemishes. If you can, choose medium-sized ones; they cook more evenly than larger ones. Trust me, your taste buds will thank you!
Step 2: Making the Cheese Sauce
Next up is the cheese sauce! In a medium saucepan, melt the unsalted butter over medium heat. Once melted, whisk in the milk, sour cream, garlic powder, onion powder, salt, and pepper. Stir until everything is well combined and heated through.
Tips for Achieving the Perfect Consistency
To get that creamy, dreamy cheese sauce, I recommend using room temperature ingredients. This helps everything blend together smoothly. If you want a thicker sauce, let it simmer a bit longer, but keep stirring to prevent it from sticking to the bottom of the pan. And don’t forget to add the shredded cheddar cheese! Stir until it’s melted and gooey.
Step 3: Combining Ingredients
Now it’s time to bring everything together! In a large mixing bowl, combine the diced potatoes with the cheese sauce. Make sure every potato piece is coated in that luscious sauce. It’s like giving each potato a warm, cheesy hug!
Tips for Even Distribution
To ensure even distribution, I like to use a spatula to gently fold the potatoes into the sauce. This way, you avoid mashing the potatoes while still getting that cheesy goodness all over. If you’re adding any optional ingredients like bacon bits or green onions, now’s the time to toss them in!
Step 4: Baking the Dish
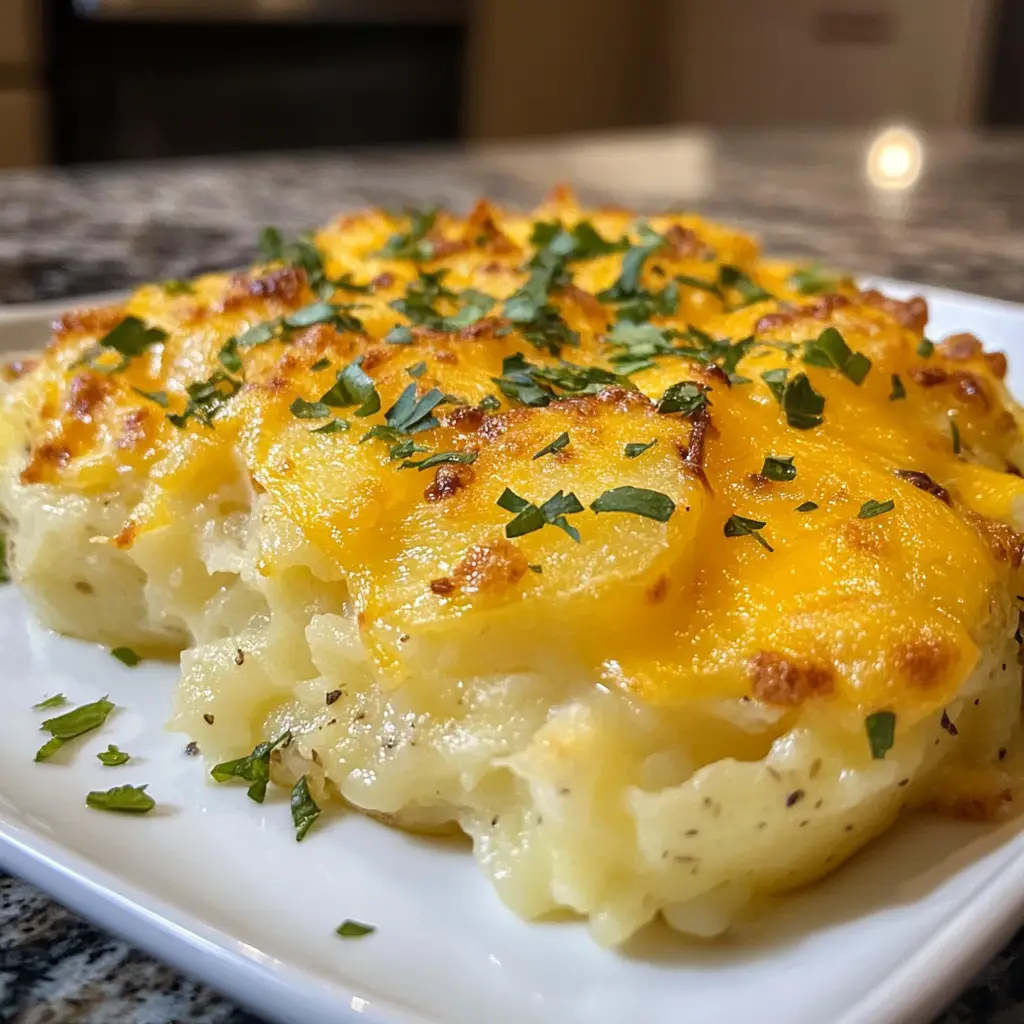
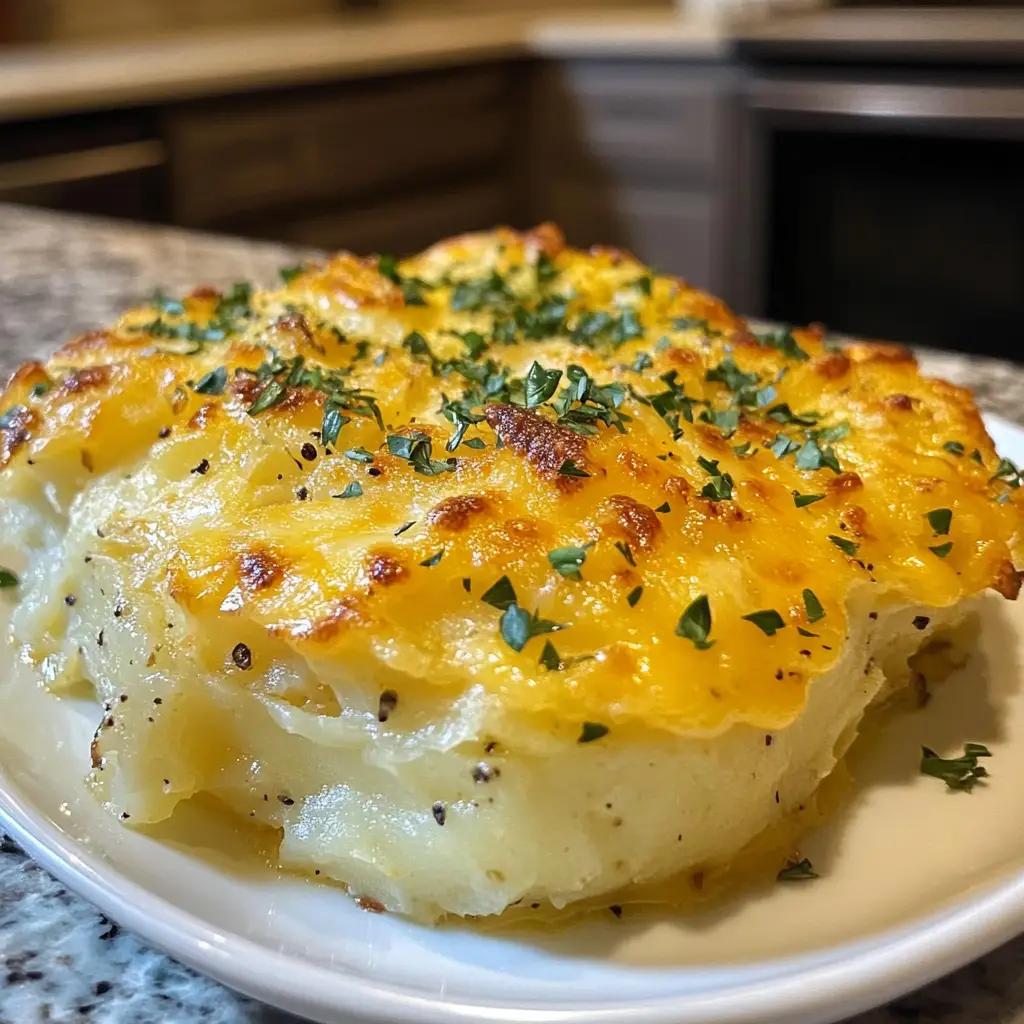
Finally, transfer the cheesy potato mixture into a greased baking dish. Spread it out evenly, and if you’re feeling fancy, sprinkle a little extra cheese on top for that golden finish. Bake in a preheated oven at 350°F (175°C) for about 30-35 minutes, or until the top is bubbly and golden brown.
Tips for Perfectly Golden Top
To achieve that perfect golden top, I like to broil the dish for the last few minutes of baking. Just keep a close eye on it, as it can go from golden to burnt in a flash! The result will be a beautiful, cheesy crust that’s simply irresistible.
Equipment Needed for Internet-Famous Cheesy Potato Side
Before we dive into the deliciousness of our cheesy potato side, let’s make sure we have the right tools at our disposal. Having the right equipment can make the cooking process smoother and more enjoyable. Here’s what you’ll need:
- Large Pot: Perfect for boiling the diced potatoes. If you don’t have a large pot, a medium-sized one will work; just cook the potatoes in batches.
- Medium Saucepan: This is where the magic happens with your cheese sauce. If you’re short on pots, you can use a skillet instead, just keep an eye on the heat.
- Mixing Bowl: A large mixing bowl is essential for combining the potatoes and cheese sauce. If you don’t have one, a deep plate can do the trick.
- Spatula: A spatula is great for folding the ingredients together without mashing the potatoes. If you don’t have one, a wooden spoon will work just fine.
- Baking Dish: A 9×13 inch baking dish is ideal for this recipe. If you don’t have one, any oven-safe dish will do; just adjust the baking time as needed.
- Whisk: A whisk is handy for mixing the cheese sauce. If you don’t have one, a fork can also get the job done!
With these tools in hand, you’re all set to create your Internet-famous cheesy potato side. Cooking is all about improvisation, so don’t stress if you need to substitute a tool or two. Just remember, the goal is to have fun and enjoy the process!
Variations of Internet-Famous Cheesy Potato Side
One of the best things about the Internet-famous cheesy potato side is its versatility! Just like a blank canvas, you can add your own flair and creativity to make it uniquely yours. Here are a few variations that I’ve tried and absolutely loved:
- Loaded Cheesy Potatoes: Add cooked bacon bits, jalapeños, and a dollop of sour cream on top for a loaded twist. It’s like a baked potato but in cheesy casserole form!
- Spicy Cheesy Potatoes: Mix in some diced green chilies or a splash of hot sauce to give your dish a kick. The heat pairs beautifully with the creamy cheese.
- Herbed Cheesy Potatoes: Fresh herbs like rosemary or thyme can elevate the flavor profile. Just chop them finely and mix them into the cheese sauce for a fragrant touch.
- Vegetable Medley: Toss in some steamed broccoli or cauliflower for a pop of color and added nutrition. It’s a great way to sneak in some veggies!
These variations not only keep things exciting but also allow you to cater to different tastes and dietary preferences. I love experimenting with new ingredients, and each time I make this dish, it feels like a new adventure. So, don’t hesitate to get creative and make this cheesy potato side your own!
Cooking Notes for Internet-Famous Cheesy Potato Side
As I’ve whipped up this Internet-famous cheesy potato side countless times, I’ve gathered a few cooking notes that can help you achieve the best results. These little nuggets of wisdom can make a big difference in your cooking experience!
- Prep Ahead: If you’re short on time, you can prep the potatoes and cheese sauce a day in advance. Just store them separately in the fridge. When you’re ready to bake, combine them and pop them in the oven!
- Don’t Overcook the Potatoes: When boiling the potatoes, keep an eye on them. You want them tender but not mushy. A fork should easily pierce them, but they should still hold their shape.
- Experiment with Cheese: While sharp cheddar is a classic choice, feel free to mix in other cheeses like mozzarella or gouda for a different flavor profile. Each cheese brings its own unique twist!
- Storage Tips: Leftovers can be stored in an airtight container in the fridge for up to three days. Reheat in the oven for the best texture, or microwave for a quick fix.
These cooking notes are like little breadcrumbs leading you to cheesy potato perfection. I hope they inspire you to make this dish your own and enjoy every cheesy bite!
Serving Suggestions for Internet-Famous Cheesy Potato Side
Now that we’ve created this mouthwatering Internet-famous cheesy potato side, it’s time to think about how to serve it! Presentation can elevate your dish from simple to spectacular, and I love to get a little creative when it comes to serving. Here are some of my favorite serving suggestions:
- As a Side Dish: This cheesy potato side pairs beautifully with roasted meats like chicken, beef, or pork. The creamy texture complements the savory flavors of the main dish, making it a perfect addition to any dinner plate.
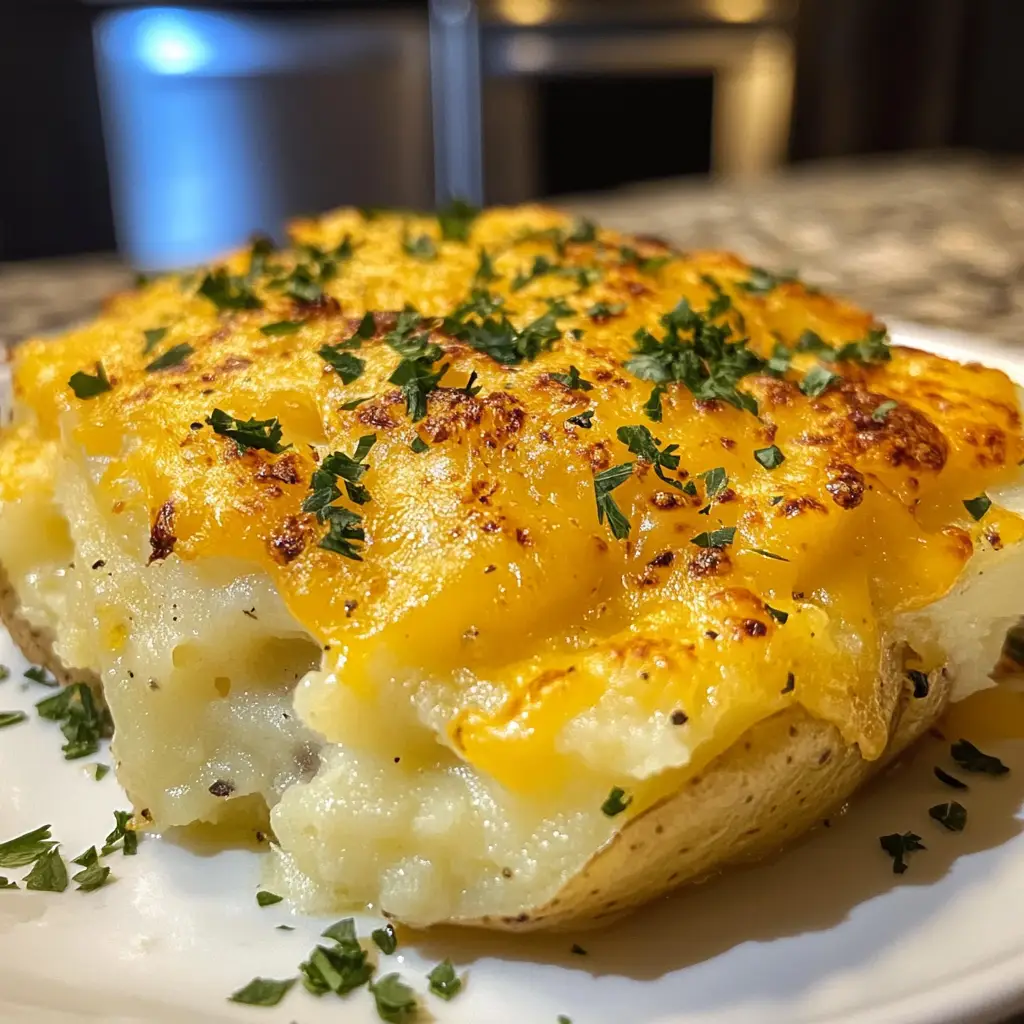
- Garnish with Fresh Herbs: A sprinkle of chopped parsley or chives on top adds a pop of color and freshness. It’s like a little green confetti that makes the dish look even more inviting!
- Serve with a Salad: Balance the richness of the cheesy potatoes with a crisp green salad. A simple vinaigrette can cut through the creaminess and provide a refreshing contrast.
- In Individual Portions: For a fun twist, serve the cheesy potatoes in small ramekins. This makes for a charming presentation and allows guests to have their own little cheesy delight!
These serving suggestions not only enhance the visual appeal of your dish but also create a delightful dining experience. I love to see the smiles on my family’s faces when I serve this cheesy potato side, and I’m sure you will too! So, gather your loved ones around the table and enjoy this comforting dish together.
Tips for Making the Best Internet-Famous Cheesy Potato Side
As a passionate home cook, I’ve learned that a few simple tips can elevate your Internet-famous cheesy potato side from good to absolutely unforgettable. Here are some of my favorite tricks that I always keep in my back pocket:
- Use Fresh Ingredients: Fresh potatoes and high-quality cheese make a world of difference. I always opt for freshly shredded cheese instead of pre-packaged. It melts better and has a richer flavor!
- Season Generously: Don’t be shy with the salt and pepper! Seasoning at every stage of cooking helps build layers of flavor. Taste as you go, and adjust to your liking.
- Let It Rest: After baking, let the dish sit for about 10 minutes before serving. This allows the cheesy goodness to set a bit, making it easier to scoop and serve.
- Experiment with Toppings: A crunchy topping can add a delightful texture. Try crushed crackers, breadcrumbs, or even fried onions sprinkled on top before baking for an extra layer of flavor.
- Pair with a Dip: Serve with a side of ranch or a spicy aioli for dipping. It adds a fun twist and enhances the overall experience!
These tips are like little golden nuggets of wisdom that I’ve gathered over the years. They help me create a cheesy potato side that not only tastes amazing but also brings joy to everyone who shares it. So, don’t hesitate to give them a try and make this dish your own!
Breakdown of Time for Internet-Famous Cheesy Potato Side
Now that we’ve covered all the delicious details, let’s talk about the time it takes to whip up this Internet-famous cheesy potato side. I know that time management in the kitchen can be a bit tricky, especially when you’re juggling multiple dishes. So, here’s a simple breakdown to help you plan your cooking adventure!
- Prep Time: Approximately 20 minutes. This includes peeling and dicing the potatoes, making the cheese sauce, and combining everything together. I like to put on some music during this time—it makes the prep feel like a fun dance party!
- Cooking Time: About 30-35 minutes. This is the time spent baking the dish until it’s bubbly and golden brown. I often use this time to set the table or prepare a salad to go alongside the cheesy potatoes.
- Total Time: Roughly 50-55 minutes. In just under an hour, you can have a comforting, cheesy side dish that’s sure to impress your family and friends!
With this time breakdown, you can easily fit this cheesy potato side into your meal planning. I love how quickly it comes together, allowing me to focus on enjoying the cooking process and the delicious results. So, roll up your sleeves and get ready to create some cheesy magic!
Nutritional Information for Internet-Famous Cheesy Potato Side
As a passionate home cook, I always find it helpful to know the nutritional value of the dishes I prepare. This Internet-famous cheesy potato side is not only delicious but can also fit into a balanced diet when enjoyed in moderation. Here’s a quick breakdown of the nutritional information per serving, based on the ingredients listed:
- Calories: Approximately 300-350 calories
- Protein: About 10-12 grams
- Carbohydrates: Roughly 40-45 grams
- Fat: Around 15-20 grams
- Saturated Fat: Approximately 8-10 grams
- Fiber: About 2-3 grams
- Sodium: Roughly 400-500 mg
Keep in mind that these values can vary based on the specific brands and quantities of ingredients you use. If you’re looking to lighten things up, consider using low-fat cheese or sour cream, or even swapping in some Greek yogurt. I love how this dish can be customized to fit different dietary needs while still delivering that comforting cheesy goodness!
Frequently Asked Questions about Internet-Famous Cheesy Potato Side
As I’ve shared my love for this Internet-famous cheesy potato side, I’ve noticed that many home cooks have similar questions. It’s always great to connect with fellow food enthusiasts, and I’m here to help! Here are some of the most frequently asked questions I’ve encountered, along with my personal insights:
Can I make this dish ahead of time?
Absolutely! One of the best things about this cheesy potato side is that it can be prepared in advance. You can assemble the dish, cover it tightly, and store it in the fridge for up to 24 hours before baking. Just remember to let it sit at room temperature for about 30 minutes before popping it in the oven. This way, you can enjoy a delicious homemade side without the last-minute rush!
Can I freeze the cheesy potato side?
Yes, you can freeze this dish! After baking, let it cool completely, then transfer it to an airtight container or freezer-safe dish. It can be frozen for up to three months. When you’re ready to enjoy it, simply thaw it in the fridge overnight and reheat in the oven until warmed through. It’s like having a little cheesy treasure waiting for you!
What can I serve with this cheesy potato side?
This cheesy potato side pairs wonderfully with a variety of main dishes! I love serving it alongside roasted chicken, grilled steak, or even a hearty vegetable stir-fry. It also complements fresh salads beautifully, balancing the richness of the cheese with crisp greens. The options are endless, so feel free to get creative!
Can I use different types of cheese?
Definitely! While sharp cheddar is a classic choice, you can experiment with other cheeses to suit your taste. I’ve tried mixing in mozzarella for a gooey texture or gouda for a smoky flavor. Just remember that different cheeses melt differently, so it’s fun to play around and find your perfect combination!
How do I store leftovers?
Leftovers can be stored in an airtight container in the fridge for up to three days. When reheating, I recommend using the oven to maintain that creamy texture. Just cover the dish with foil to prevent it from drying out, and heat at 350°F (175°C) until warmed through. You’ll be amazed at how delicious it still tastes!
These FAQs are just a glimpse into the wonderful world of the Internet-famous cheesy potato side. I hope they help you feel more confident in your cooking journey. Remember, cooking is all about experimenting and having fun, so don’t hesitate to make this dish your own! Happy cooking!
Conclusion on Internet-Famous Cheesy Potato Side
As I wrap up this delightful journey into the world of the Internet-famous cheesy potato side, I can’t help but feel a sense of warmth and joy. This dish is more than just a recipe; it’s a celebration of comfort, creativity, and connection. With its creamy cheese, tender potatoes, and endless possibilities for customization, it’s no wonder this dish has captured the hearts of so many home cooks, including myself.
Whether you’re serving it at a family gathering, a cozy dinner with friends, or simply indulging in a comforting meal at home, this cheesy potato side is sure to bring smiles and satisfaction. The best part? It’s incredibly easy to make, allowing you to focus on what truly matters—enjoying the cooking process and sharing delicious food with loved ones.
So, as you embark on your own cheesy potato adventure, remember to have fun, experiment with flavors, and make it your own. I can’t wait for you to experience the joy of this dish, and I hope it becomes a beloved staple in your kitchen, just as it has in mine. Happy cooking, and may your cheesy potato side always be a hit!
