

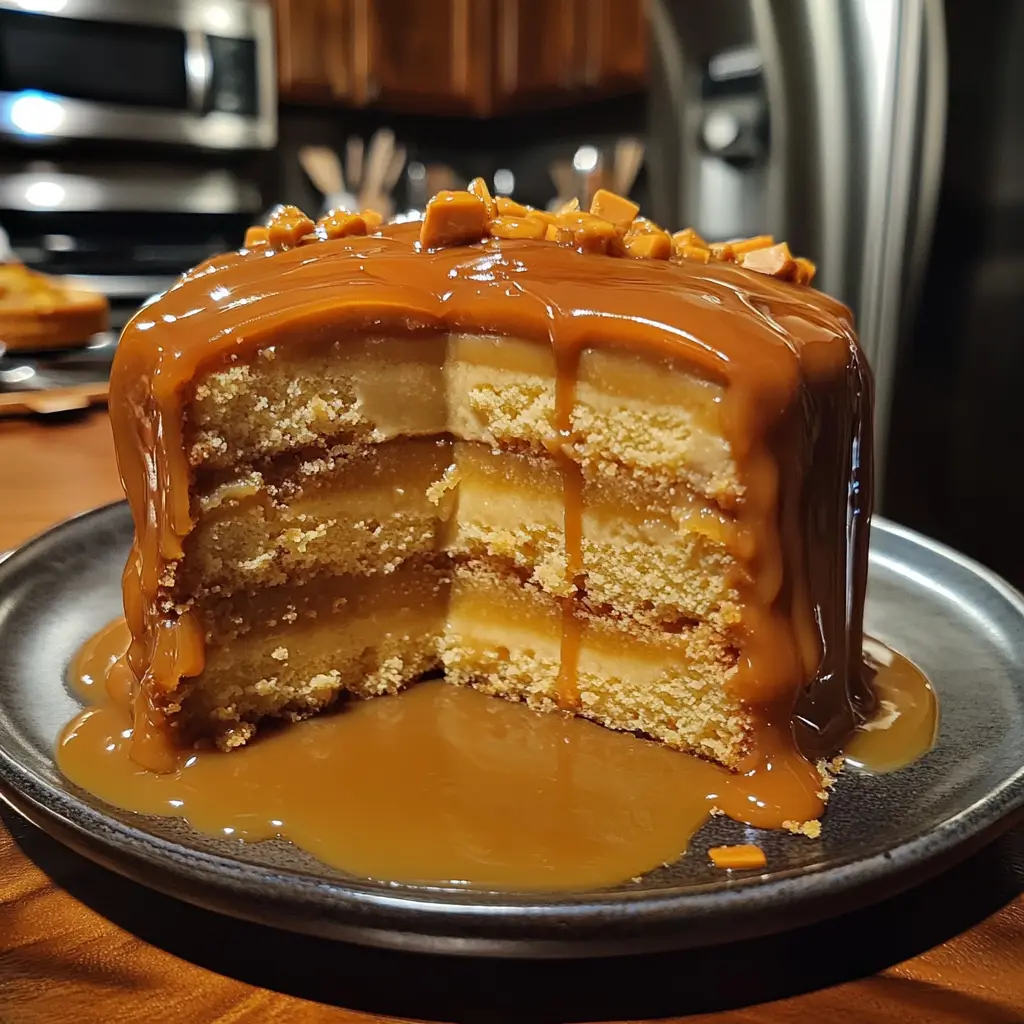
Introduction to Butterscotch Pudding Cake
Ah, butterscotch pudding cake! Just the name makes my heart flutter with joy. I remember the first time I tasted this delightful dessert. It was at my grandmother’s kitchen table, where the air was thick with the sweet aroma of caramelized sugar and warm spices. She would often whip up this cake on rainy afternoons, and it quickly became a family favorite. The way the cake rises, only to reveal a luscious layer of butterscotch pudding beneath, is nothing short of magical.
As a passionate home cook, I find that this recipe is not just about the ingredients; it’s about the memories we create while baking. Each time I make butterscotch pudding cake, I’m transported back to those cozy afternoons, surrounded by laughter and love. The beauty of this dessert lies in its simplicity. With just a handful of ingredients, you can create a cake that feels like a warm hug on a plate.
What I love most about butterscotch pudding cake is its versatility. It can be served warm, straight from the oven, or chilled for a refreshing treat. You can dress it up with whipped cream or enjoy it plain, and it always delivers that comforting sweetness we crave. So, whether you’re looking to impress guests or simply indulge in a slice of nostalgia, this cake is sure to please.
Join me as we dive into the world of butterscotch pudding cake. I’ll share my favorite tips, tricks, and personal anecdotes to help you create your own delicious masterpiece. Let’s get started on this sweet adventure!
Ingredients for Butterscotch Pudding Cake
Now that we’ve set the stage for our sweet adventure, let’s gather the ingredients for our butterscotch pudding cake. I always say that the quality of your ingredients can make a world of difference. So, let’s make sure we’re using the best of the best!
Main Ingredients
- 1 cup all-purpose flour
- 1 cup brown sugar, packed (the darker, the better for that rich flavor!)
- 1 teaspoon baking powder
- 1/2 teaspoon salt
- 1 cup milk (I prefer whole milk for creaminess)
- 1/4 cup unsalted butter, melted (don’t skimp on the butter, it adds magic!)
- 1 teaspoon vanilla extract (pure vanilla is a must for that aromatic touch)
- 1 cup butterscotch pudding mix (instant works perfectly here)
- 1 1/2 cups boiling water (this is the secret to the pudding layer!)
Each of these ingredients plays a vital role in creating that delightful texture and flavor. The brown sugar, for instance, gives the cake its signature butterscotch taste, while the pudding mix ensures that luscious layer we all adore.
Optional Add-ons
- Chopped nuts (like pecans or walnuts) for a crunchy texture
- Chocolate chips for a sweet twist
- Whipped cream for serving (because who doesn’t love a dollop of cream?)
- Caramel sauce drizzled on top for extra indulgence
Feel free to get creative with these optional add-ons! I often toss in a handful of chocolate chips when I’m feeling adventurous. It adds a delightful surprise in every bite. Remember, cooking is all about experimenting and finding what makes your taste buds dance!
How to Prepare Butterscotch Pudding Cake
Now that we have our ingredients ready, it’s time to roll up our sleeves and dive into the fun part—preparing our butterscotch pudding cake! I always find that the process of baking is just as enjoyable as the final product. So, let’s get started with these simple steps!
Step 1: Preheat the Oven and Prepare Baking Dish
First things first, preheat your oven to 350°F (175°C). This ensures that your cake bakes evenly. While the oven warms up, grab an 8-inch square baking dish and grease it with a little butter or cooking spray. This will help the cake slide out easily once it’s baked.
Tips for Step 1
- Make sure your oven is fully preheated before putting the cake in. A hot oven is key to a fluffy cake!
- If you want to add a little extra flavor, consider dusting the greased dish with a bit of cocoa powder or flour.
Step 2: Mix Dry Ingredients
In a large mixing bowl, combine the flour, brown sugar, baking powder, and salt. Whisk them together until they’re well blended. This step is crucial because it helps to evenly distribute the leavening agent, ensuring a nice rise.
Tips for Step 2
- Use a sifter if you have one! It helps to aerate the flour and makes for a lighter cake.
- Don’t rush this step; take your time to mix thoroughly. It makes a difference!
Step 3: Combine Wet Ingredients
In another bowl, mix together the milk, melted butter, and vanilla extract. Stir until everything is well combined. The melted butter should be warm but not hot, as you don’t want to cook the other ingredients.
Tips for Step 3
- For a richer flavor, you can use brown butter instead of regular melted butter. Just melt it slowly until it turns golden brown!
- Make sure to measure your milk accurately. Too much or too little can affect the cake’s texture.
Step 4: Combine Wet and Dry Mixtures
Now, pour the wet mixture into the bowl of dry ingredients. Gently fold them together using a spatula or wooden spoon. Be careful not to overmix; a few lumps are perfectly fine. This will keep your cake tender and moist.
Tips for Step 4
- Use a folding motion rather than stirring vigorously. This helps to keep the air in the batter.
- If you’re adding any optional ingredients like chocolate chips or nuts, now’s the time to fold them in!
Step 5: Bake the Cake
Pour the batter into your prepared baking dish. Then, carefully pour the boiling water over the top of the batter. Don’t stir! This is what creates that magical pudding layer beneath the cake. Bake in the preheated oven for about 30-35 minutes, or until the top is golden brown.
Tips for Step 5
- Keep an eye on the cake during the last few minutes of baking. Ovens can vary, and you want to catch it at just the right moment!
- Use a toothpick to check for doneness. It should come out clean from the cake part, but a little pudding may cling to it.
Step 6: Prepare the Butterscotch Sauce
While the cake is baking, you can prepare a simple butterscotch sauce if you’d like to drizzle it on top. In a small saucepan, combine 1 cup of brown sugar, 1/2 cup of heavy cream, and 1/4 cup of butter. Cook over medium heat, stirring until the sugar dissolves and the mixture thickens slightly.
Tips for Step 6
- Be careful not to let the sauce boil too vigorously; you want it to gently bubble.
- For an extra kick, add a pinch of sea salt to the sauce for a salted butterscotch flavor!
And there you have it! Follow these steps, and you’ll be well on your way to creating a delicious butterscotch pudding cake that will warm your heart and delight your taste buds. Let’s move on to the next section where we’ll discuss the equipment needed for this delightful dessert!
Equipment Needed for Butterscotch Pudding Cake
Before we dive into baking, let’s make sure we have all the right tools at our fingertips. Having the right equipment can make the process smoother and more enjoyable. Here’s what you’ll need to whip up your butterscotch pudding cake:
- 8-inch square baking dish: This is perfect for our cake. If you don’t have one, a round cake pan will work just fine!
- Mixing bowls: I recommend having at least two—one for dry ingredients and one for wet. It keeps things organized and makes mixing easier.
- Whisk: A good whisk is essential for blending your dry ingredients and mixing the wet ones. If you don’t have a whisk, a fork can do the trick!
- Spatula or wooden spoon: You’ll need this for folding the batter together. A silicone spatula is my favorite because it scrapes every last bit from the bowl.
- Measuring cups and spoons: Accurate measurements are key to baking success. If you don’t have a set, you can use a kitchen scale for precision.
- Toothpick or cake tester: This handy tool helps you check if your cake is done. If you don’t have one, a clean knife works just as well!
- Small saucepan: This is for making the butterscotch sauce. If you don’t have a saucepan, a microwave-safe bowl can be used to melt the ingredients together.
With these tools in hand, you’ll be ready to create your butterscotch pudding cake masterpiece. Remember, the joy of cooking comes not just from the final product but also from the process itself. So, let’s get baking!
Variations of Butterscotch Pudding Cake
As a passionate home cook, I love to experiment with recipes, and butterscotch pudding cake is no exception! While the classic version is absolutely delightful, there are so many fun variations to try. Here are a few that I’ve enjoyed over the years:
- Chocolate Butterscotch Pudding Cake: Add a half cup of cocoa powder to the dry ingredients for a rich chocolate twist. The combination of chocolate and butterscotch is simply divine!
- Spiced Butterscotch Pudding Cake: Incorporate a teaspoon of cinnamon or nutmeg into the dry ingredients. This adds a warm, cozy flavor that’s perfect for fall.
- Fruit-Infused Butterscotch Pudding Cake: Toss in some fresh berries or sliced bananas into the batter before baking. The fruit adds a burst of freshness that complements the sweetness beautifully.
- Nutty Butterscotch Pudding Cake: Fold in a cup of chopped nuts, like pecans or almonds, for a delightful crunch. The texture contrast is simply irresistible!
These variations not only keep things exciting but also allow you to tailor the cake to your taste preferences. I encourage you to get creative and make this recipe your own. After all, cooking is all about joy and exploration!
Cooking Notes for Butterscotch Pudding Cake
As I’ve journeyed through the delightful world of butterscotch pudding cake, I’ve gathered a few cooking notes that can help elevate your baking experience. These little nuggets of wisdom can make a big difference in the outcome of your cake!
- Room Temperature Ingredients: Whenever possible, use room temperature ingredients. This helps them blend more easily, creating a smoother batter. I always take my eggs and milk out of the fridge about 30 minutes before I start baking.
- Don’t Overmix: It’s tempting to keep mixing until everything is perfectly smooth, but overmixing can lead to a dense cake. A few lumps are perfectly fine, so embrace the rustic charm!
- Cooling Time: Allow the cake to cool for a few minutes in the baking dish before serving. This helps the pudding layer set a bit more, making it easier to slice. Plus, it’s a great time to whip up some fresh cream!
- Storage Tips: If you have leftovers (which is rare in my house!), store them in an airtight container in the fridge. The cake tastes even better the next day as the flavors meld together.
- Serving Temperature: While I love it warm, butterscotch pudding cake is also delicious chilled. Experiment with both to find your favorite way to enjoy it!
These cooking notes are like little secrets I’ve picked up along the way. They help ensure that each time I make butterscotch pudding cake, it’s a delightful success. Happy baking, and may your kitchen be filled with sweet aromas and joyful memories!
Serving Suggestions for Butterscotch Pudding Cake
Now that our butterscotch pudding cake is baked to perfection, it’s time to think about how to serve this delightful treat! Presentation can elevate the experience, and I love to get a little creative when it comes to serving. Here are some of my favorite suggestions:
- Warm with Whipped Cream: Serve a warm slice topped with a generous dollop of freshly whipped cream. The cream melts slightly into the warm cake, creating a heavenly combination!
- Drizzled with Butterscotch Sauce: If you made that luscious butterscotch sauce, drizzle it over the top for an extra layer of sweetness. It’s like a sweet hug for your taste buds!
- With Fresh Fruit: Pair the cake with fresh berries or sliced bananas. The fruity freshness cuts through the richness and adds a pop of color to your plate.
- Chilled and Sliced: For a refreshing twist, chill the cake in the fridge and serve it cold. It’s a delightful treat on a hot day!
- Garnished with Nuts: Sprinkle some chopped nuts on top for added crunch and flavor. It’s a simple touch that makes a big difference!
These serving suggestions not only enhance the flavor but also make your butterscotch pudding cake look irresistible. Whether you’re hosting a gathering or enjoying a quiet evening at home, these ideas will surely impress. So, grab your fork and dig in—this cake is ready to be savored!
Tips for Making the Best Butterscotch Pudding Cake
As I’ve baked my fair share of butterscotch pudding cakes, I’ve gathered a treasure trove of tips that can help you achieve the best results. These little nuggets of wisdom can make all the difference in your baking journey. Here are my top tips for making this delightful dessert:
- Use Quality Ingredients: Always opt for high-quality brown sugar and pure vanilla extract. The better the ingredients, the richer the flavor of your cake!
- Measure Accurately: Baking is a science, so precise measurements are key. Use measuring cups and spoons for dry ingredients and a liquid measuring cup for wet ingredients.
- Don’t Skip the Boiling Water: Pouring boiling water over the batter is what creates that magical pudding layer. Trust the process; it’s essential for the cake’s texture!
- Experiment with Flavors: Don’t be afraid to add your own twist! Whether it’s a sprinkle of cinnamon or a handful of chocolate chips, make it your own.
- Let It Rest: After baking, allow the cake to cool for a few minutes before serving. This helps the pudding layer set and makes for easier slicing.
With these tips in your back pocket, you’ll be well on your way to creating a butterscotch pudding cake that’s not only delicious but also a true reflection of your culinary passion. Happy baking, and may your kitchen be filled with sweet success!
Breakdown of Time for Butterscotch Pudding Cake
As a passionate home cook, I know that timing is everything in the kitchen. When it comes to making butterscotch pudding cake, having a clear idea of how long each step takes can help you plan your baking adventure. Here’s a quick breakdown of the time you’ll need:
- Prep Time: Approximately 15-20 minutes. This includes gathering your ingredients, measuring them out, and mixing the batter. It’s a fun time to get your hands a little messy!
- Cooking Time: About 30-35 minutes. This is when the magic happens in the oven, transforming your batter into a fluffy cake with a luscious pudding layer underneath.
- Total Time: Roughly 50-55 minutes. From start to finish, you’ll have a delicious butterscotch pudding cake ready to enjoy in under an hour!
With this time breakdown, you can easily fit this delightful dessert into your day. Whether you’re baking for a special occasion or just treating yourself, knowing how long each step takes makes the process smoother and more enjoyable. So, let’s get baking and savor the sweet rewards of our efforts!
Nutritional Information for Butterscotch Pudding Cake
As a passionate home cook, I believe it’s important to enjoy our treats while also being mindful of what goes into them. Butterscotch pudding cake is a delightful indulgence, and knowing its nutritional information can help you savor it even more. Here’s a general breakdown per serving, assuming the cake is cut into 9 pieces:
- Calories: Approximately 250-300 calories
- Fat: 10-12 grams (depending on the butter and optional toppings)
- Carbohydrates: 40-45 grams
- Protein: 3-4 grams
- Sugar: 20-25 grams
- Fiber: 1 gram
Keep in mind that these values can vary based on the specific ingredients you use and any optional add-ons you choose to include. If you’re looking to lighten things up a bit, consider using low-fat milk or reducing the amount of sugar. Regardless, this cake is a sweet treat that’s perfect for special occasions or a cozy night in. Enjoy every bite, and remember, balance is key in any culinary adventure!
Frequently Asked Questions about Butterscotch Pudding Cake
As I’ve shared my love for butterscotch pudding cake, I’ve often encountered a few common questions from fellow home cooks. It’s always a joy to help others navigate their baking adventures! Here are some frequently asked questions that might just answer your own curiosities:
Can I use homemade butterscotch pudding instead of the mix?
Absolutely! If you have a favorite homemade butterscotch pudding recipe, feel free to use it. Just make sure it’s thick enough to create that luscious layer beneath the cake. Homemade pudding can add a personal touch and elevate the flavor even more!
What if I don’t have brown sugar?
If you find yourself out of brown sugar, don’t fret! You can make a quick substitute by mixing white sugar with a bit of molasses. For every cup of brown sugar needed, combine 1 cup of white sugar with 1 tablespoon of molasses. It’s a simple fix that works wonders!
Can I make this cake ahead of time?
Yes, you can! Butterscotch pudding cake can be made a day in advance. Just store it in the refrigerator after it cools. The flavors will meld beautifully overnight, making it even more delicious. Just remember to let it sit at room temperature for a bit before serving!
How do I store leftovers?
To keep your butterscotch pudding cake fresh, store it in an airtight container in the refrigerator. It should last for about 3-4 days. If you’re like me, though, leftovers might not last that long because it’s just too tempting!
Can I freeze butterscotch pudding cake?
While I recommend enjoying it fresh, you can freeze the cake if needed. Wrap it tightly in plastic wrap and then in aluminum foil. It can be frozen for up to 2 months. When you’re ready to enjoy it, thaw it in the fridge overnight and reheat gently in the oven.
These questions reflect the curiosity and creativity that come with baking. I hope my answers help you feel more confident as you embark on your butterscotch pudding cake journey. Remember, every baking adventure is a chance to learn and grow, so don’t hesitate to ask questions and explore new possibilities!
Conclusion on Butterscotch Pudding Cake
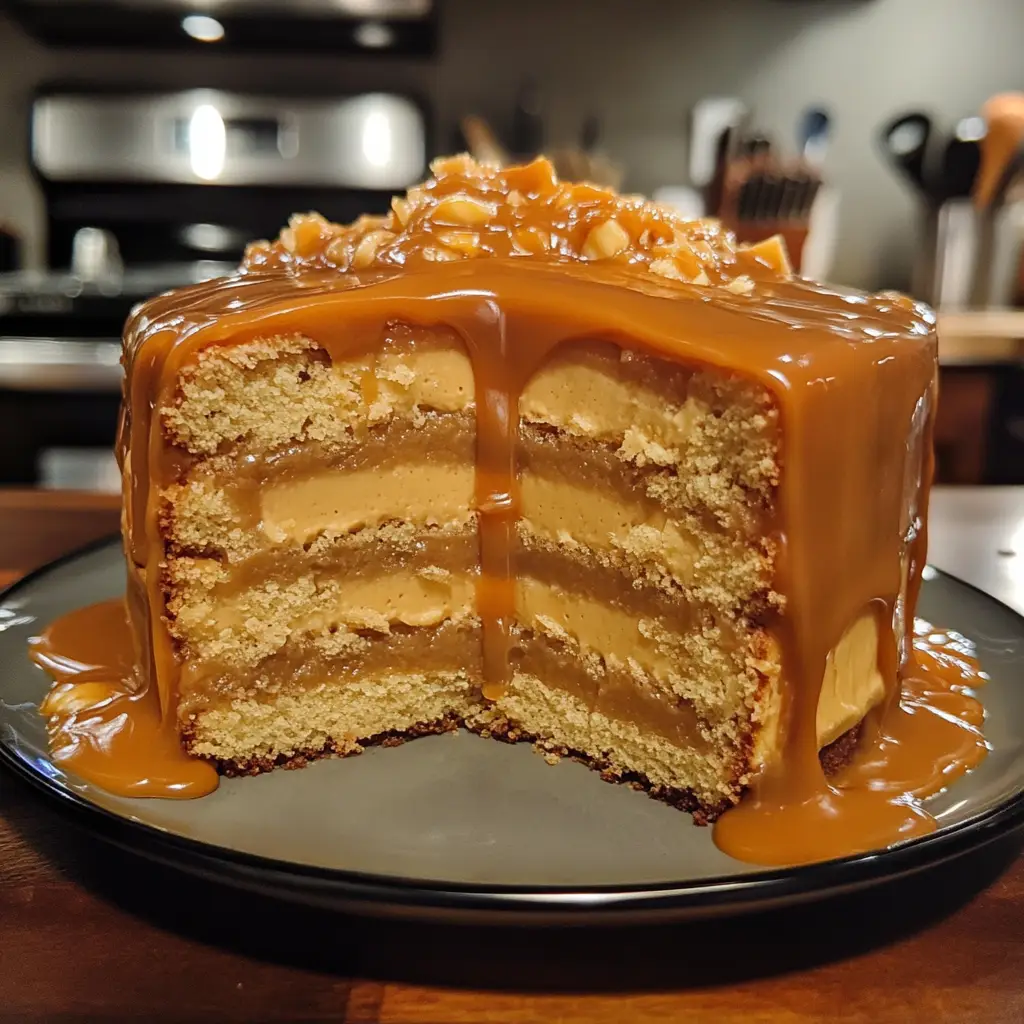
As we wrap up our sweet journey through the world of butterscotch pudding cake, I can’t help but feel a sense of warmth and nostalgia. This delightful dessert is more than just a recipe; it’s a celebration of flavors, memories, and the joy of cooking. The combination of a fluffy cake topped with a rich, creamy pudding layer creates a symphony of textures that dance on your palate.
What I love most about butterscotch pudding cake is its versatility. Whether you serve it warm with a dollop of whipped cream or chilled with fresh fruit, it never fails to impress. Plus, it’s a fantastic canvas for creativity, allowing you to experiment with flavors and add your personal touch. Each bite is a reminder of the love and care that goes into baking, making it a perfect treat for any occasion.
So, whether you’re baking for a special celebration or simply indulging in a moment of self-care, butterscotch pudding cake is sure to bring a smile to your face. I encourage you to gather your ingredients, roll up your sleeves, and create your own version of this beloved dessert. Happy baking, and may your kitchen always be filled with sweet aromas and cherished memories!
