
Introduction to Salted Caramel Cream Cake Recipe
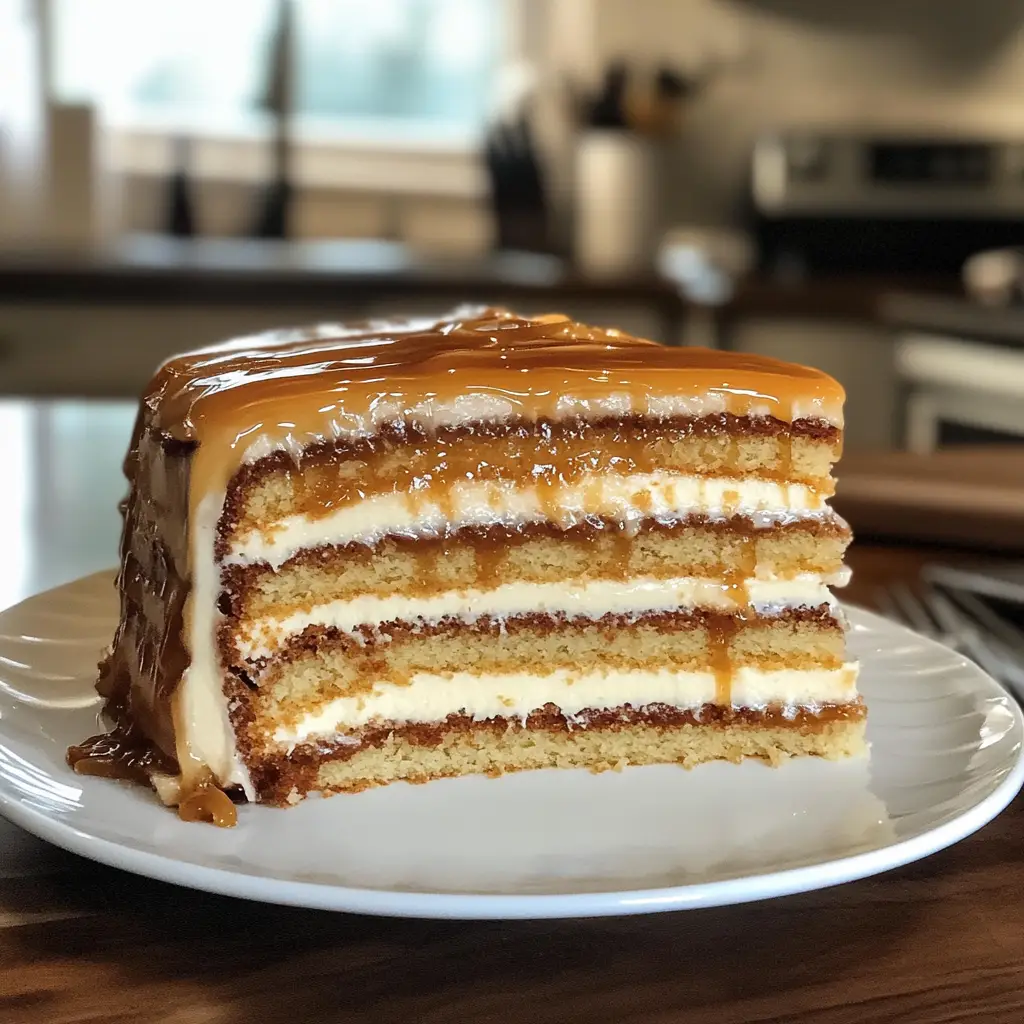
As a passionate home cook, I often find myself daydreaming about desserts that can make any occasion feel special. One such creation that has captured my heart is the Salted Caramel Cream Cake. This cake is not just a treat; it’s a celebration of flavors that dance on your palate. Imagine biting into a soft, fluffy cake layered with rich, velvety cream and drizzled with luscious salted caramel. It’s pure bliss!
My journey with this cake began on a rainy afternoon. I was flipping through my favorite cookbook, and there it was—a picture of a stunning cake that looked like it belonged in a bakery window. The golden caramel glistening on top called to me, and I knew I had to try making it myself. After a few attempts, I finally perfected my version, and now I can’t wait to share it with you!
This Salted Caramel Cream Cake is perfect for birthdays, anniversaries, or even just a cozy weekend treat. The combination of sweet and salty flavors creates a delightful balance that keeps you coming back for more. Plus, the process of making it is just as enjoyable as eating it. From whipping the cream to watching the caramel bubble away on the stove, every step is a little adventure in my kitchen.
So, grab your apron and let’s dive into this delicious recipe together! I promise you, once you taste this cake, it will become a cherished favorite in your home, just like it has in mine.
Ingredients for Salted Caramel Cream Cake Recipe
Before we embark on this delightful baking adventure, let’s gather our ingredients. Having everything ready makes the process smoother and more enjoyable. Here’s what you’ll need to create this heavenly Salted Caramel Cream Cake.
Main Ingredients
- For the Cake:
- 2 cups all-purpose flour
- 1 ½ cups granulated sugar
- ½ cup unsalted butter, softened
- 1 cup whole milk
- 3 large eggs
- 2 teaspoons baking powder
- 1 teaspoon vanilla extract
- ½ teaspoon salt
- For the Salted Caramel Sauce:
- 1 cup granulated sugar
- 6 tablespoons unsalted butter, cut into pieces
- ½ cup heavy cream
- 1 teaspoon sea salt
- For the Cream Filling:
- 2 cups heavy whipping cream
- ½ cup powdered sugar
- 1 teaspoon vanilla extract
Optional Add-ons
- For Extra Flavor:
- 1 tablespoon espresso powder (for a mocha twist)
- Chopped nuts (like pecans or walnuts) for added crunch
- Chocolate shavings for a decadent touch
- For Decoration:
- Extra salted caramel sauce for drizzling on top
- Fresh berries for a pop of color
When selecting your ingredients, I always recommend using high-quality butter and fresh eggs. They make a world of difference in flavor and texture. For the caramel, be patient and use granulated sugar that’s free from clumps. Trust me, the effort will pay off when you taste that rich, buttery caramel sauce!
How to Prepare Salted Caramel Cream Cake Recipe
Now that we have our ingredients ready, it’s time to roll up our sleeves and get baking! I find that the process of making this Salted Caramel Cream Cake is just as rewarding as the final product. Let’s dive into each step together, and I’ll share some of my favorite tips along the way!
Step 1: Baking the Cake Layers
First things first, we need to bake those fluffy cake layers. Preheat your oven to 350°F (175°C) and grease two 9-inch round cake pans. This is where the magic begins!
- In a large mixing bowl, cream together the softened butter and granulated sugar until it’s light and fluffy. This usually takes about 3-5 minutes.
- Add in the eggs, one at a time, mixing well after each addition. Then, stir in the vanilla extract.
- In another bowl, whisk together the flour, baking powder, and salt. Gradually add this dry mixture to the wet ingredients, alternating with the milk. Start and end with the flour mixture.
- Once everything is combined, pour the batter evenly into the prepared cake pans.
- Bake for 25-30 minutes, or until a toothpick inserted in the center comes out clean.
Tips for Achieving Perfect Cake Layers
To ensure your cake layers rise beautifully, make sure your ingredients are at room temperature. This helps them blend better. Also, avoid overmixing the batter; it should be just combined. Trust me, your cake will thank you!
Step 2: Making the Salted Caramel Sauce
While the cake layers are baking, let’s whip up that luscious salted caramel sauce. This step is where the sweet and salty magic happens!
- In a medium saucepan over medium heat, add the granulated sugar. Stir constantly until it melts and turns a beautiful amber color. Be careful not to burn it!
- Once the sugar is melted, carefully add the butter. The mixture will bubble up, so watch your hands!
- After the butter has melted, slowly pour in the heavy cream while stirring. This will create a smooth sauce.
- Finally, stir in the sea salt and let the sauce cool slightly before using.
Tips for Perfect Caramel Consistency
Patience is key when making caramel. If it’s your first time, keep a close eye on the sugar as it melts. If it gets too dark, it can taste bitter. If you find your caramel is too thick, you can add a splash of cream to loosen it up.
Step 3: Preparing the Cream Filling
Now, let’s prepare the cream filling that will add a delightful lightness to our cake. This part is super fun!
- In a large mixing bowl, pour in the heavy whipping cream. Using an electric mixer, beat the cream on medium speed until it starts to thicken.
- Add the powdered sugar and vanilla extract, then continue to whip until stiff peaks form. This means the cream should hold its shape when you lift the beaters.
Tips for Whipping Cream to Perfection
Make sure your mixing bowl and beaters are cold. This helps the cream whip up faster and achieve that perfect texture. Also, don’t overwhip; you want it fluffy, not grainy!
Step 4: Assembling the Cake
It’s time to bring everything together! This is where your cake transforms into a masterpiece.
- Once the cake layers are completely cool, place one layer on a serving plate. Spread a generous amount of cream filling on top.
- Drizzle some salted caramel sauce over the cream filling, letting it cascade down the sides.
- Carefully place the second cake layer on top and repeat the process with the remaining cream filling and caramel sauce.
- For the final touch, you can frost the sides of the cake with any leftover cream filling and drizzle more caramel on top.
Tips for Layering and Frosting
To keep your cake layers from sliding, make sure they are completely cool before stacking. If you want a cleaner look, you can chill the assembled cake for about 30 minutes before frosting. This helps everything set nicely!
Equipment Needed for Salted Caramel Cream Cake Recipe
Before we dive into the baking process, let’s make sure we have all the right tools at our fingertips. Having the right equipment can make a world of difference in your baking experience. Here’s what you’ll need for this Salted Caramel Cream Cake:
- Mixing Bowls: A set of mixing bowls in various sizes will help you combine your ingredients easily. I love using glass bowls because I can see the mixture as I whip it up!
- Electric Mixer: An electric mixer is a must for whipping the cream and mixing the cake batter. If you don’t have one, a whisk and some elbow grease will do the trick, but it may take a bit longer.
- Measuring Cups and Spoons: Accurate measurements are key to baking success. I always keep a set of dry and liquid measuring cups handy.
- 9-inch Round Cake Pans: You’ll need two of these to bake your cake layers. If you don’t have round pans, you can use square ones, but adjust the baking time accordingly.
- Spatula: A rubber spatula is perfect for scraping down the sides of your mixing bowls and spreading the cream filling evenly.
- Medium Saucepan: This is essential for making the salted caramel sauce. A heavy-bottomed pan works best to prevent burning.
- Cooling Rack: Once your cake layers are baked, a cooling rack will help them cool evenly and prevent sogginess.
Don’t worry if you’re missing a few items! You can always improvise. For example, if you don’t have a cooling rack, placing the cake pans on a plate will work just fine. The most important thing is to enjoy the process and have fun in the kitchen!
Variations of Salted Caramel Cream Cake Recipe
As much as I adore the classic Salted Caramel Cream Cake, there’s something exciting about experimenting with variations. Each twist brings a new flavor profile that can surprise and delight your taste buds. Here are a few fun ideas to inspire your baking adventures:
- Chocolate Salted Caramel Cake: Swap out half of the all-purpose flour for cocoa powder to create a rich chocolate cake. The combination of chocolate and salted caramel is simply divine!
- Spiced Salted Caramel Cake: Add a teaspoon of cinnamon and a pinch of nutmeg to the cake batter for a warm, spiced flavor. This variation is perfect for cozy fall gatherings.
- Fruit-Infused Salted Caramel Cake: Incorporate fresh fruits like raspberries or sliced bananas into the cream filling. The tartness of the fruit pairs beautifully with the sweet caramel.
- Nutty Salted Caramel Cake: Fold in chopped nuts, such as pecans or almonds, into the cake batter for added texture. You can also sprinkle some on top for decoration!
These variations not only keep things interesting but also allow you to tailor the cake to your personal preferences or the occasion. So, don’t hesitate to get creative and make this recipe your own!
Cooking Notes for Salted Caramel Cream Cake Recipe
As I’ve learned through my baking journey, a few cooking notes can make all the difference in achieving that perfect Salted Caramel Cream Cake. Here are some tips that I always keep in mind:
- Room Temperature Ingredients: Make sure your butter, eggs, and milk are at room temperature before you start. This helps create a smoother batter and a fluffier cake.
- Don’t Rush the Caramel: When making the salted caramel sauce, take your time. If you rush it, you might end up with burnt sugar. Patience is key!
- Cool Completely: Allow your cake layers to cool completely before assembling. If they’re even slightly warm, the cream filling can melt, and you’ll end up with a gooey mess.
- Chill the Cream: For the best whipped cream, chill your mixing bowl and beaters in the fridge for about 15 minutes before whipping. This helps the cream whip up faster and hold its shape better.
- Storage Tips: If you have leftovers (which is rare!), store the cake in an airtight container in the fridge. It’s best enjoyed within a few days, but I promise it won’t last long!
These little notes are like secret ingredients that can elevate your baking experience. Trust me, they’ll help you create a cake that not only looks stunning but tastes absolutely divine!
Serving Suggestions for Salted Caramel Cream Cake Recipe
Now that we’ve crafted this beautiful Salted Caramel Cream Cake, it’s time to think about how to serve it! Presentation can elevate your dessert from delightful to dazzling. Here are some of my favorite serving suggestions that will make your cake the star of the show:
- Garnish with Fresh Berries: A handful of fresh raspberries or strawberries on the side adds a pop of color and a refreshing contrast to the rich caramel.
- Drizzle Extra Caramel: Don’t hold back! A generous drizzle of salted caramel sauce over each slice not only looks stunning but also enhances the flavor.
- Serve with Whipped Cream: A dollop of freshly whipped cream on the side can add a light, airy touch that balances the cake’s richness.
- Pair with Coffee or Tea: This cake pairs beautifully with a warm cup of coffee or a soothing herbal tea. The flavors complement each other perfectly!
- Make it a Celebration: For special occasions, consider adding festive decorations like edible flowers or chocolate shavings on top for an extra touch of elegance.
These serving suggestions not only enhance the visual appeal but also create a delightful experience for your guests. Whether it’s a birthday party or a cozy family dinner, this Salted Caramel Cream Cake is sure to impress everyone at the table!
Tips for Making the Best Salted Caramel Cream Cake Recipe
As I’ve baked this Salted Caramel Cream Cake time and time again, I’ve gathered a treasure trove of tips that can help you achieve the best results. These little nuggets of wisdom can make a world of difference in your baking journey. Here are my top tips to ensure your cake turns out perfectly every time:
- Measure Accurately: Baking is a science, so precise measurements are crucial. Use a kitchen scale for the best accuracy, especially for ingredients like flour and sugar.
- Use Quality Ingredients: The flavor of your cake hinges on the quality of your ingredients. Opt for real vanilla extract and fresh, high-quality butter for the best taste.
- Don’t Overmix: When combining your wet and dry ingredients, mix just until combined. Overmixing can lead to a dense cake, and we want it light and fluffy!
- Cool Layers Properly: Allow your cake layers to cool in the pans for about 10 minutes before transferring them to a cooling rack. This helps prevent them from breaking apart.
- Chill the Cake: After assembling, chill the cake for at least 30 minutes before serving. This helps the layers set and makes slicing easier.
By keeping these tips in mind, you’ll be well on your way to creating a Salted Caramel Cream Cake that not only looks stunning but tastes absolutely divine. Happy baking!
Breakdown of Time for Salted Caramel Cream Cake Recipe
As a home cook, I know that time management is key when it comes to baking. Understanding how long each step takes can help you plan your baking adventure more effectively. Here’s a quick breakdown of the time you’ll need for the Salted Caramel Cream Cake:
- Prep Time: Approximately 30 minutes. This includes gathering your ingredients, measuring them out, and preparing the cake batter and caramel sauce.
- Cooking Time: About 30-35 minutes. This is the time it takes to bake the cake layers and make the salted caramel sauce.
- Cooling Time: 1 hour. Allow the cake layers to cool completely before assembling. This step is crucial to prevent the cream filling from melting.
- Assembly Time: 20 minutes. This includes layering the cake, adding the cream filling, and drizzling the caramel sauce.
Total Time: Approximately 2 hours and 15 minutes. This total includes all the prep, cooking, cooling, and assembly time. While it may seem like a bit of a commitment, I promise you that the end result is worth every minute spent in the kitchen!
So, set aside a cozy afternoon, put on your favorite playlist, and let’s create something delicious together. You’ll be savoring each slice of this Salted Caramel Cream Cake before you know it!
Nutritional Information for Salted Caramel Cream Cake Recipe
As a passionate home cook, I believe that enjoying a delicious dessert like the Salted Caramel Cream Cake can be part of a balanced lifestyle. While this cake is a treat, it’s good to know what you’re indulging in. Here’s a general breakdown of the nutritional information per slice (assuming the cake is cut into 12 slices):
- Calories: Approximately 350 calories
- Fat: 22 grams
- Saturated Fat: 12 grams
- Cholesterol: 80 milligrams
- Sodium: 150 milligrams
- Carbohydrates: 36 grams
- Fiber: 1 gram
- Sugar: 20 grams
- Protein: 4 grams
Keep in mind that these values can vary based on the specific ingredients you use and the size of your slices. If you’re looking to lighten things up a bit, consider using lower-fat cream or reducing the amount of caramel sauce. Remember, it’s all about balance and enjoying the sweet moments in life!
Frequently Asked Questions about Salted Caramel Cream Cake Recipe
As I’ve shared my beloved Salted Caramel Cream Cake recipe, I often get questions from fellow home cooks eager to try it out. I love the enthusiasm! Here are some of the most frequently asked questions, along with my answers to help you on your baking journey.
Can I make this cake ahead of time?
Absolutely! This cake can be made a day in advance. Just be sure to store it in the refrigerator. The flavors will meld beautifully overnight, making it even more delicious. Just remember to let it sit at room temperature for about 30 minutes before serving for the best texture!
What if I don’t have heavy cream for the filling?
If you’re out of heavy cream, you can substitute it with a mixture of half-and-half and a bit of melted butter. This will give you a similar richness, though the texture may be slightly different. You can also use whipped topping as a quick alternative, but I recommend sticking to real cream for the best flavor.
How do I store leftovers?
To keep your Salted Caramel Cream Cake fresh, store it in an airtight container in the refrigerator. It’s best enjoyed within 3-4 days. If you have leftover caramel sauce, store it separately in a jar in the fridge. You can reheat it gently in the microwave when you’re ready to enjoy more cake!
Can I freeze the cake?
Yes, you can freeze the cake! I recommend freezing the layers separately without the cream filling or caramel sauce. Wrap each layer tightly in plastic wrap and then in aluminum foil. When you’re ready to enjoy it, let the layers thaw in the fridge overnight before assembling.
What can I use instead of sea salt in the caramel sauce?
If you don’t have sea salt, regular table salt will work just fine. However, I find that sea salt adds a lovely texture and flavor contrast to the caramel. If you have flaky sea salt, that’s even better for a delightful crunch!
These questions reflect the curiosity and creativity of fellow bakers, and I love sharing my insights! If you have more questions, feel free to reach out. Baking is all about learning and enjoying the process, so let’s keep the conversation going!
Conclusion on Salted Caramel Cream Cake Recipe
As we wrap up our delightful journey through the Salted Caramel Cream Cake recipe, I can’t help but feel a sense of joy. This cake is more than just a dessert; it’s a celebration of flavors that brings people together. The combination of soft, fluffy cake, rich cream, and that irresistible salted caramel creates a symphony of taste that dances on your tongue.
Whether you’re baking for a special occasion or simply treating yourself, this cake is sure to impress. It’s a recipe that invites creativity, allowing you to experiment with flavors and decorations. Plus, the process of making it is filled with little moments of joy—from whipping the cream to watching the caramel bubble away on the stove.
So, I encourage you to gather your ingredients, put on your apron, and dive into this baking adventure. I promise that once you taste this Salted Caramel Cream Cake, it will become a cherished favorite in your home, just as it has in mine. Happy baking, and may your kitchen be filled with sweet memories!
